Inventory Movement Worksheet
The Movement Worksheet allows for the manual movement of product from one Bin to another. Some common movements include moving product:
- From a Receiving Bin to either a Putaway or Pick/Put Bin,
- From a Putaway Bin to a Pick Bin, or
- Into a hold bin.
Movements can either be entered manually, by using and ADCS handheld, or by calculating replenishment using the Movement Worksheet Warehouse Activity Plan (WAP) functionality. The scope of this document is manual movements, which will be discussed as they relate to the Items on Agency Orders Report guidance or determined by other means.
For Pick Bin replenishment using the WAP, please see the Warehouse Activity Plan procedure document. For movements executed by the ADCS handhelds, please see the Warehouse ADCS Barcode Processing document.
Ceres Object release 5.00.00 is required for the functionality described in this document.
When to use the Movement Worksheet
There are times when product needs to be moved to a Pick bin to fulfill the demand on orders for a specified shipment date. Once the orders have been released, this movement can be conducted using the Movement Worksheet. The movement of product for picks should only be completed for released orders for a specific shipment date, before Picks are created and printed. Otherwise you risk moving product from the Bin the Pick is indicating for that Item.
The Movement Worksheet page contains the worksheet in which you plan movements of inventory within the warehouse. The most routine movements you plan are the movements to replenish the bins with the fastest moving inventory. You can also create movements that would not normally be suggested by Ceres, even movements from a higher-ranking bin to a lower-ranking bin.
Before using the Movement Worksheet, a batch for each location that will be using Movement Worksheets must be created and linked to that location.
Refer to the Inventory Movement Worksheet Templates document for instructions.
-
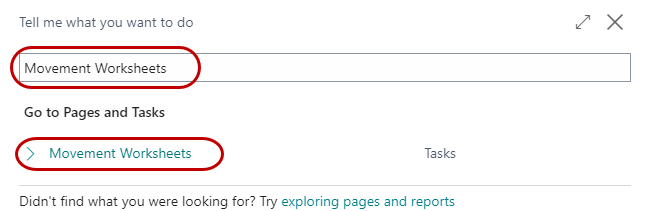
The Movement Worksheet can be accessed from Departments ▸ Warehouse ▸ Planning & Execution ▸ Tasks ▸ Movement Worksheets.
-
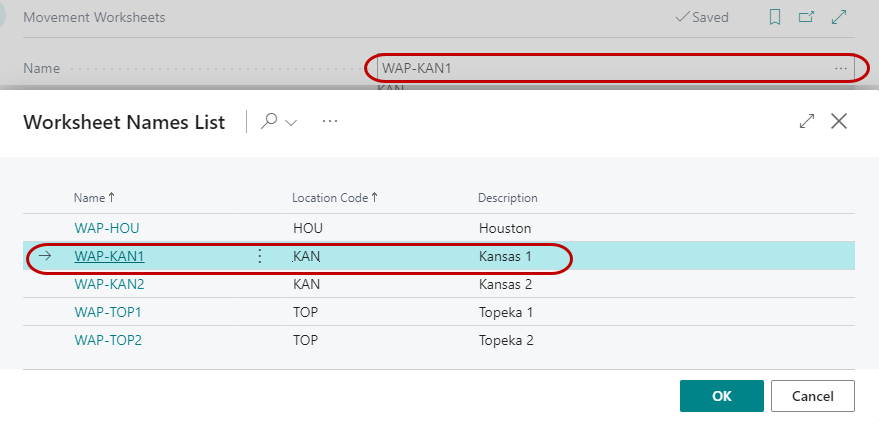
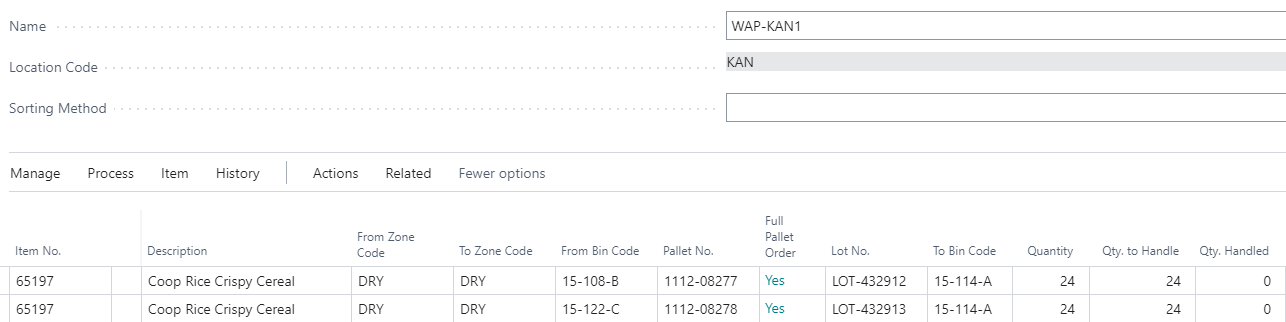
Select a Movement Worksheet from the Worksheet Names list. Once you select a Worksheet Name, the Location Code will auto-fill based upon the Location linked to that worksheet template.
-
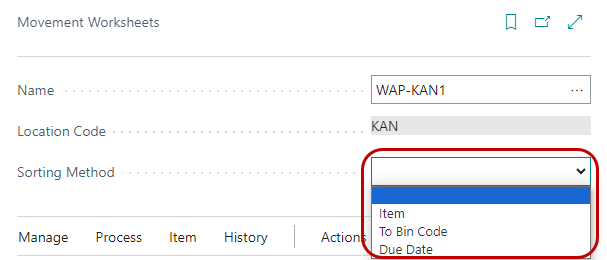
The optional Sorting Method field defines the way the worksheet is sorted. If you change the method, you change how the lines are sorted. The options are: <Blank>, Item, To Bin Code and Due Date.
-
Begin entering the items for movement (based upon the Items on Released Orders report). Once the Item No. is entered, the description will populate.
-
If the item is palletized, select the pallet to move, if not, select the Lot No.
- Enter the From Zone Code and From Bin Code (or enter the From Bin Code and the From Zone Code will populate).
-
Enter the To Zone Code and To Bin Code.
-
Enter the Quantity (to move) and the Qty. Outstanding & Qty. to Handle will populate.
-
-
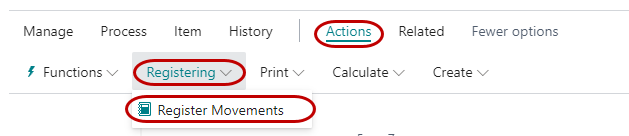
Finish entering the lines to move the items and then click the Register Movements found on the Actions ribbon.
-
Click Yes on the confirmation box to proceed. Registering the Movement Worksheet posts the movement.