AE3 Agencies, Shopppers and Items
The purpose of this document is to explain the setup of Agencies, Shoppers, and Items to support the use of Agency Express 3 with Ceres 5. This document is a supplement to the overview documents for Agency and Item setup and Agency Groups.
Ceres Object release 5.00.00 is required for the functionality described in this document.
Agency/Shopper Setup
Before using Agency Express online ordering, web-enabled Agencies, Shoppers and Items must be set up. The following sections outline this process. There are many other steps to properly establishing communication between Agency Express 3 and Ceres 5, and assistance from both TechBridge and your Ceres provider is required.
Agency Setup – Web Enabling
The following set of steps outlines the process of setting up an Agency for web ordering.
-
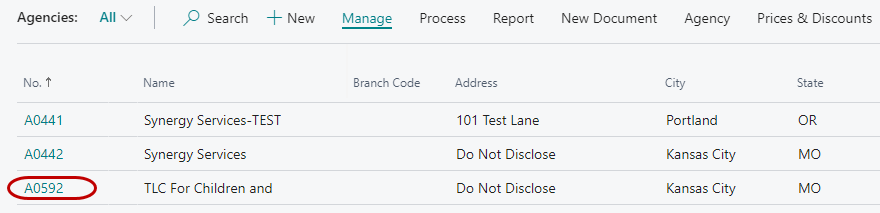
To access Agencies, navigate to Departments ⯈ Agencies & Receivables ⯈ Agency Relations ⯈ Agencies.
-
This will open the Agency List Page where you can select the desired Agency. Double-click on the Agency you wish to edit (or select Edit from the Home ribbon.)
-
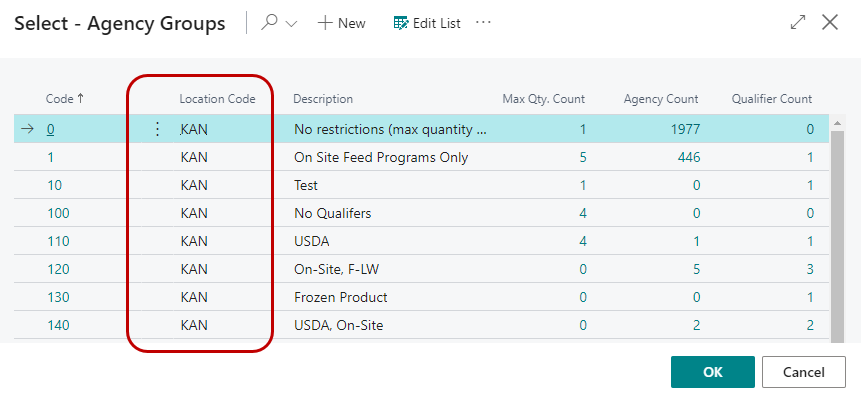
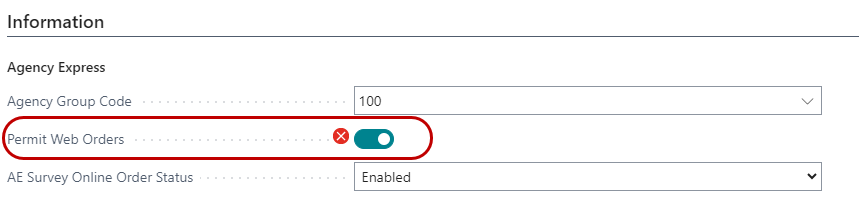
On the Information FastTab, select an Agency Group Code.
The Agency Group Code should correspond to the Location assigned to the Agency that you are web-enabling. The Agency Group’sLocation is used to limit the Agency to ordering inventory available in that location. Inventory in other locations will not be available to this Agency during on-line ordering.
noteTo see the Location Codes associated with Agency Group Codes, click on Advanced.

-
Assigning an Agency to an Agency Group will also assign the associated qualifiers to the Agency. The Agency will inherit the qualifiers from the Agency Group’s Qualifiers.
noteAdding qualifiers to the Agency Card does not update Agency Group Qualifiers.
-
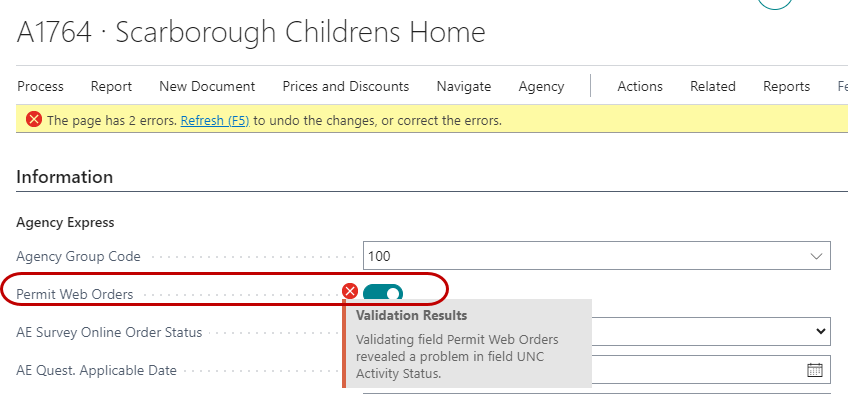
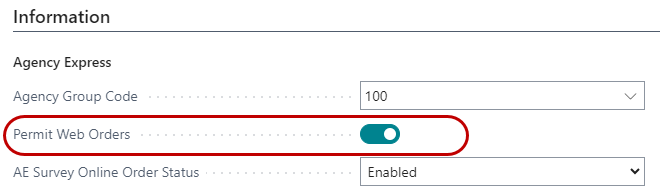
On the Agency Card, place a checkmark in the Permit Web Orders field. Checking this box causes Ceres to verify that several additional fields are filled in for the Agency you are working with. If no errors are received, continue to step 6. If Ceres determines that a required field is not filled in, you receive an error. You must go back and fill in the required field and then recheck Permit Web Orders. Repeat this process until all required fields have been populated with data. An example is provided below. Notice that the tab where the error is being generated from is identified (General). If you click the down arrow on the right of the error, you see all notifications:
-
Once Permit Web Orders is checked, the Agency is web-enabled.
There are several other fields used in online ordering. The following section describes these fields and how they are used:
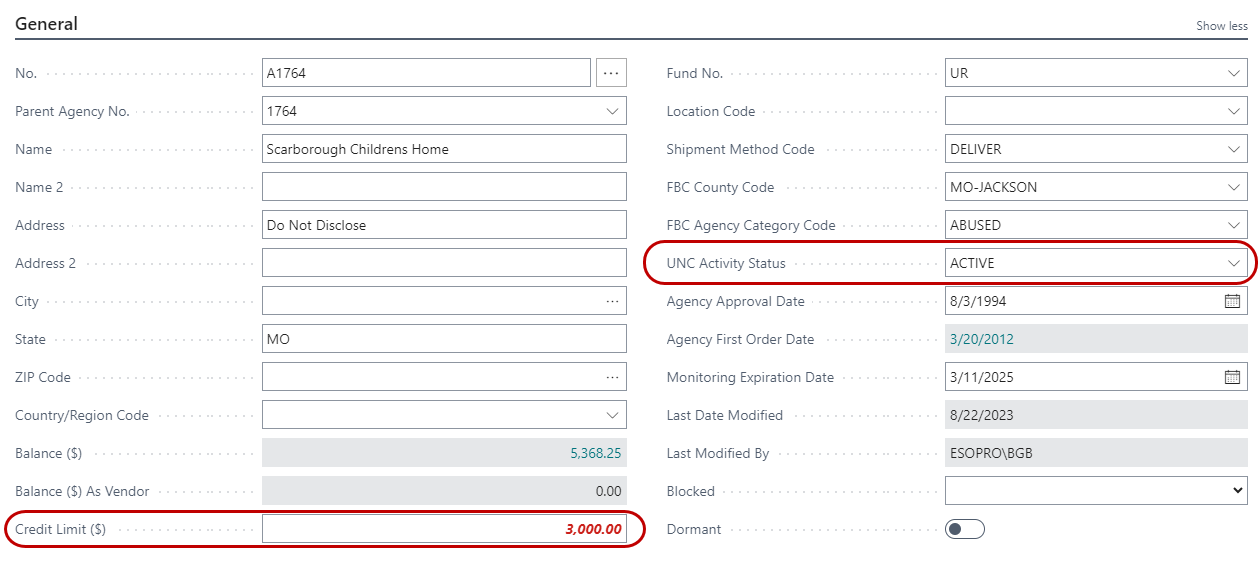
Credit Limit - This is a base Ceres field used to govern Agency credit limits. This value is also transmitted to the web and utilized for credit monitoring online, depending on the Credit Limit setup on AE.
UNC Activity Status - This field dictates whether an Agency can order online. Agencies with an Activity Status that allows posting can order online if permitted. Agencies that have an Activity Status which does not allow posting cannot order online. They will, however, still be able to log in to perform other activities.
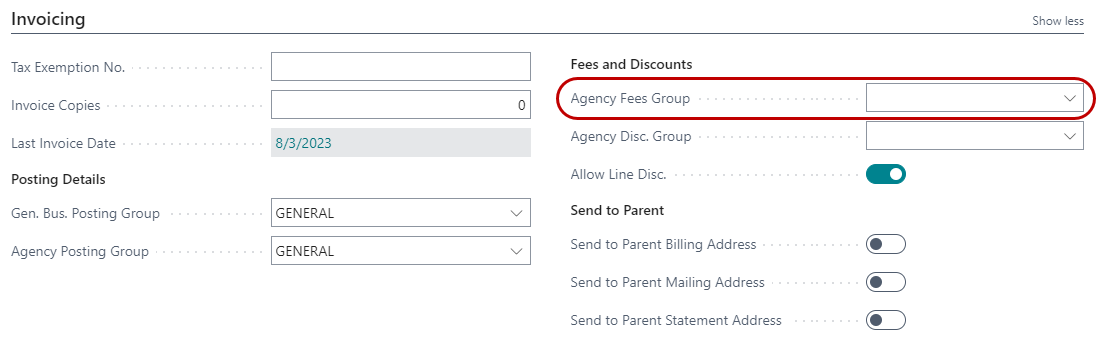
Agency Fee Group - This is assigned to all Agencies that use item fees (special item pricing). This field should only be populated if special fees are applied to particular agencies.
noteFilling this field in without item fees being set up correctly causes an agency not to see inventory online.
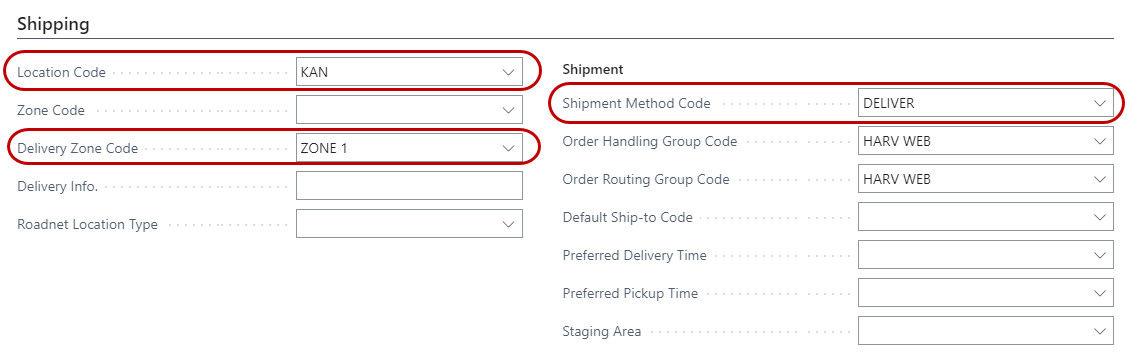
Location Code - This plays a role in item availability. The Location Code must coincide with Agency Group Code as described in the previous section.
Delivery Zone Code - This can be used in conjunction with online delivery fees. Filling in this field, when delivery fees have been set up and transmitted to the web, will allow Agency Express to assign a delivery fee to all online orders for a particular Agency. The fee shown in Agency Express is an estimate, the actual delivery fee will be calculated by Ceres when the invoice is generated. Agencies should be made aware that the delivery fees shown during on-line ordering are estimates.
Shipment Method Code - This is used for scheduling in Ceres. If an Agency will be using both Delivery and Pickup appointments online, this field should be left blank. Otherwise web orders will have trouble auto-validating on a consistent basis. For example, if Agency A-001 is setup with a Shipment Method Code of “Deliver”, and a Pickup order comes from the web, auto-validate will fail because it will see that the Agency is a Delivery Agency.
Shopper Setup – Web Enabling
The next step is to set up a Shopper. If a Shopper already exists, activate it for web ordering by checking the Permit Web Orders checkbox. For this example, we will assume no Shoppers exist for the Agency we just activated for web ordering. The following steps outline the process of creating a web-enabled shopper:
-
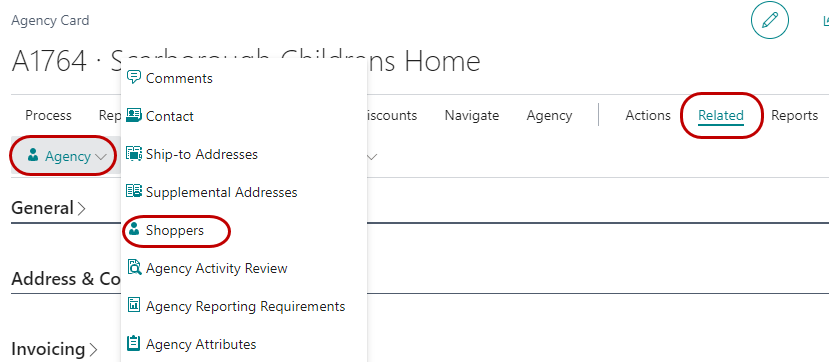
From the Agency Card, select Shoppers from the Navigate ribbon to open the Shopper List.
-
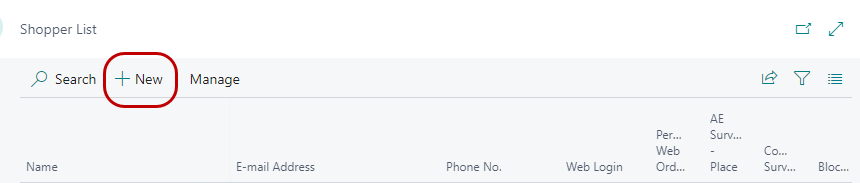
Click New to create the shopper card:
-
The shopper card will open so you can fill in the following fields:
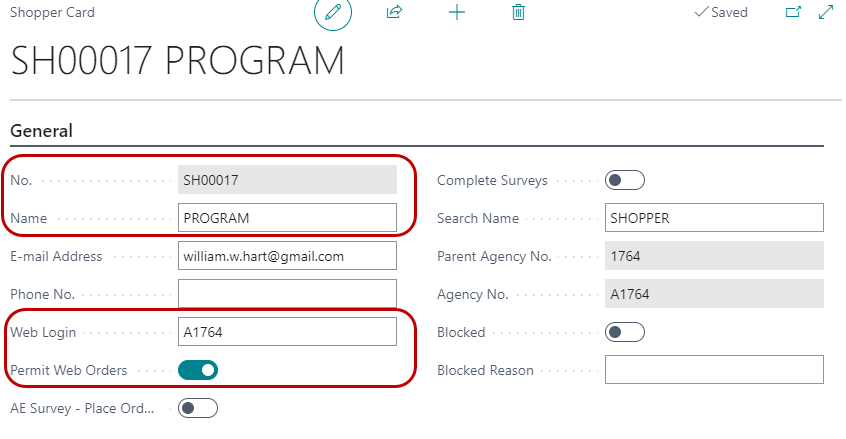
No. - The Shopper No. will populate when the name is entered.
Name - Shopper Name must be a first AND last name. (Field is required)
E-mail Address - Used for auto-generated emails in Ceres. (Field is required)
Web Login - The login used to access Agency Express. (Field is required)
Permit Web Orders - Once checked, this field enables a shopper for web ordering.
Once the required fields are filled in/checked, then the agency/shopper will be able to order online (after the information has been transmitted to the web). To enable additional shoppers for web ordering, repeat the steps outlined in this section.
If you edit a Permitted Shopper, make sure that the shopper always has Name, Email and Web Login fields populated or you can create issues in importing shopper data into Agency Express 3.
noteThere are several fields that may only be edited when the shopper is not permitted for Web Orders. In order to edit these fields, you must first disable web ordering for the shopper by unchecking the “Permit Web Order” box. Then changes may be made to the fields, and once the edits are complete, you may re-check the “Permit Web Order” box. This causes Ceres to resynchronize the shopper with AE. The fields that cannot be edited while web ordering is enabled are Search Name, Web Login, First Name, Last Name, and E-mail Address.
Agency/Shopper – Web Disabling
To disable a shopper for web ordering, simply uncheck Permit Web Orders for the shopper in question. To disable all shoppers, as well as the associated agency, uncheck Permit Web Order for the agency.
To show that a shopper is blocked in Ceres (this does not affect AE), you may check the Blocked field on the Shopper Card and enter a Blocked Reason. This lets anyone reviewing the shopper card know why the shopper has been blocked. However, only un-checking Permit Web Orders removes the shopper from the ability to shop on Agency Express.
Item Setup
The following section outlines the process of setting up Inventory Items for web ordering and describes the fields used in Ceres.
-
Access Items by navigating to Departments ⯈ Purchasing ⯈ Planning ⯈ Items.
-
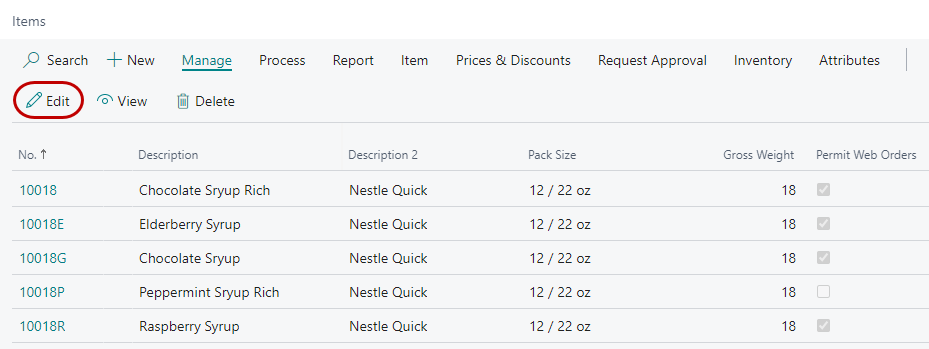
This will open the Item List. Select the Item to be enabled for web ordering by double-clicking on the Item (or select Edit from the Home ribbon).
-
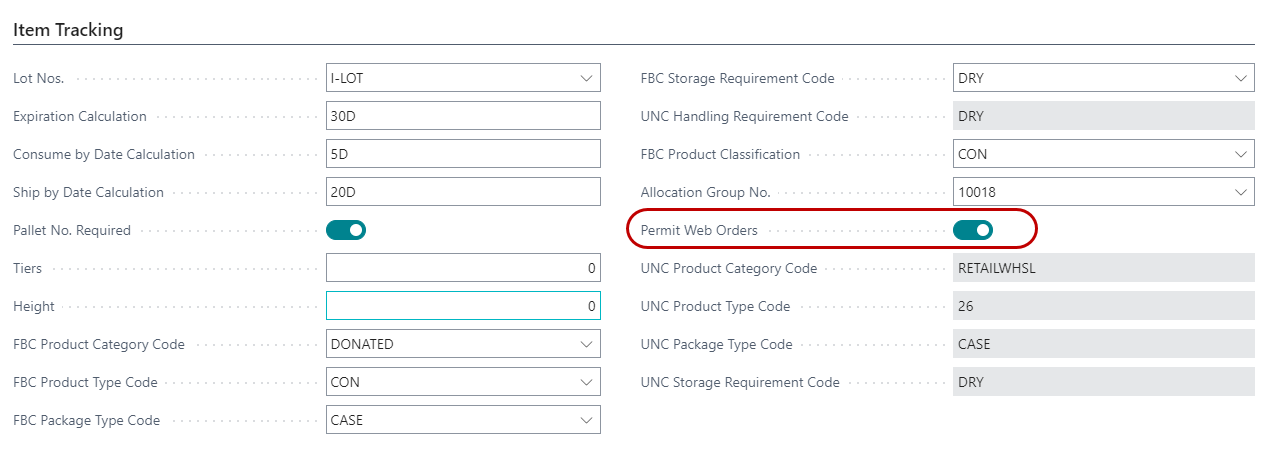
On the Item Tracking FastTab of the Item Card, check the Permit Web Orders checkbox to allow the item to be ordered online if there is quantity on hand and quantity available for the ordering Agency. There are several other fields that impact what is displayed in the shopping list online. The following section describes these fields and how they are utilized on Agency Express.
-
The following fields from the General FastTab are all transmitted via the ITM file and are displayed on the Shopping List online.
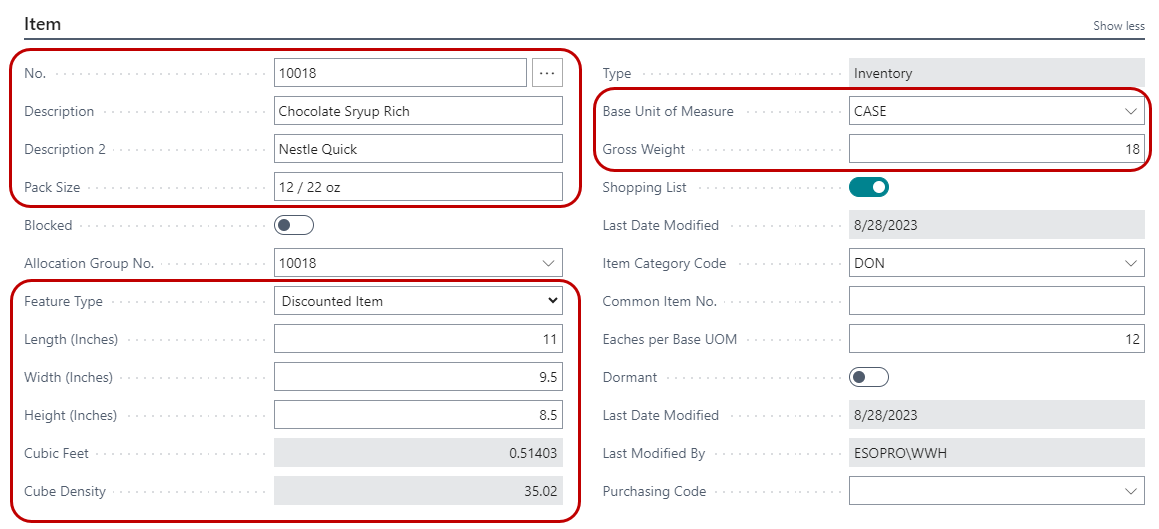
No. - Item Number
Description - Item Description
Description 2 - Item Description 2
Pack Size - Item Pack Size
Feature Type - Feature Type associated with the Item (from a list of default types)
Length (Inches) - Used in the calculation of Cube size.
Width (Inches) - Used in the calculation of Cube size.
Height (Inches) - Used in the calculation of Cube size.
Cubic Feet (Cube Size) - Automatically calculated. Used to display how much space an item would likely take up on a truck.
Cube Density - Automatically calculated. This field generates based on the length, width, height and weight fields. It is non-editable by the user and computes the relative density of an Item from the weight of the case and dimensions of the case. It is calculated by dividing the weight by the cubic feet of the Item. Higher values represent denser items which should be placed at the bottom of pallets during pallet construction.
Base Unit of Measure - Item Base Unit of Measure
Gross Weight - Item Gross Weight
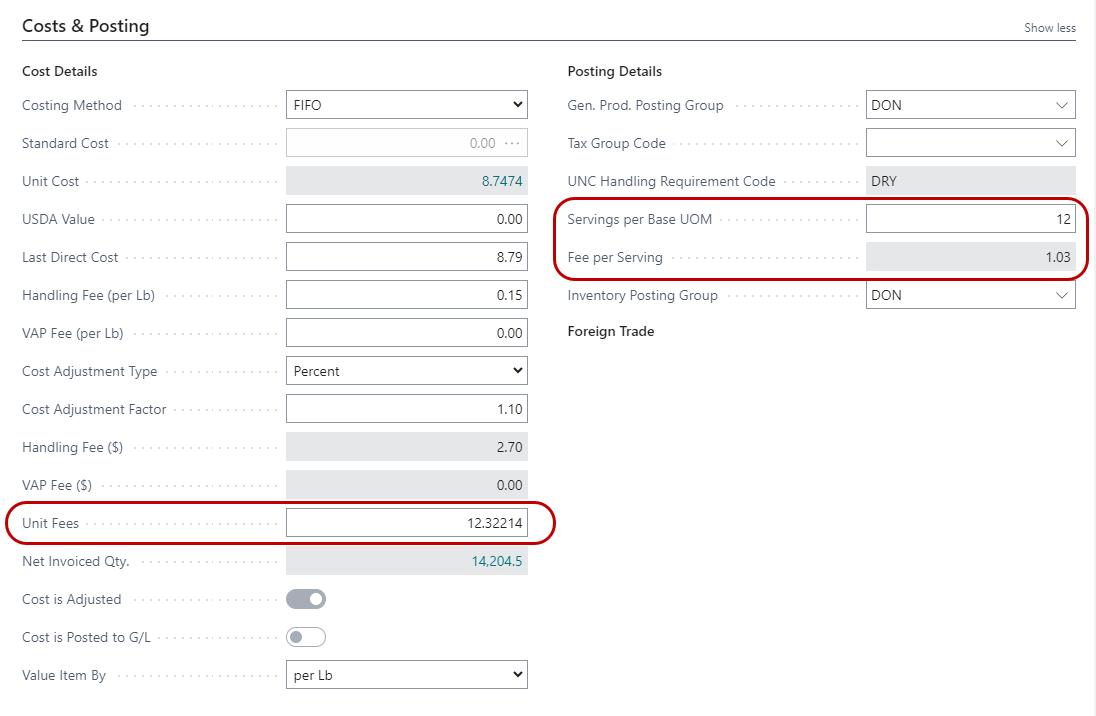
Unit Fees - The item fee displayed online (assuming Agency-specific item fees are not being used), a value based on the other fee fields above.
Servings per Base UOM - Used in the calculation of Fee per Serving that displays online.
Fee per Serving - This displays the approximate cost per serving of the Item.

Item Group Code - This is not displayed online, however this field (when used) is used in conjunction with maximum order quantities assigned to Agency Groups.
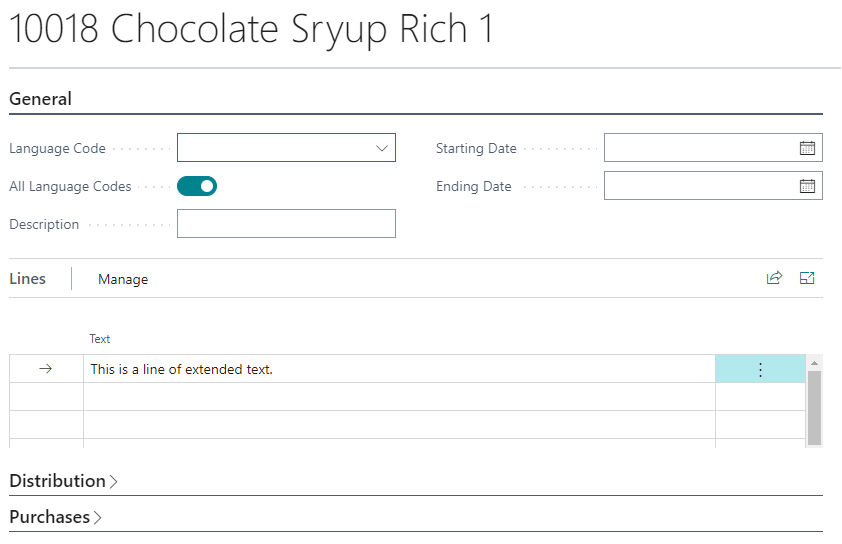
Adding Extended Item Text
Extended Text may be added to any Item. If enabled in Agencies and Receivables Setup, this extended text can be synchronized with the Agency Express on-line ordering system to provide on-line shoppers with more detailed information about Items, such as a suggested recipe or use. To enter Extended Text on an Item, do the following:
-
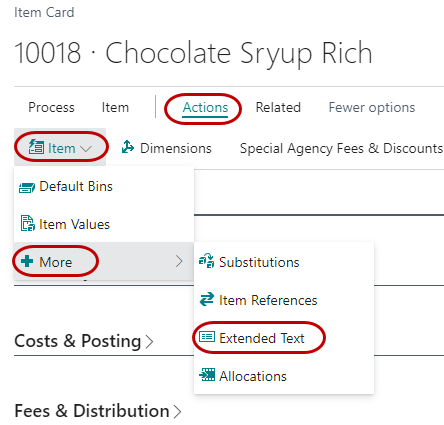
On the Item Card, from the Actions ribbon, select Extended Text from the More menu button.
-
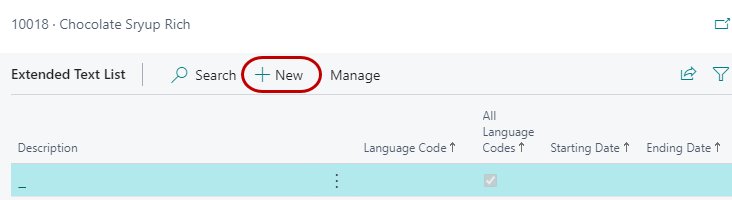
Select New from the Home ribbon.
-
Move down to the Lines section and begin typing your extended text. Only 250 characters of extended text will be transmitted to the web, though you can type as much as you want in Ceres.
Enabling Extended Item Text
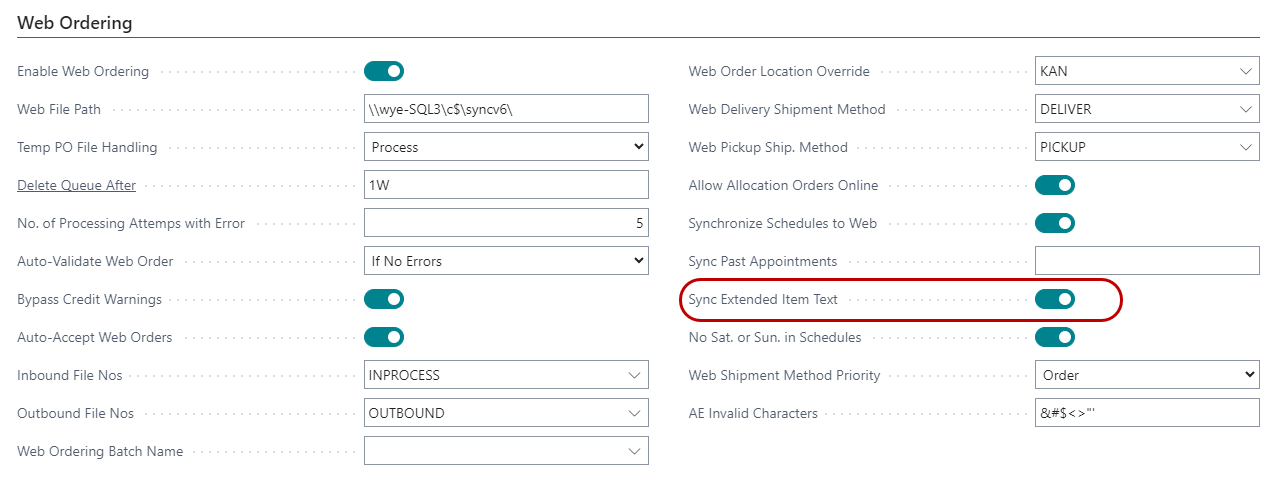
Extended text may be added to any item regardless of whether the Item is used in Agency Express on-line ordering or not. It is important to remember that although extended text may be setup for Items, you must enable Ceres to send this extended text to the Agency Express on-line ordering system. Follow these instructions to enable the synchronization of Item extended text between Ceres and the Agency Express on-line ordering system.
-
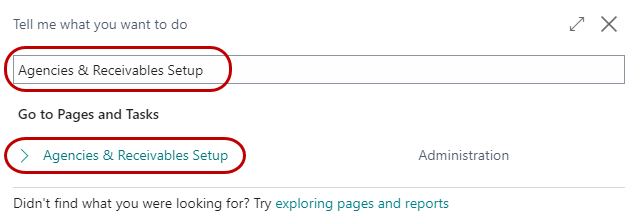
You must first enable Sync Extended Item Text in Agencies & Receivables Setup. To do so, from the main menu, select Departments ⯈ Agencies & Receivables ⯈ Administration ⯈ Agencies & Receivables Setup.
-
On the Web Ordering FastTab, check the Sync Extended Item Text field to enable extended item text.
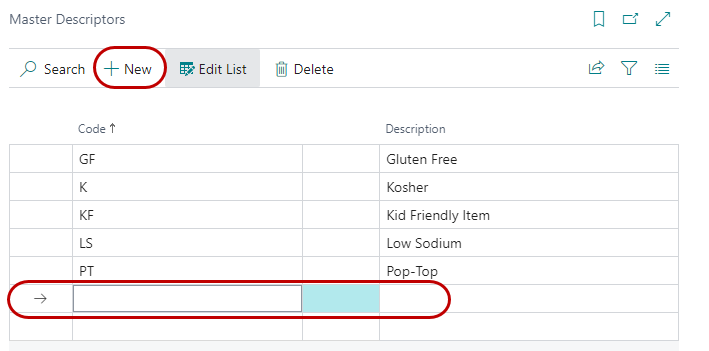
Item Descriptors
Item Descriptors are a way to display additional information on Agency Express about an item. Some food banks use this for including nutrition information or other item details. The following section outlines the process of setting up Item Descriptors.
-
Select Departments ⯈ Warehouse ⯈ Administration ⯈ Setup ⯈ Inventory ⯈ Master Descriptors

-
Click on a new line or click New to enter a Code and Description for each Master Descriptor.
-
You will receive a message each time you make a change to this form indicating you must make the same change online. That is because this list must be completely in sync with the Master Descriptor list in Agency Express.

-
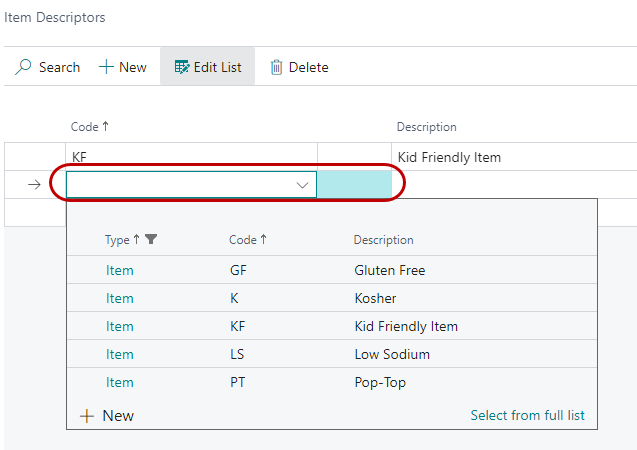
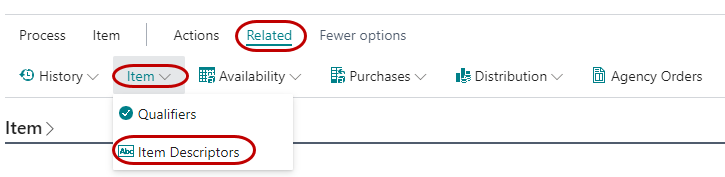
Once you have created a list of Master Item Descriptors you can assign them to items. From the Item Card, select Item Descriptors from the Actions ribbon to open the Item Descriptors Page.
-
Select a Code and hit enter. Repeat this process until you have added all required Item Descriptor Codes to the Item.