Agency Order Overview
Agency Orders are used to process orders from Agencies for product. These can be either Shopping Orders completed when an Agency is checking out, or a pre-order of product for pickup or delivery either via manual entry or Web Ordering. An Agency Order in Ceres allows you to create the initial order, ship product, and finish by posting an invoice for all types of orders.
Agency orders can be either created manually or through a web ordering system like Agency Express 3.0. See the Related Topics section for many related documents regarding Agency Ordering.
The options such as the Shipping Option and “Exclude from Warehouse Documents” mentioned in this procedure should be reviewed and established before the food bank starts creating Agency Orders. Assistance from your Ceres 5 VAR or the Feeding America Service Desk may be needed if you wish to update these configuration options.
Ceres Object release 5.00.00 is required for the functionality described in this document.
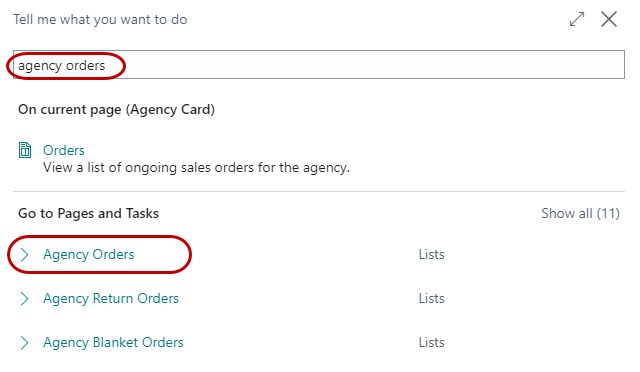
Accessing the Agency Order
-
The Agency Order can be accessed from Departments ⯈ Agencies & Receivables ⯈ Order Processing ⯈ Agency Orders
-
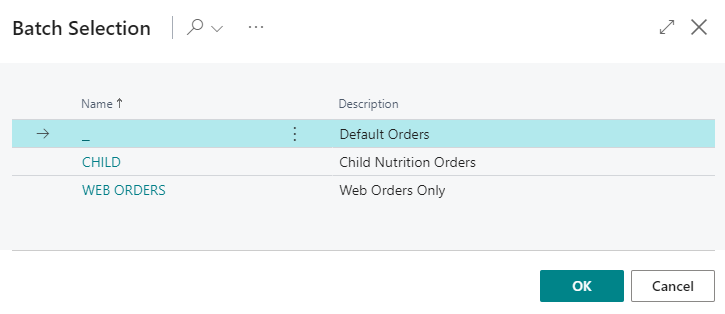
If you are using batches, select your batch from the batch list and click OK; otherwise click Cancel.
 info
infoClicking Cancel when batches are enabled will display all orders.
-
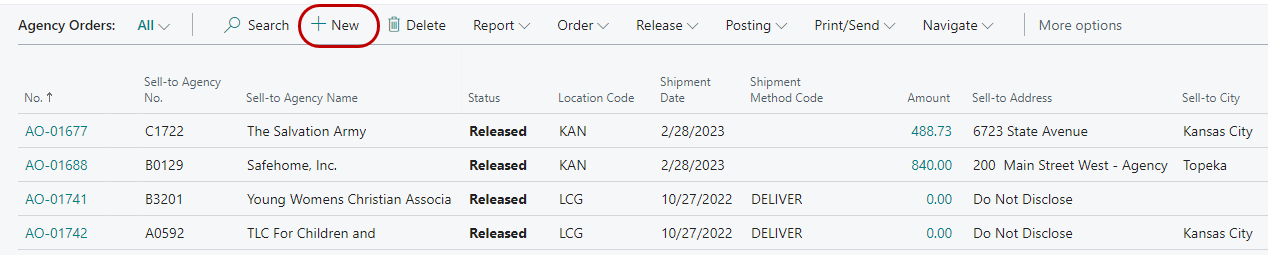
You will see the listing of open Agency Orders that exist within the system (filtered by batch as selected). Select an order from the list to edit it or click New to create a new Order.
Creating Agency Orders
This section of the procedure provides a general overview of creating and processing an Agency Order. This general process is then further clarified in the Agency Order Shipping Options and Excluding Zone from Warehouse Documents sections below. To determine your current Agency Order configuration contact your Ceres lead, the FA Service Desk or your Ceres VAR as appropriate.
-
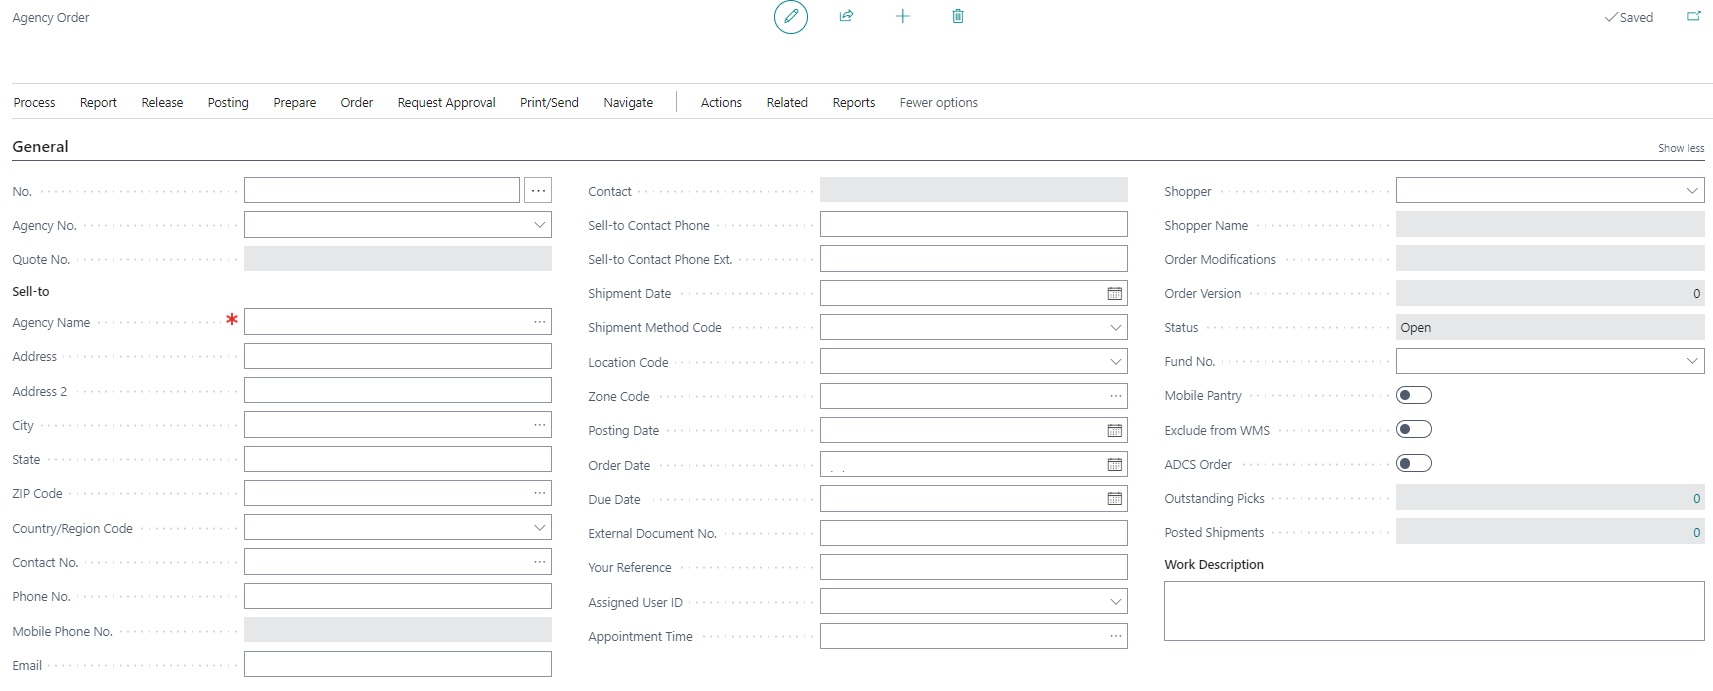
Click Home New to create a new Agency Order
-
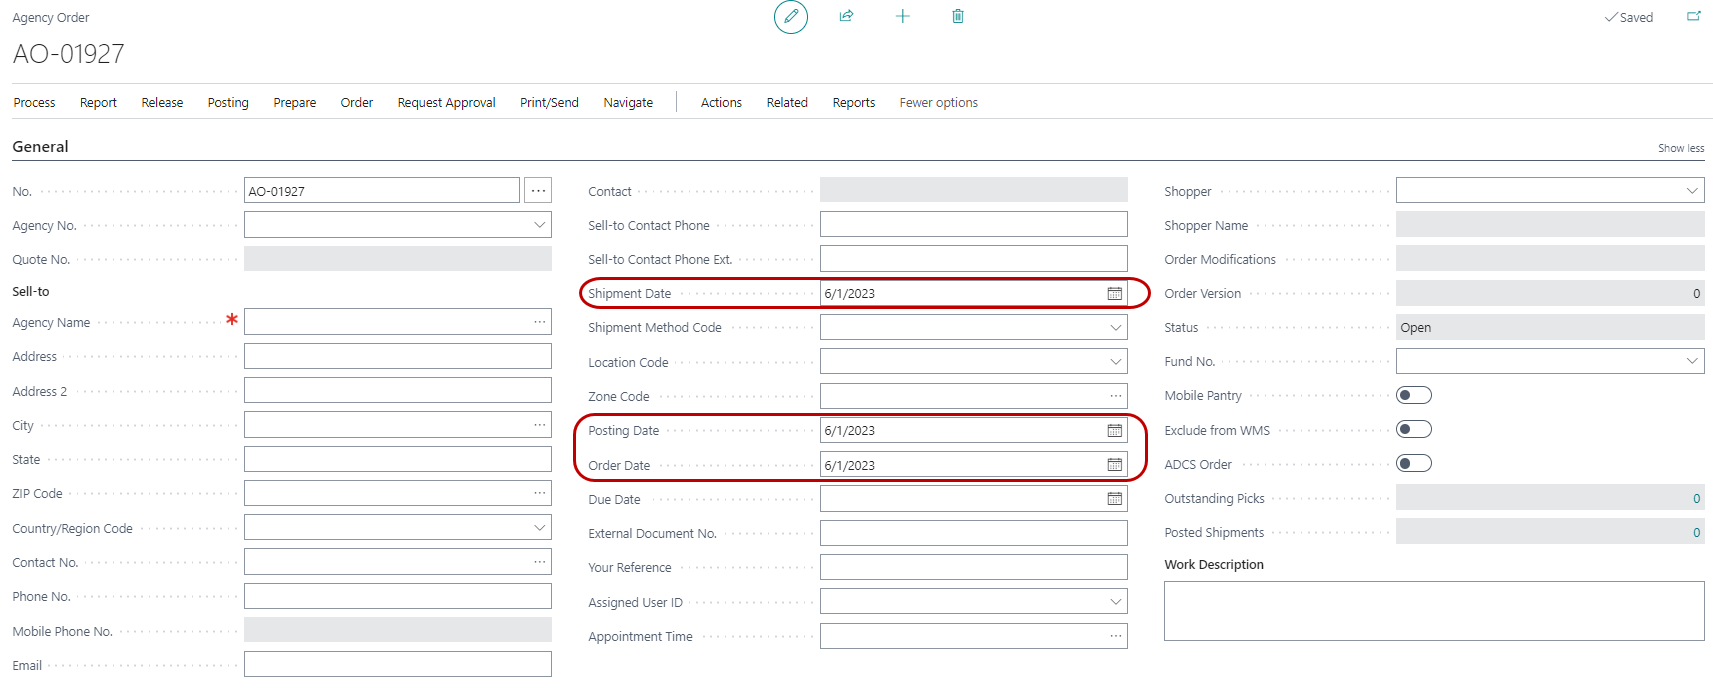
Press the Enter or Tab key to have Ceres automatically assign the next document number in the No. field. This will also fill in the Posting Date, Order Date, and Shipment Date by using the Work Date.
-
In the Sell-to Agency No. field, enter the Agency No. or use the lookup to select the Agency from the list. Information such as the agency’s name, address and Fund No. will flow from the Agency Card. If the Agency has any invoicing information, shipping information or delivery information it will flow to the appropriate tab of the Agency Order. This includes location, delivery zone, payment terms, etc. If you have a Ship-To Address defined for this agency, certain information like location and shipment method will default from the Ship-To address instead of the Agency card.
-
Fill in the Shopper field. This is the person who placed the order.
-
Fill in the Your Reference field with an Agency supplied document number, such as a purchase order number, that will help them identify documents related to this Agency Order.
infoIf a web order, this field will have the PO number for Agency Express and will not be editable.
-
Move to the lines of the Agency Order. Here you specify which items the agency is ordering, along with the quantity and any fees. Depending on the setup of the warehouse location, you may need to enter additional information here, regarding pallets, lots or bin locations. This will be discussed in detail in the section titled Agency Order Shipping Options.
-
In the Type field, select “Item.”
-
In the No. field, type in the item number or use the lookup to select the Item from the list. The Item’s Description, Unit of Measure, Available Quantity, and Agency Fee will flow forward to the line.
noteIf the Agency’s credit limit has been exceeded or they are past their monitoring expiration date, you will receive warnings accordingly. Depending on your level of access, you may or may not be able to resolve the warnings.
-
If you wish to change the location for this line; in the location field, select the Location where the Item will be shipped from. If you leave Location blank, it will default from the Order Header, which in turn defaults from the Location specified for this Agency.
-
If the Location you specified is not set up for inventory picks (See Location Overview Procedure), then you must enter the Bin Code, Lot No. and Pallet No. The Pallet No. is only required for items that are set up as palletized items. See Agency Order Shipping Options.

-
If the two Global Dimension codes found on the Invoice Details FastTab have values, those values will also be copied to any lines that are entered. The global dimension codes may be populated as Dimension Defaults from the Agency Card or may be entered manually prior to entering any detail in the lines section.
-
The Global Dimensions can also be assigned or changed directly on the lines. Global Dimensions listed in the Invoice Details section and within the Lines do not need to match. Dimensions on the Invoice Details Tab will post through with the Agency Invoice Header. Dimensions entered on the Lines will post through with the inventory information (Item Ledger Entry).

- Shortcut Dimensions are not available on the Invoice Details FastTab but can be added in the Lines. Other Dimensions can be added by selecting Related Information ⯈ Dimensions from the Line menu on the Lines FastTab.

- In the Quantity field, specify the quantity ordered. The requested quantity is in reference to the Unit of Measure field.
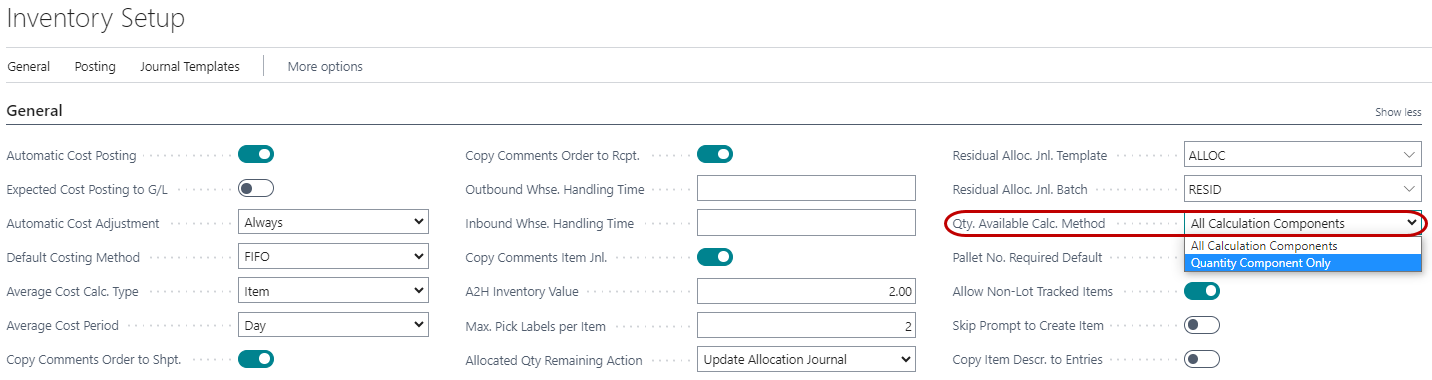
Availability of items is subject to numerous factors including location, agency qualifiers, item qualifiers, and warehouse Zone and Bin types. Additionally, the Available Quantity calculation may be delayed depending the value of the “Qty. Available Calc. Method” field on Inventory Setup.
-
The Qty. Available Calc. Method has the following options:
-
All Calculation Components - Imposes no change to the availability calculation; the calculation executes whenever any singular component of the calculation (i.e. Item, Location, Zone, Bin, Pallet, Lot, or quantity) is specified or changed on the Agency Order line.
-
Quantity Component Only - The Quantity Available calculation will only execute if a value for Quantity is specified or changed or if a value for Quantity already exists and any other component of the calculation is specified or changed (i.e. Item, Location, Zone, Bin, Pallet, or Lot).
-
-
Repeat the steps above for each additional item that will be ordered.
Agency Orders can be edited by highlighting an order from the list, then right clicking and selecting Edit or by double clicking on the Order number.
Calculate Delivery Charge Functions
-
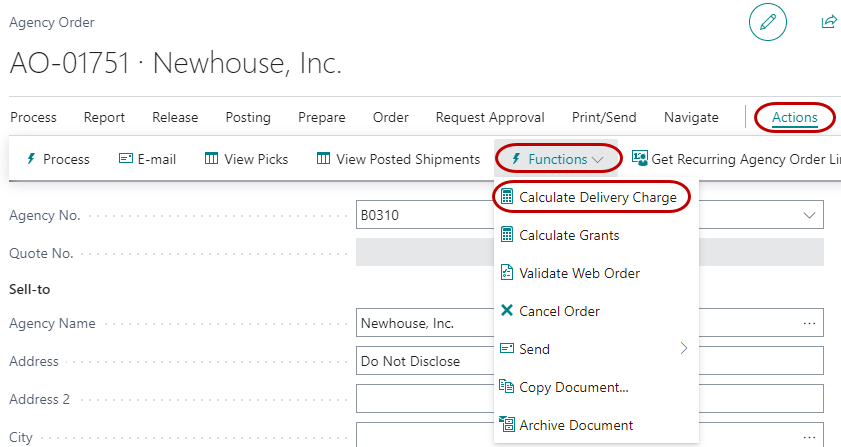
Ceres provides the ability to calculate and charge the Agency for the delivery of product on the Agency Order. This is accomplished through the delivery zones and fees process which is explained in detail in the Delivery Zones and Delivery Fees document. To calculate the delivery charge on an agency order, select Calculate Delivery Charge from the Functions section of the Actions ribbon:
-
Ceres will calculate the appropriate charge and insert a delivery charge line on the Agency Order, based on setup. (This requires that there is a value in the Delivery Zone field on the Delivery/Web FastTab and is only applicable for Delivery orders).

Calculate Grants
-
Ceres provides the ability to calculate and allocate qualified grant money to the Agency Orders. The calculation and qualification of Agency and product are explained in detail in the Agency Grants document. To calculate the grant allocation on an Agency Order, click Calculate Grants from the Functions section of the Actions ribbon:
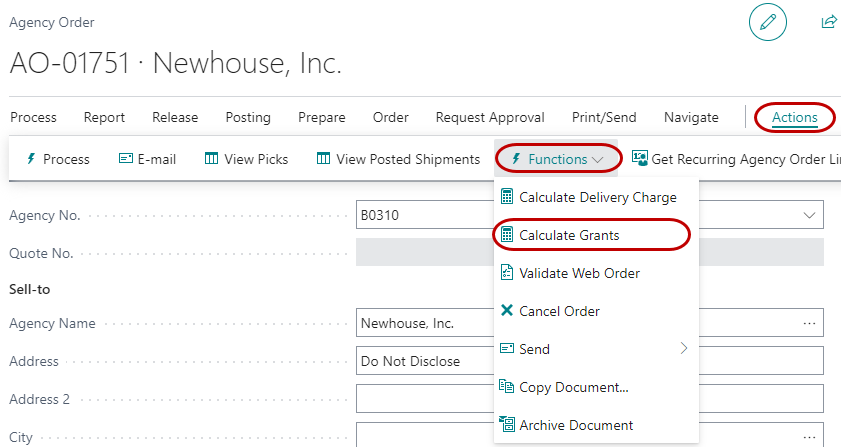
Ceres will calculate the appropriate allocation for each eligible product and enter it on the appropriate Agency Order Lines. See Agency Orders with Grants Overview for more details on this process.

Releasing the Document to the Warehouse
-
When the data entry is complete and the Order is ready to be released for picking and shipping, Click Release from the Process section of the Home ribbon. This locks the page so that users are unable to enter more items or change quantities and makes the order available to the warehouse for picking or shipping. This step is required prior to posting.
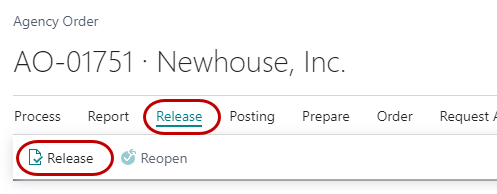 tip
tipThe order can be reopened by clicking the Reopen button.
There is also an option to Release all Agency Orders for a specific date using a batch routine. More information on this task is available in the Order Grouping and Staging Procedure.
-
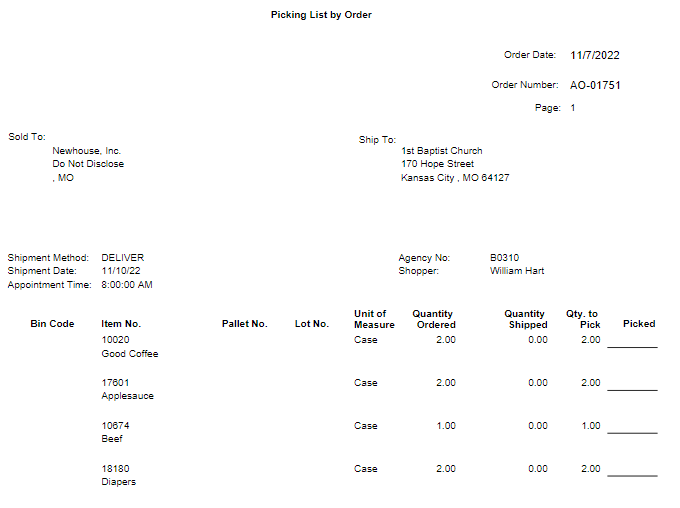
If your Location is not set up for Require Pick (Ship Option 2) or require Shipment (Ship Option 3) you may print a Pick Ticket from the Agency Order by clicking Ceres Picking List by Order from the Report section of the Home ribbon.

-
Below is a sample of the printed Pick Ticket from the Agency Order.
-
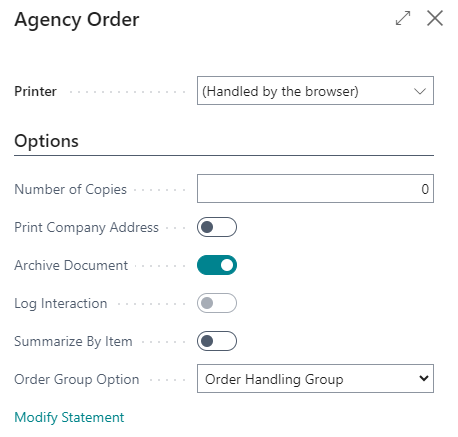
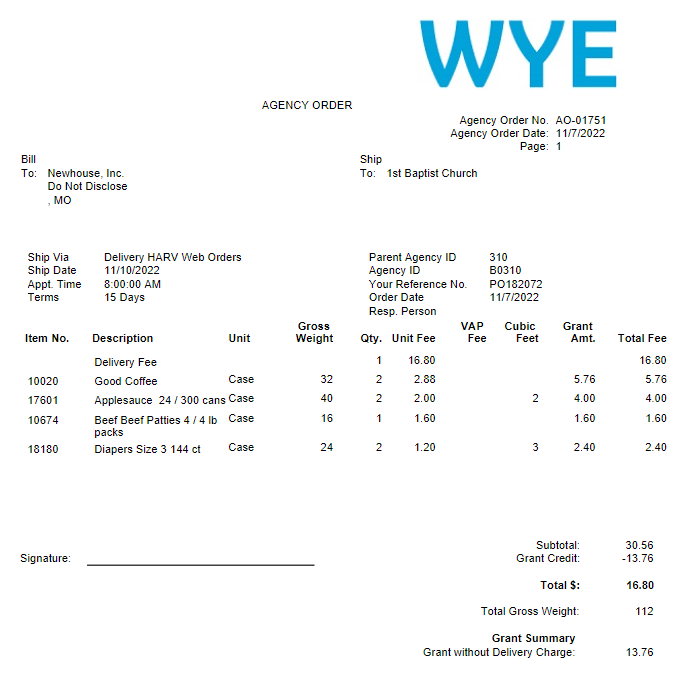
You may print the Order Confirmation if needed by clicking Prin Confirmation from the Process section of the Home ribbon. On the options FastTab, you can choose how many copies to print and choose if your Company Address should show.
noteIf Default No. of Copies is set up, those will print in addition to the number entered in Number of Copies in this Options window.
-
Click Print. Below is a sample Order Confirmation (Based on the Report ID selected in Report Selections for Agency Order):
-
You may now close the Agency Order
Agency Order Shipping Options
Warehouse shipping documents or inventory pick documents are the primary source documents used for outbound processing of inventory on Agency Orders. When setting up your warehouse you make a number of different choices regarding how you want to operate and the level of detail and complexity you want to work with. The choices you make affect how you perform operations in Ceres. One of these choices is how you want to pick items in your warehouse location. Ceres provides three basic options to accomplish this task depending on the setup and needs of the individual warehouse locations. Different Locations of the food bank may operate differently. The Location & Zone Setup has fields that are used to determine how Ceres will handle outbound shipment needs. The Inventory Workflow Procedure Document for Ceres has a detailed description of each option. The Location Overview and Zone Overview Documents also discuss the fields in some detail.
| Warehouse Location Options | Shipment Required (FALSE) | Shipment Required (TRUE) |
|---|---|---|
| Pick Required (FALSE) | OPTION 1 – Ship & Invoice directly from Agency Order | OPTION 3 – Warehouse Shipment Document – 1 Step – No Staging |
| Pick Required (TRUE) | OPTION 2 – Use create inventory pick documents |
Regardless of Shipping Option chosen, please refer to the section Excluding Zones from Warehouse Documents at the end of this document for additional information.
Shipping Option 1- Agency Order
This option allows for direct posting from the Agency Order without the need to create any warehouse documents. This is the simplest of the options but provides the least control over the planning and execution of warehouse activities. It is typically used by Shopping food banks and those with minimal need for a directed Picking process.
Agency Orders using this type of warehouse setup require the user to enter all needed warehouse information or allow it to be auto assigned on Release. The Branch Code, Location Code, Zone Code and Bin Code must be entered in the Agency Order line. The Pallet No. is optional depending on the setup and the individual items being ordered. If the Location has a single bin, the Zone Code and Bin Code will default to the same Zone Code and Bin Code of that single bin. When a Pallet No. is entered on the Agency Order line, the Zone Code and Bin Code linked to the Pallet will be automatically entered on the Agency Order Line for ou.
After the order is physically fulfilled either by shopping or picking, follow the steps below to complete and post the order and invoice theAgency.
-
After the products have been picked and shipped, return to the Agency Order from Departments ⯈ Agencies & Receivables ⯈ Order Processing ⯈ Agency Orders
-
Double click the Agency Order in the list, or select it and click Edit from the Home ribbon.
-
Enter today’s date in the Posting Date field on the General FastTab and adjust the Shipment Date on the Shipping FastTab if necessary.
-
In the Lines section of the Agency Order, Update the Qty. to Ship field with the actual quantity shopped/picked/shipped to the agency.
noteIf the Qty. to Ship is less than the Quantity field (representing the quantity requested), you will need to update the Quantity to match the quantity shipped, otherwise you will be left with a remaining quantity to ship/invoice for that line.
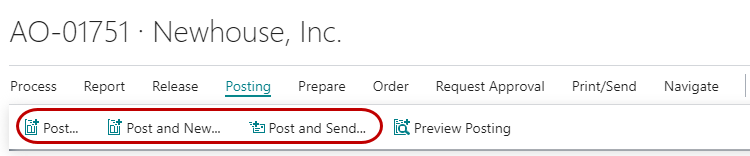
-
Once you have verified the data, click either Post or Post and Send from the Posting section of the Home ribbon. Post and Send allows you to print and/or email the invoice and shipping documents.


 note
noteOnce the Agency Order has been posted, it no longer appears in the Agency Orders list. The detail has been transferred to Posted Agency Shipments and Posted Agency Invoices. You may reprint shipping documents or invoices from those lists respectively.
-
Select Ship and click OK

 note
noteYou can post the Order shipment and invoice in one step by choosing Ship and Invoice. If you choose only to Ship now, you may return to the order and select Invoice to post the actual Agency Invoice. In most cases if you are using Option 1 to handle outbound shipments directly from the agency order, you should select Ship and Invoice.
Shipping Option 2 – Inventory Pick
This model will most likely be used by food banks that want a separate pick document with more guidance for the warehouse team. This option is typically used by larger food banks that have their agencies pre-order most product. It does not preclude setting up a Shopping Area and processing orders as noted with Shipping Option 1 above.
When your Location or Zone is set up to require warehouse processing in this way, you create at least one warehouse pick guide document for each outbound Agency Order. If the Agency Order contains order lines from multiple Locations, then a separate pick document will be created for each Location with the corresponding Agency Order lines on it. You can also choose to create a Pick for each warehouse Zone if desired. From the pick page, you organize your picking information, print the picking ticket, enter the result of the pick, and post the pick. Refer to the Pick Enhancements document for more detailed information on creating pick documents.
Creating inventory pick documents can be accessed from either the Agency Order or from the Warehouse menu.
Creating Inventory Pick from the Warehouse Menu
-
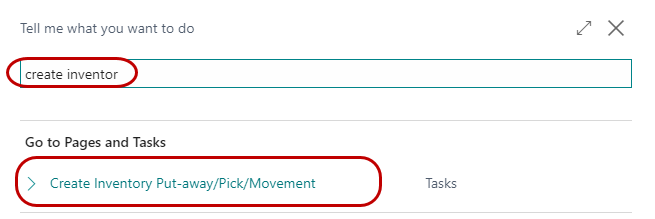
Multiple pick documents can be created at once from Departments ⯈ Warehouse ⯈ Planning & Execution ⯈ Tasks ⯈ Create Invt. Put-away /Pick:
-
From the Create Invt. Put-Away/Pick Page, set filters based on how you want to generate the pick documents. Refer to the Pick Generation Enhancement Procedure for some additional options.
-
Pick documents are created with the lines and quantity needed for each line. The recommended Bin code, Lot or Pallet for the quantity are also provided on the Line. You can find the List of Picks created by accessing them via each Agency Order or via Inventory Tasks Goods Handling Order by Order Lists Inventory Picks.
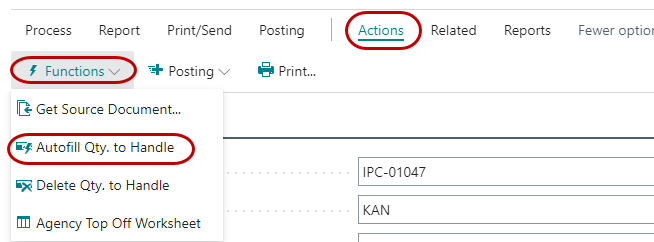
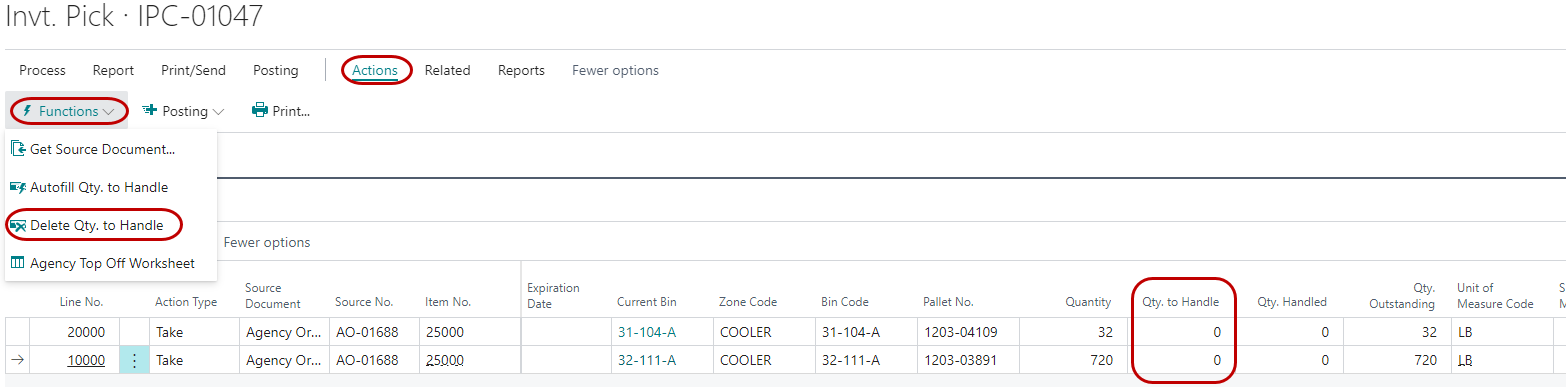
Once the product has been picked, go to the Inventory Picks lines sections and update the Qty. to Handle field to reflect what was actually picked.
noteThere is an “Autofill Qty to Handle” option on the Ribbon as well. When the pick documents are created, the Qty to Handle field automatically defaults to the Quantity field.
-
In this example the Qty. to Handle was changed to 7 instead of the 10 requested based on actual availability of product:
 note
noteYou can use the Delete Qty to Handle function to remove the quantities in the “Qty. to Handle” field. This can be useful on documents with many lines where you may have used the auto fill function in error.
-
Once you have updated the pick documents you can post them to indicate the product is no longer in the Pick Bin. The posting function will allow you to either post only the shipment or post the shipment and invoice at the same time. If any required information for posting the invoice is missing you will only be able to post the shipment and the invoice can be posted later from the Agency Order. If the warehouse team is posting Picks, typically “Ship” is selected, and Accounting reviews and Posts the Invoice from the Agency Order. This is the recommended workflow so that Delivery fees and Grant applications are not missed.
noteIf an Agency Order is only shipped, Ceres is able to undo the shipment with the Undo Shipment function found in the Functions menu of the Pick lines. This can be heflpful when QA discovers that an incorrect quantity, pallet or item has been picked. Undo Shipment lets you correct the pick without having to take the extra steps to Credit Memo the entire order.
-
To post the pick, click Post or Post and Print from the Process section of the Home ribbon.

-
Choose “Ship” or “Ship and Invoice” and click OK.

Creating Inventory Pick from the Agency Order
-
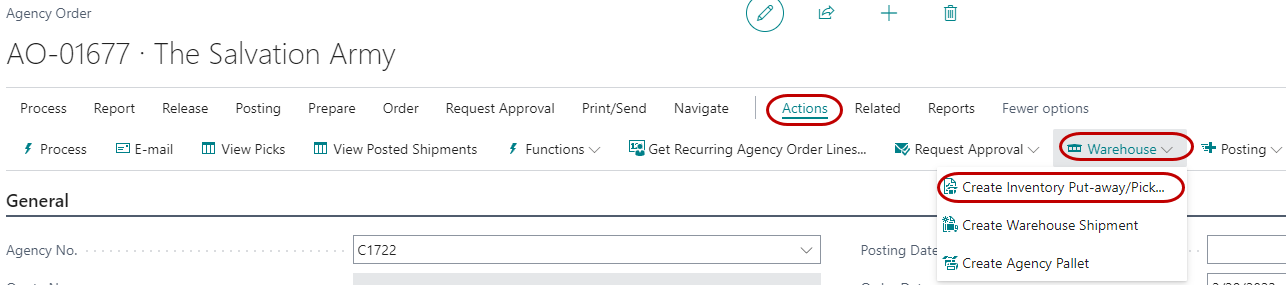
To create a Pick for a single Agency Order, from the Agency Order, click Create Inventory Put-away/Pick from the Process section of the Home ribbon. The Agency Order must be Released in order to create the pick.
-
Ensure that “Create Invt. Pick:” is checked. Check the “Print Document” field if you wish to have a printed copy of the Inventory Pick documents created. Check “Print Agency Pallet Tag” if you wish to have a tag to put on the completed agency order. See the Document Agency Pallet Tracking for more information. Press OK to create the pick(s) and print any documents as selected.
 note
noteThe Create Invt. Put-away / Pick report can also be run from Departments ⯈ Warehouse ⯈ Planning & Execution ⯈ Tasks ⯈ Create Invt. Put-away/Pick. Running from this location is generally done in order to create picks for multiple Agency Orders at once.
-
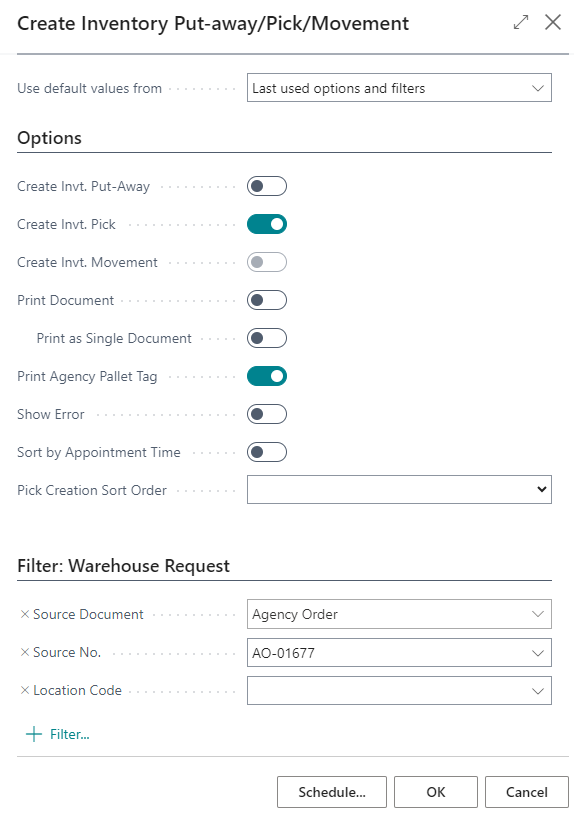
You will receive a message informing you of how many picks were created. If you checked the Print Document box, the picks will print as well.

-
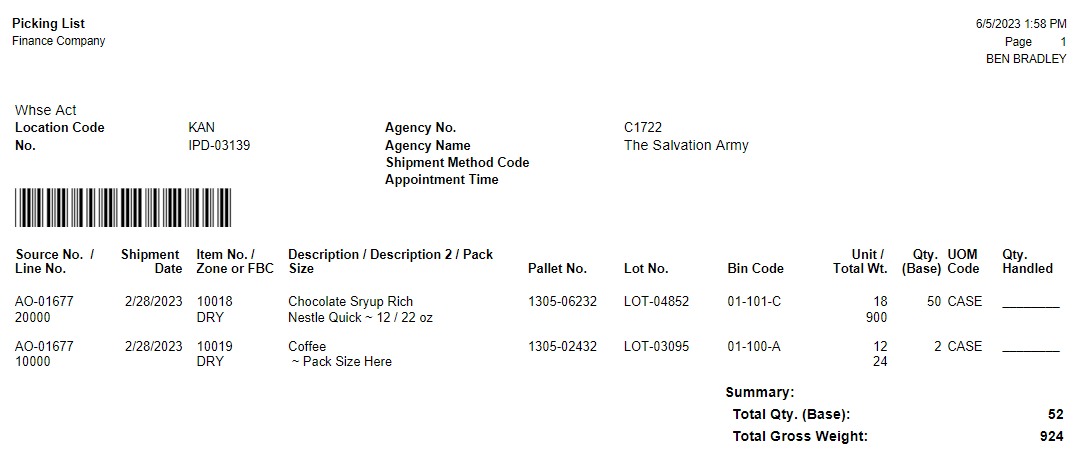
Below is a sample of the printed Picking List. Note: This Picking List has been configured to print a barcode to facilitate picking with handhelds.
-
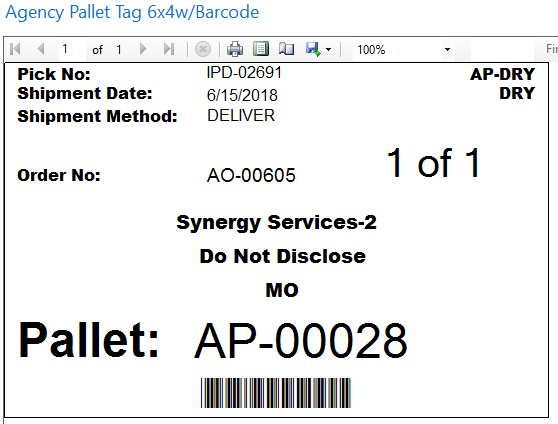
Below is a sample of the printed Agency Pallet Tag.
-
Once the pick document has been created it will then be handled from the warehouse menus for picking and shipping. Please refer to the section above: “Creating Inventory Picks from the Warehouse Menu,” for further explanation of the picking and shipping process.
Shipping Option 3 – Warehouse Shipment
Option 3 allows for the creation of a single warehouse shipment for multiple Agency Orders. Warehouse shipment facilitates a single step posting for the shipment and does not provide for staging. Refer to the Inventory Workflow Procedure for more information on the Shipping Options. This option is typically used in smaller pre-order warehouses where a Wave Pick style fulfillment is preferred. Alternately, you can create a Warehouse Shipment for multiple Orders for the same Agency if you need a mechanism to group them together for picking.
It is possible to setup Zones within a Location to be excluded from inventory picks by checking the field “Exclude from Pick” on the Zone. For those Zones, the Zone Code and Bin Code must be entered on the Agency Order Line and those lines must be posted via the Agency Order (Shipping Option 1).
Creating warehouse shipment documents can be accessed from either the Agency Order or from the Warehouse menu.
Creating Warehouse Shipment from Agency Order
-
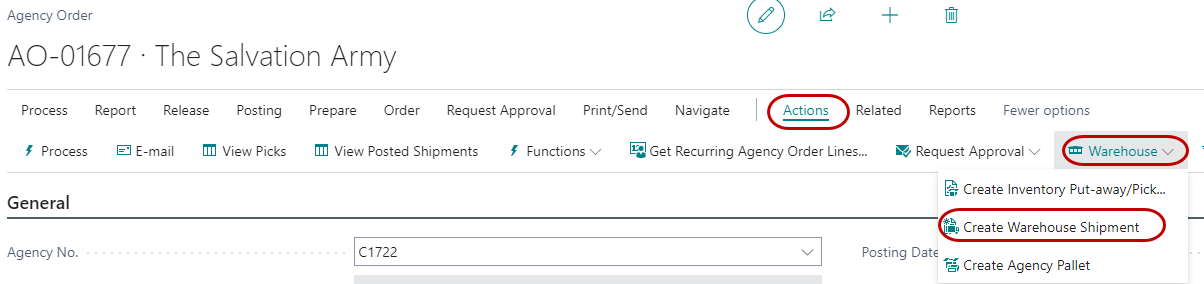
To create a warehouse shipment from the Agency Order, select Actions Warehouse Create Whse. Shipment from the Actions command bar of the Agency Order. Note that the Agency Order must be Released.
-
The warehouse shipment will be created and a message informing you of that will be reported back.

-
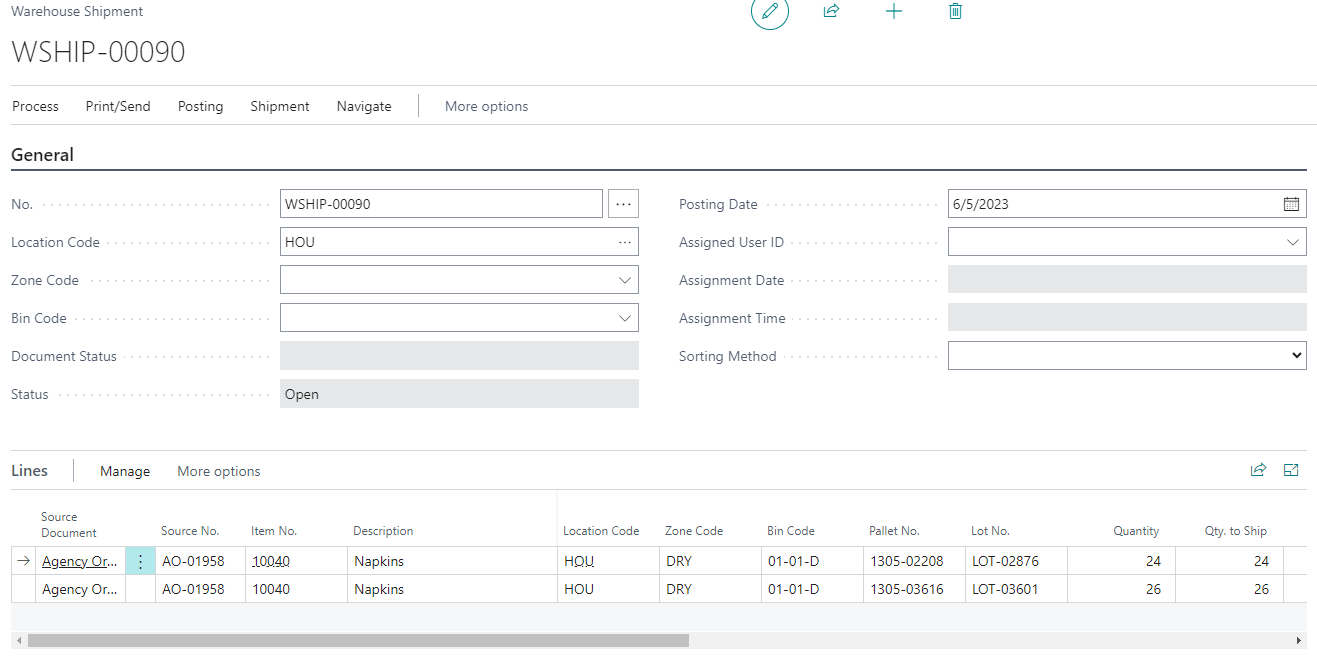
After clicking OK on the creation notification, the new warehouse shipment created will be displayed.
-
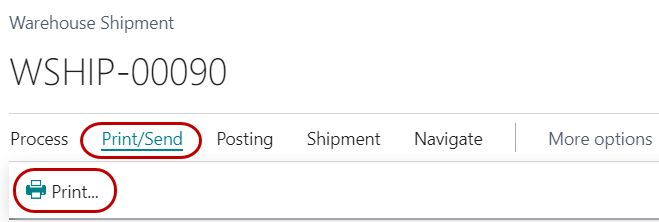
Next you may print the warehouse shipment document. To print the document, select Home Process Print from the command bar or select Print from the command ribbon bar.
-
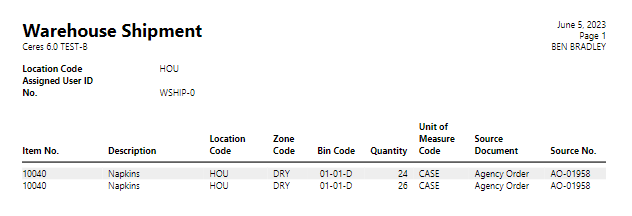
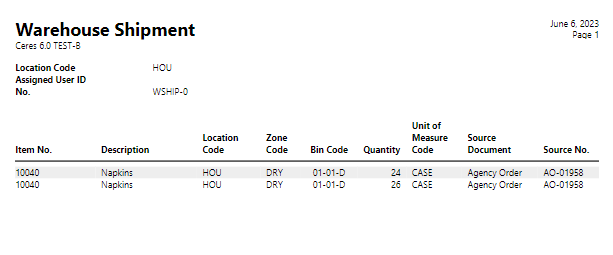
Below is a sample of the warehouse shipment document.
-
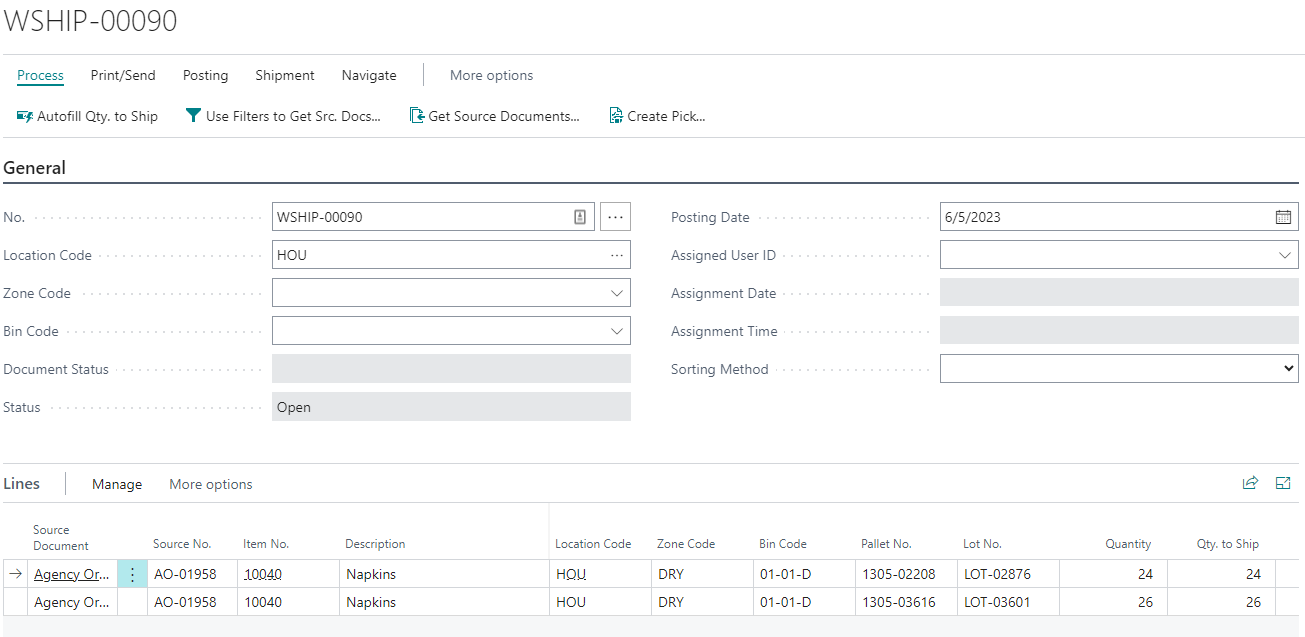
The warehouse shipment will automatically default the “quantity to ship” to the requested quantity on the agency order. The Pallet No., Lot No., and Bin Code will be assigned by the system using the defined warehouse picking logic. If there are other pallets in picking bins available to choose from, you may override the suggested pallet number and choose another one. In most cases it will be unnecessary to override the suggested pallet number. You may change the quantity to ship as necessary.

-
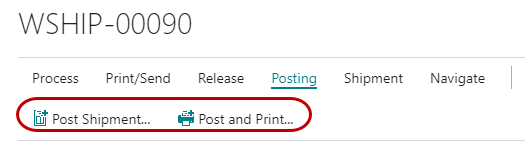
When you are satisfied with information entered, you may post the shipment be selecting either “Post Shipment” or “Post and Print”.
Creating Warehouse Shipment from Warehouse Menu
This option allows you to create Warehouse Shipments for multiple Orders at once. This is the more common use model and is often used to create shipments for a given Ship Option (delivery vs. pick up) or Shipment date.
-
Warehouse Shipments can be accessed from Departments ⯈ Warehouse ⯈ Planning & Execution ⯈ Warehouse Shipments
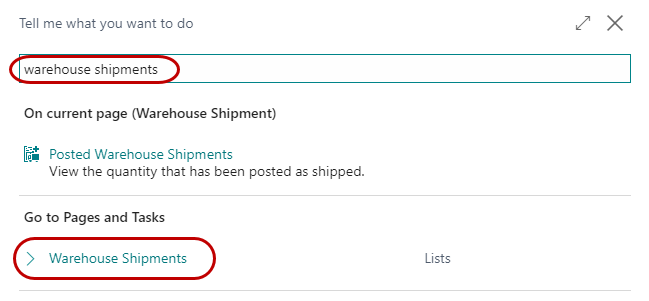
-
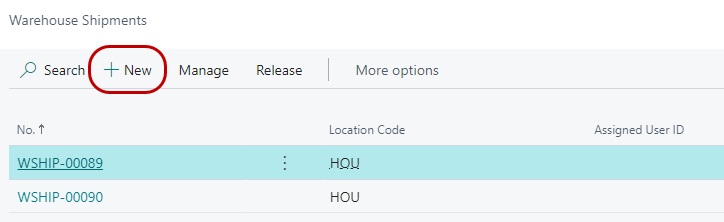
Click New to create a new warehouse shipment.
-
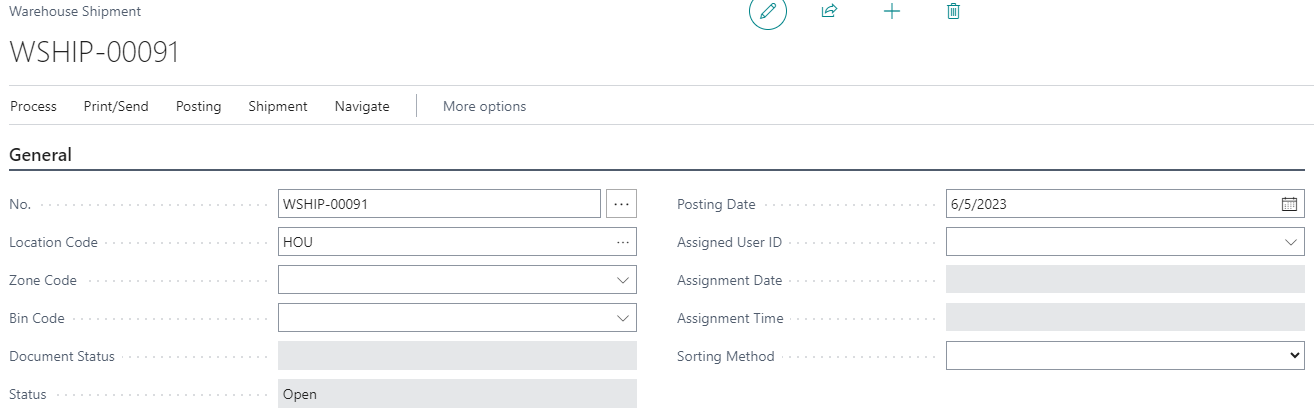
Enter a warehouse shipment number or press tab to have the system generate the next available warehouse shipment number and enter the location this warehouse shipment applies to.
-
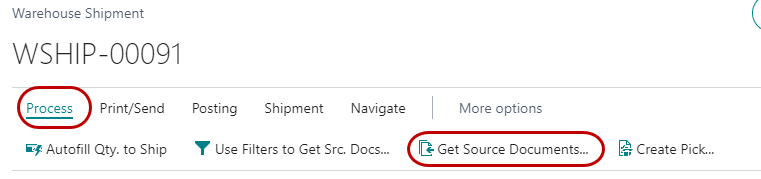
Enter the Location Code and then click on “Get Source Documents” in the Actions command ribbon to select form a list of shipping request associated with this location.
-
Choose the document or documents you wish to process, and then click OK.

-
The warehouse shipment lines will be created from the source document. Depending on settings, you may have to select some or all of the Pallet/Lot No’s on the lines.
-
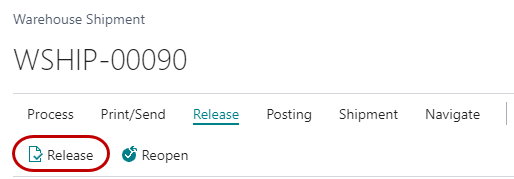
You may repeat steps 6 & 7 as necessary to create warehouse shipment lines for as many source documents (Agency Orders) as needed. Once you have selected the source documents you wish to process, click Release from the actions ribbon bar to release the warehouse shipment document.
-
Click Print from the Home ribbon bar to print the document.

-
This will generate the warehouse shipment document to be used for picking the product for the Agency Order or Orders.
-
Once the warehouse personnel have picked the product, you return to the warehouse shipment document to record the shipment. Select Post Shipment or Post and Print from the Home ribbon bar to post the shipment which will relieve inventory and record the item ledger entries.
- Select from “Ship” or “Ship and Invoice”. Most food banks should only use the “Ship” option because there may be additional information or processing needed before the invoice is posted that is not known by warehouse personnel*.* Security rights may also be set to prevent warehouse employees from posting the Invoice. The recommended option is Ship.
Excluding Zones from Warehouse Documents
Explode & Assign Pallet, Lot, Zone & Bin
When using Shipping Options 2 or 3 it is possible to specify certain Zones in the warehouse to be excluded from the warehouse documents. This is usually done for several reasons, for example, setting up a shopping zone that won’t need the extra documents and workload associated with the warehouse document flow. Another option is if you need a “WIP” to place Inventory that should not be available for orders on Agency Express. Ceres allows for the creation of such zones within your warehouse. Ceres also allows the ability to place items requiring warehouse documents (inventory picks or shipments) and shopping items on the same Agency Order. However, individual food banks may wish to segregate shopping orders from warehouse orders as a standard operating procedure.
When excluding a Zone from the warehouse documents, the task falls upon the user to assign the proper Lot, Zone, Bin and Pallet (if needed) on each Agency Order Line. This can be a time-consuming and even confusing task when trying to process these orders. Often it may be necessary to split the line into two or more lines to properly apply to multiple Pallets, Lots, or Bins. To expedite this process, Ceres will, upon release of the Agency Order, automatically explode the Agency Order Line into as many lines as necessary and assign each line with the appropriate information (Zone, Bin, Lot & Pallet). This is only done for Agency Order Lines in Zones designated as “Exclude from Warehouse Documents”. Any lines on the Agency Order in Zones not designated as “Exclude from Warehouse Documents” will continue to process according to the Shipping Option selected for the Location.
If at any time the Agency Order is reopened, the exploded lines will consolidate back into single lines on the Agency Order and can then be edited in normal fashion. When the Agency Order is released again, the explosion of lines and assignment of Pallets, Lots, Zones, and Bins will re-occur.
If an order contains both types of Zones, the option to “Ship & Invoice” from the either the Inventory Pick (Shipping Option 2) or the Warehouse Shipment (Shipping Option 3) will not be allowed. Orders containing both types of zones will only allow the “Ship” option upon posting of inventory picks and warehouse shipments. The invoice must be posted from the Agency Order screen on any such orders.
Designating the Zone (Shipping Options 2 and 3 Only)
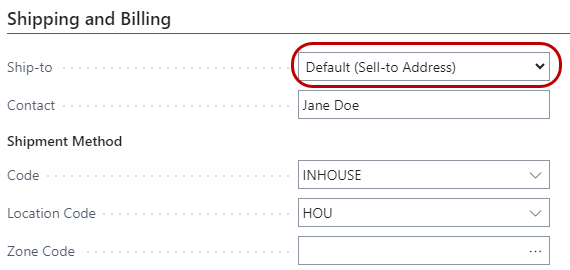
In Ceres it is possible to have an item in both types of Zones at the same time. In these instances, available inventory will not show up for Zones excluded from warehouse documents until a Zone is selected. You may select a default Zone for the entire Order by specifying the Zone in the Order Header, or by changing the Zone on the individual line items. Even if you specify a default Zone for the Order, you may change the Zone or delete it on any specific line. You may not designate Zones under Shipping Option 1.
Below is a screen shot of the default zone specified on the shipping tab for a sample Agency Order.
Under Shipping Option 1, the explosion will occur, and assignments will be made from all Zones and Bins where the product is located that are designated as pick bins. Because Shipping Option 1 does not involve warehouse documents, all Zones are treated as “Exclude from Warehouse Documents” and will function exactly the same. To exclude particular bins from being included they should not be set as pick type bins. Inventory located in Bins not marked as pick type bins will be ignored from the explosion/assignment logic
Example of Lot Explosion & Assignment
In this example we have entered a palletized item with a quantity of 200 and released the order. The release process has exploded the singular line of quantity 200 and assigned Zone, Pallet, Lot, and Bin.

Reopening the order, will bring it back to its original state:

Printing the Invoice
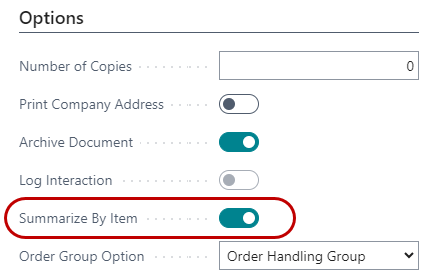
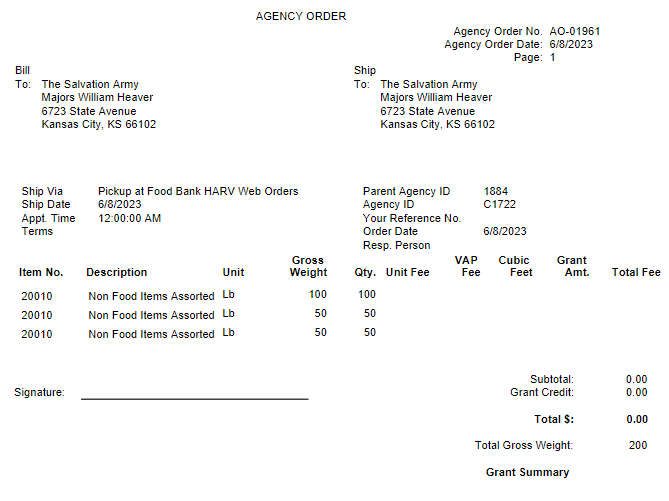
Because the explosion of an individual line item into many lines may be confusing to the Agency, Ceres provides an option in invoicing to summarize the Invoice by Item. Invoices printed with the summarize option will consolidate all the lines for an item back into one printed invoice line. This feature is selected on the Options FastTab of the print invoice report.

In the first example, the invoice is printed without the summarize option checked. Notice how lines are exploded much like they are on the Agency Order:
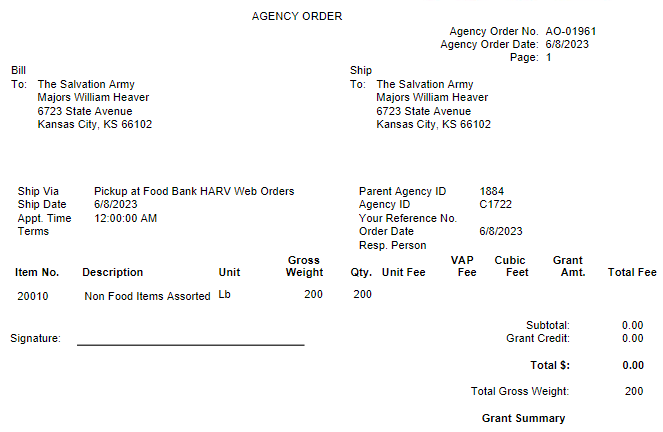
In the second example, the summarize option is checked.
Notice that line is summarized by Item.
Agency Order and Invoice Print Options
Ceres provides several order and invoice print options to choose from. Since the release of Ceres 4.02.19, two new order versions and two new invoice versions have been made available. The new options provide the ability to segregate the VAP and Handling fees in distinct columns and show each fee separately on the order/invoice line. The new reports are as follows:
Orders
-
Report 14012573 – Ceres Agency Order w/ VAP Det. (Report show separate VAP and handling fees and the Grant Information is shown in summary form).
-
Report 14012575 – Agency Order Grant/VAP Det. (Report show separate VAP and handling fees and the Grant Detail information)
Invoices
-
Report 14012572 – Agency Invoice w/ VAP Det. (Report show separate VAP and handling fees and the Grant Information is shown in summary form).
-
Report 14012574 – Agency Invoice Grant/VAP Det. (Report show separate VAP and handling fees and the Grant Detail information)
Related Topics
- Location Overview
- Zone Overview
- Bin Overview
- Agency Orders with Grants
- Agency Express Managing Web Orders
- Inventory Picks for Agency Orders
- Agency Delivery Zones and Delivery Fees
- Cancelling Agency Orders
- Agency Credit Memos
- Agency Return Orders
- Item Overview
- Order Handling Groups Order Routing Groups
- Agency Credit Order and Recreate
- Agency Clear Backorders
- Delivery Zones and Delivery Fees