Agency Scheduling
The purpose of this document is to describe the process of creating and managing Food Bank shopping, pickup and delivery monthly schedules and Agency appointment times in Ceres. The Scheduling functionality may be used just in Ceres 5, or in conjunction with Agency Express 3.
Ceres Object release 5.00.00 is required for the functionality described in this document.
Creating Schedules and Appointments in Ceres
Scheduling in Ceres is based upon a Schedule Template and Location Code. There are currently three different types of Schedule Templates to work with:
-
Deliver
-
Pickup
-
Shopping
For each Schedule Template, it is possible to have one or more locations. For example, under the Deliver Schedule Template, we might want separate calendars for locations MAIN and OFFSITE. In such a scenario, we would need to create appointment lines for Schedule Template = Deliver and Location Code = MAIN, as well as Schedule Template = Deliver and Location Code = OFFSITE. The following sections will describe how best to set this up. Please note – if you use Agency Express the Schedule templates must be named exactly “Deliver”, “Pickup” and “Shopping” in order to function with Agency Express.
Creating Master Schedule Lines
The first step in the scheduling process is to create Master Schedule Lines for the Schedule Template and Location you wish to work with. Master Schedule Lines are essentially a blueprint for a particular calendar; they are not the actual appointment lines but rather appointments slots that appointment lines will eventually be created from. The following instructions and associated screenshots will provide added detail.
To create Master Schedule Lines, open the Agency Scheduling Matrix. This is accomplished from the Departments Menu by clicking Agencies & Receivables ▸ Agency Relations ▸ Agency Scheduling as illustrated:

Upon selecting Agency Scheduling, you will be taken into the Agency Scheduling form. From here, you will need to specify:
-
The Schedule Template you wish to use,
-
The Location Code you wish to work with, and the
-
Date Filter. (This defaults to the current date + 9 days). To view other date ranges, hit either Next Set or Previous Set before “Show Matrix”.
For this example, we are going to work with Schedule Template
DELIVERand Location CodeMAIN.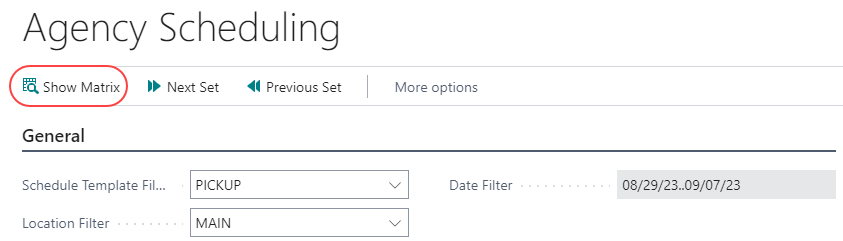
Click Show Matrix from the Home ribbon to view the appointment data for the Template, Location, and Date range. Currently there is no appointment data in this calendar.
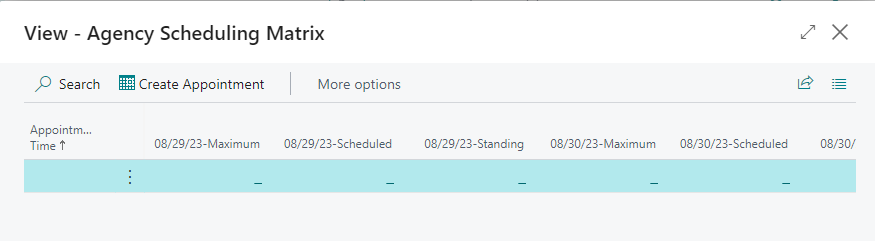
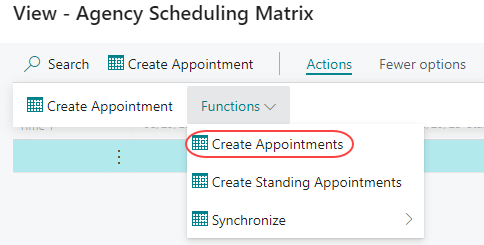
To generate appointments, we must first start by building the Master Schedule Lines. Select Create Appointments from the Actions ribbon to open the Create Appointments page.
There are two different buttons with very similar names. Create Appointments (plural) is used to create the Master Schedule as shown here. The Create Appointment (singular) button is used to manually create a single appointment.
From here you can specify information about the Calendar you wish to create.
The specific setup of Master Schedule Lines is flexible to allow customization per food bank. Be certain to include a Start Time and an End Time. If there will be a mid-day break (a lunch break for example) be sure to include a second Start Time and End Time as illustrated in the screenshot. Also, be sure to select the Create Master Schedule Lines checkbox. The Time Interval indicates how much time exists between appointments slots. In this example, the first appointment is at 7:30 and one occurs every hour through 10:30, with a lunch break and afternoon appointments starting at 12:30 and ending at 2:30.

::: Do not be concerned with the Starting Date and Ending Date when generating Master Schedule Lines, the 12/31/9998 is used behind the scenes for special processing, it does not concern us here. When you are finished with your setup, hit the “Execute” button at the top of the page. Clicking OK cancels the task.
In order to synchronize properly with Agency Express, Starting/Ending Times must include minutes that start with :00, :05, :10, :15, :20, through :55. It cannot start or end with any minute in-between five-minute intervals. For example: 07:30:00 AM is a valid start time, but 07:32:00 AM is not.
When the master appointment lines are generated, you will receive a notification prompt:
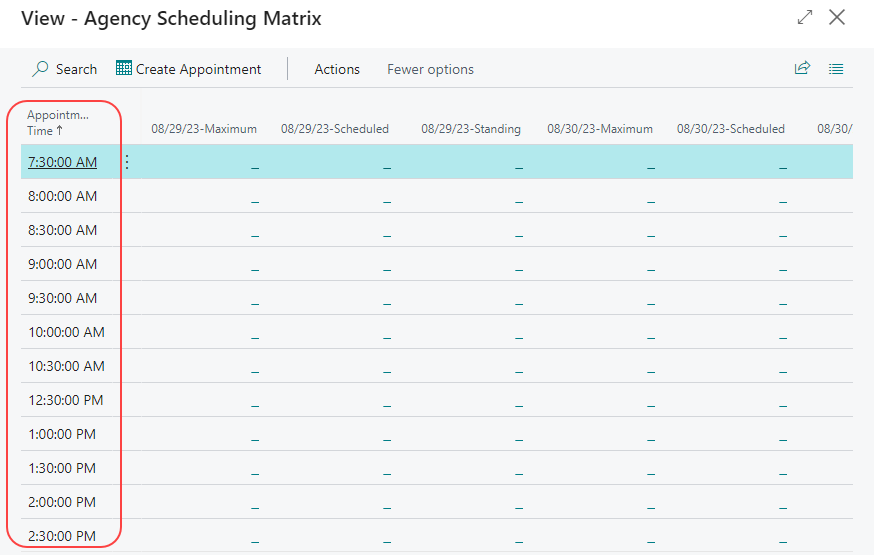
You will notice that the Agency Scheduling Matrix now has a list of times on the right hand side of the page. These are the Master Schedule Lines; they form the general structure of the calendar. Without the master appointment lines generated, it would not be possible to create appointment lines.
Now that this has been completed, you can create Appointment Lines.
Creating Appointment Lines
Select Create Appointments from the Actions ribbon to open the Create Appointments page.
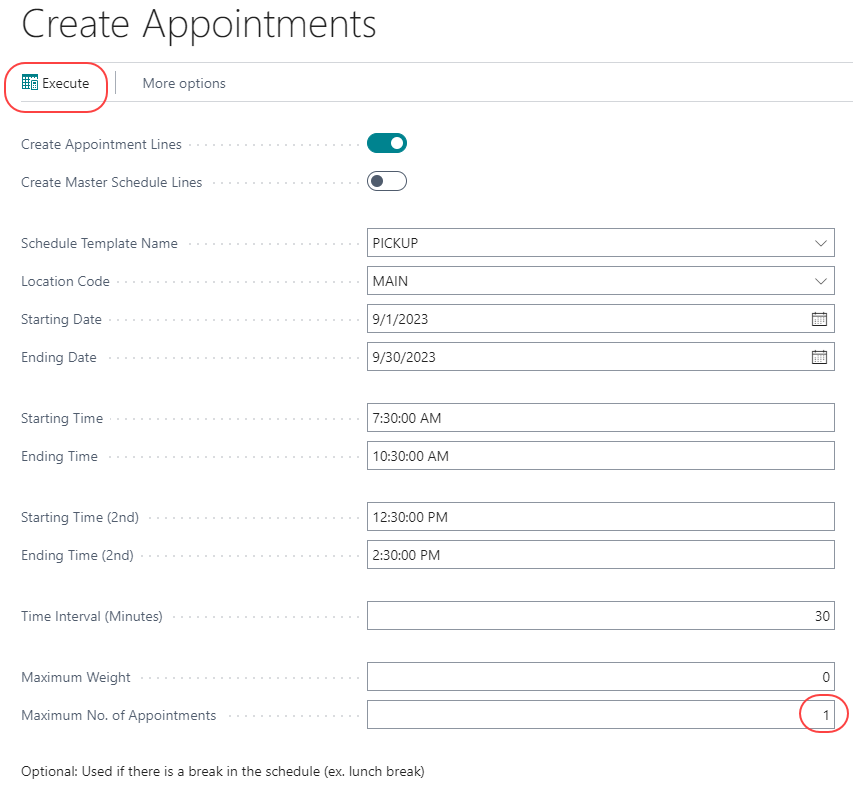
Once the page has opened, begin by selecting the Create Appointment Lines option. Next, select an appropriate Schedule Template Name, Location Code, Starting Date, and Ending Date. Starting Time and Ending Time must correspond to what was entered when creating the Master Schedule Lines. For example, if Master Schedule Lines are for 7:30am – 2:30pm, we could not create an Appointment Line for 3:30pm as no placeholder exists for it on the master calendar. The Time Interval will auto-populate based upon the Master Schedule Lines. Max Weight and Max No. of Appointments are set by user discretion. In this example, we have chosen a Max. No. of appointments per time slot of 1. If you are using Standing Appointments Only, set Maximum No. of Appointments to 0.
Once all fields have been filled in, hit Execute to create Appointment Lines. As above, clicking OK cancels the task.
A dialog box displays when the process has completed:
Click OK.
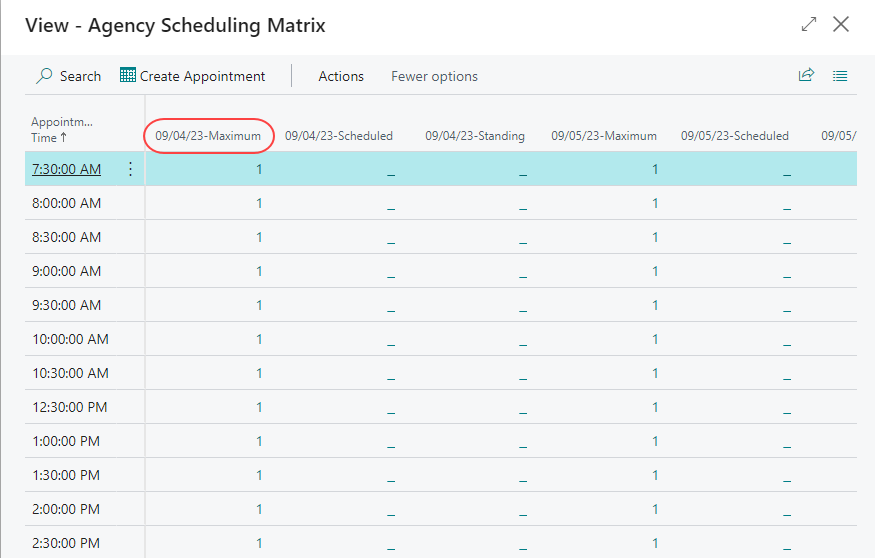
Once appointments have been created, you will notice that the Agency Scheduling Matrix has additional data under the Maximum column. This indicates that Appointment Lines have been successfully generated. No data will appear in the Scheduled and Standing columns until later. At this point our Calendar is complete. Orders may now be scheduled against it.
This process must be completed for all combinations of Locations and Schedules that you are using.
Marking Days Off
If you anticipate being closed for a holiday, or will be operating on a revised schedule, you need to mark days and times off of the calendar. This must be done PRIOR to synchronizing schedules to Agency Express. This prevents appointments from being scheduled during a time when the food bank is not open. In this example appointments have been created for the month of August. The Food Bank has a Company Picnic on August 16th, so appointments need to be removed for that day.
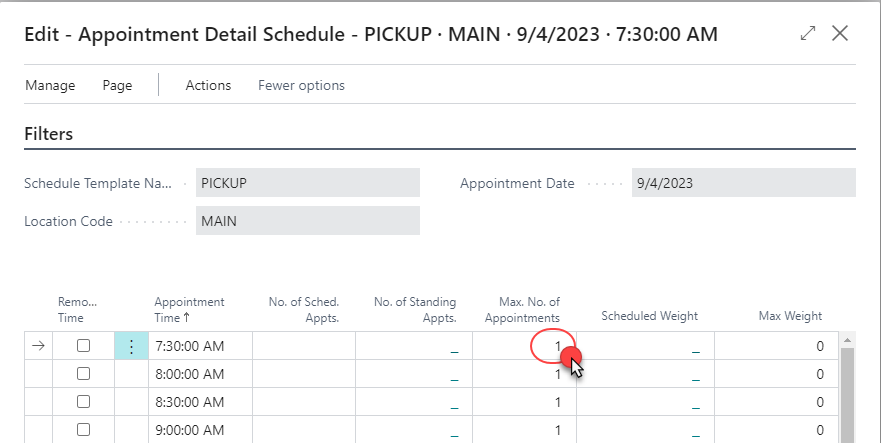
To do so, first make sure that the Matrix is displaying the time frame that includes the date you are planning to remove. (You may need to return to the Agency Scheduling start window and choose Next Set until that date is included). Once the Matrix opens, locate the date and right click the Maximum Appointments Column and select Advanced Lookup.
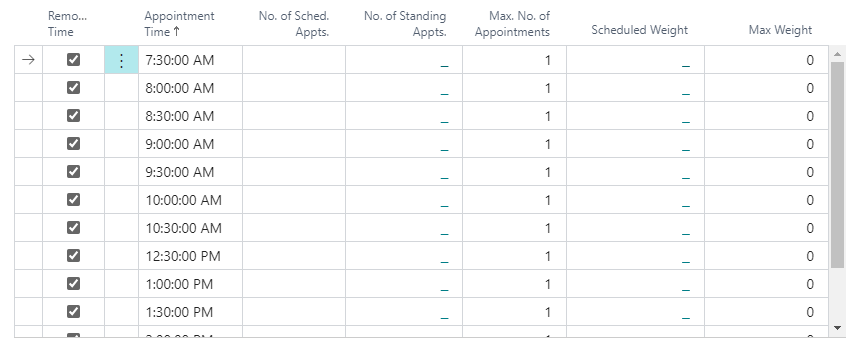
This opens the Appointment Detail Schedule window:
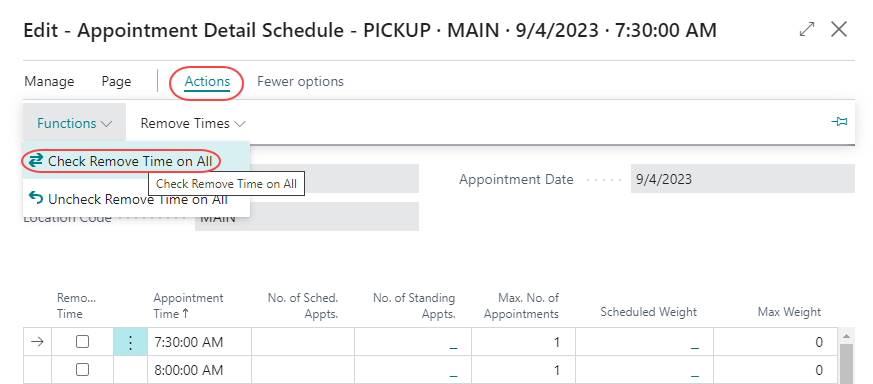
From here, select Check Remove Time on All from the Actions ribbon.
This will cause all times to be marked for removal from this calendar. If you do not want to mark the entire day for deletion, you can selectively check which times you wish to remove by manually checking the Remove Time checkboxes as appropriate.
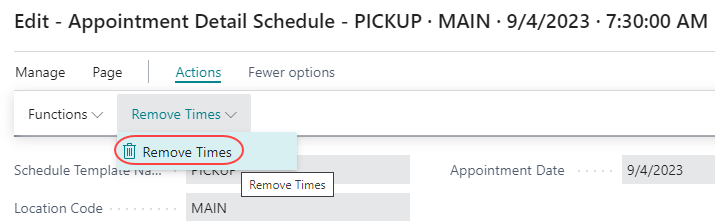
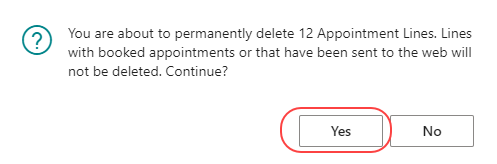
Once you have selected times to remove, hit Remove Times from the Actions menu (clicking OK closes the window without making changes.) Confirm that you wish to delete the lines by pressing “Yes”.
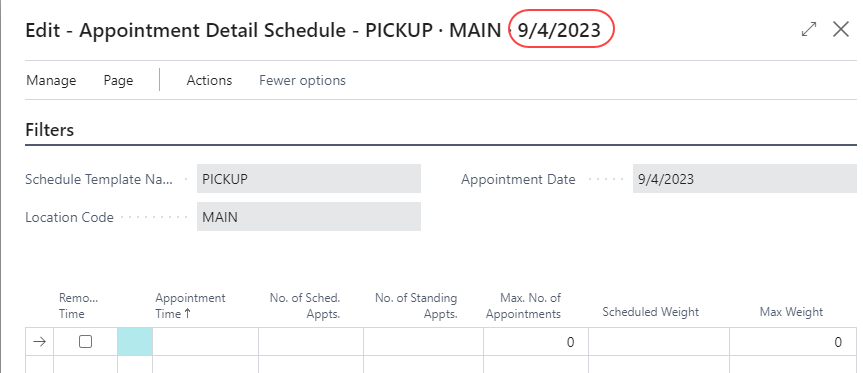
All appointment lines for August 16th are now deleted and cannot be scheduled against as they no longer exist.
Synchronizing Appointments (Calendars and Appointment Lines)
Before Creating Standing Appointments, it is recommended that you first Synchronize Calendars and Appointments with Agency Express. Standing Appointments are sent to AE as soon as they are generated, so it is better to have the ‘template’ for those standing appointments sent to the Web before you create them.
There are two pieces of scheduling data to be synchronized: Calendar data (In the Web Processing Queue they display as Type = “Schedule Master” entries and in the folder structure for AE, they are ISM files) and Appointment data (In the Web Processing Queue they display as Type = “Appointment” entries and ISQ files for AE).
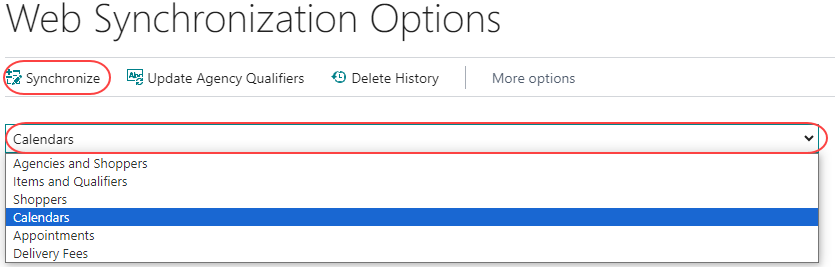
To synchronize Calendars, go to Web Synchronization Options and choose Calendars in the drop-down. Then Synchronize from the Home ribbon (clicking OK closes the window without making changes):

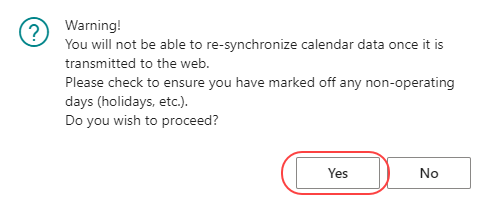
Once you synchronize a calendar with the web you cannot make additional changes to it. For example, if you synchronize a calendar and realize later that you forgot to mark off a holiday, you must contact TechBridge for assistance as you cannot remove that date after the calendar has been synchronized. It is extremely important to make sure your calendar is correct before you send it to the web.
Click Yes to Synchronize. A Warning will pop-up to confirm that you have confirmed your dates before you send the Calendar to AE:

When the Master Calendar has been synchronized, it will return you to the Web Synchronization Options window.
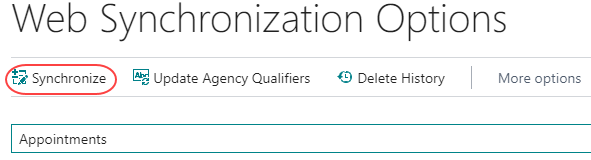
To synchronize appointments, select Appointments from the drop-down, then Synchronize from the Home ribbon:

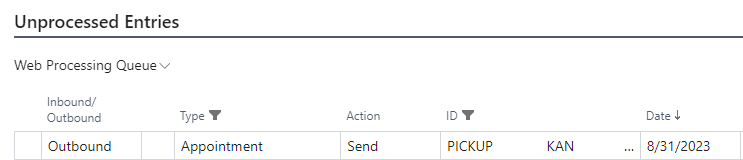
In the Web Processing Queue, Calendar entries will display as Type = Schedule Master:

Appointments will display as Type = Appointment.
If you use Standing Appointments only (no open or pre-reservation appointments) for a calendar, you will not see any appointment lines until you generate Standing Appointments.
Creating Standing Appointments
Standing Appointments are default appointment days and times that can be established for Agencies. Using Standing Appointments only (Maximum No. of Appointments = 0) for certain calendars means that the Agencies cannot free-select appointments on Agency Express, but must choose from only the available standing appointments that are assigned to them. There are two ways to create standing appointments in Ceres:
- Automatically via the Create Standing Appointment batch routine.
- Create standing appointments manually (usually single appointments as needed).
Automatic Standing Appointments
To automatically create standing appointments, you must first complete Standing Appointment Setup for the agencies in question. Once the Standing Appointment Setup (template) has been completed for an agency, it should not need to be modified unless a change has occurred due to changes in the food bank’s hours of operation or to the schedule itself).
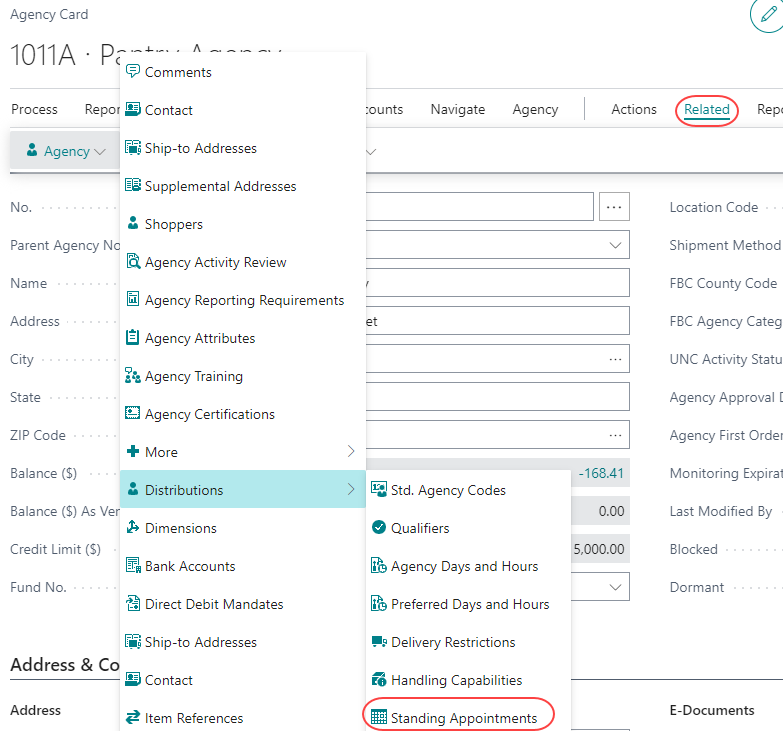
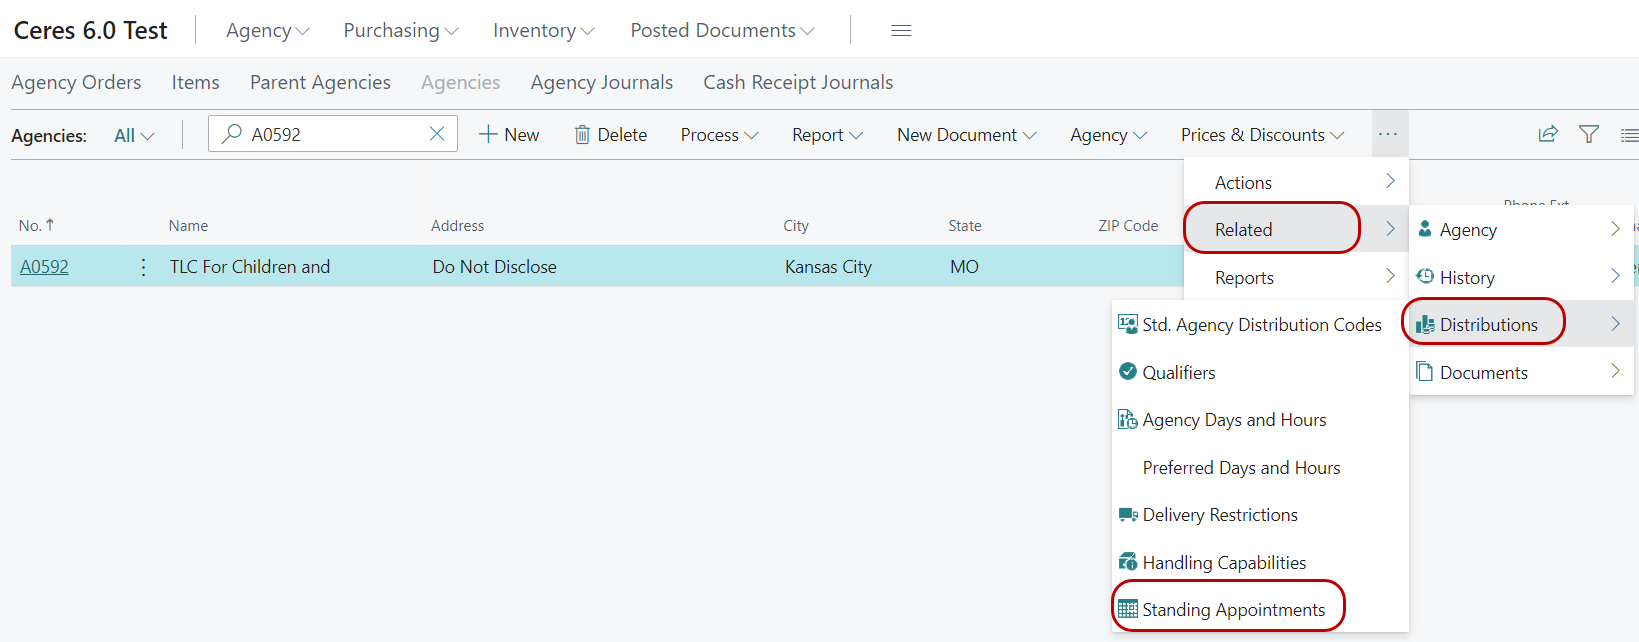
From an Agency card, select Standing Appointments from the Distributions section of the Navigate ribbon:
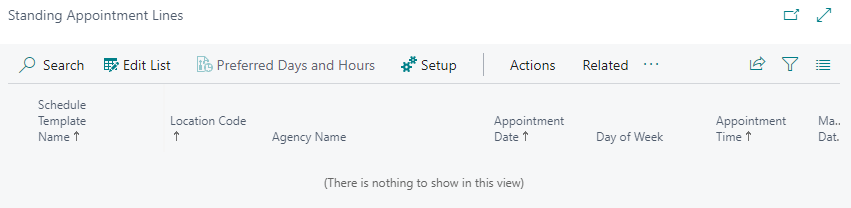
This opens the Standing Appointment Lines for that Agency. If no standing appointment lines exist, that is because they have not been created yet.
To open Standing Appointment Setup, click Setup from the Home ribbon:
If a template already exists then the setup lines will display, if not, you will need to create the template lines:

There are a couple of different ways that standing appointments can be setup as shown in the screenshot.
The first Standing Appointment Setup Line indicates scheduling standing appointments for agency B0129 every first Wednesday of every month at 9:30am.
The second line indicates scheduling a standing appointment for the same agency on the third Wednesday of every month at 9:30am.
The third line indicates scheduling standing appointments on the 25th of every month at 9:30am.
The fourth line indicates using a setting for every x number of weeks (cannot be set to 1 or used with Week No. in Month, Day of Week or Date in Month). In the Last Appointment Date column, use a date that will correspond with the last appointment date before the first appointment date for this agency based on. When Create Standing Appointments is run, the system will update the “Every X Weeks Last Appointment Date” with the last standing appointment created for the time frame, so that the system knows where to start the next time the process is run.
Once satisfied with the Setup page, hit OK to go back to the Standing Appointments page.
Standing Appointment Setup is generally relatively static. In other words, you shouldn’t anticipate having to change this very often once completed unless an agency, or even the food bank, deems it necessary. You will need to complete this for any agency that you wish to automatically create standing appointments for, but once setup is complete, you should not need to revisit often.
Creating Standing Appointments from the Agency Card (less common)
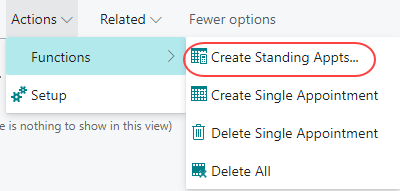
Now that setup is complete, you can automatically create appointments for this agency. This is done by selecting Create Standing Appointments from the Actions ribbon. You will notice that the Create Standing Appointments routine is pre-filtered for the agency you are working with. We will run the routine globally in the next section, but for now, leave the agency filter in place. You will need to enter a date filter. This process can only be run for an entire month (the dates created are based on the appointment lines you created earlier and may not be for an entire month if that’s how you schedule). Typically, we enter a date filter that matches the date range for the calendar we just created. Because we just created appointment for the month of January, we will create standing appointment for the month of January as well. Once the filter has been entered, hit Preview to create standing appointments for your agency.


If any errors occurred during this process and a standing appointment cannot be created, an exception report will print. In this case, no errors occurred so a dialog box will appear indicating that there were no errors. Standing appointments have now been created for this particular agency.
The reason there is no appointment for 8/25/19 is that it falls on a Sunday, so the system generated an appointment for the next available calendar date, 8/26/19. Notice that the Every X Weeks Last Appointment Date in Setup was updated to account for the most recent appointment date:
Creating Standing Appointment for Multiple Agencies (most common)
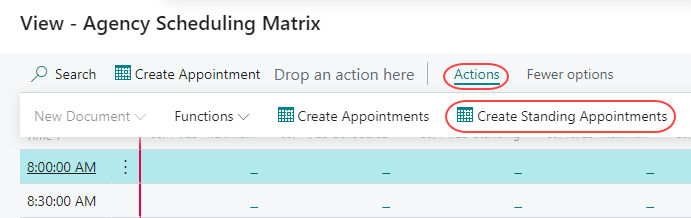
Creating standing appointments for multiple agencies at a time is the most common function. This is done through the Agency Scheduling Matrix. From the Agency Scheduling Matrix, select Create Standing Appointments from the Actions ribbon.
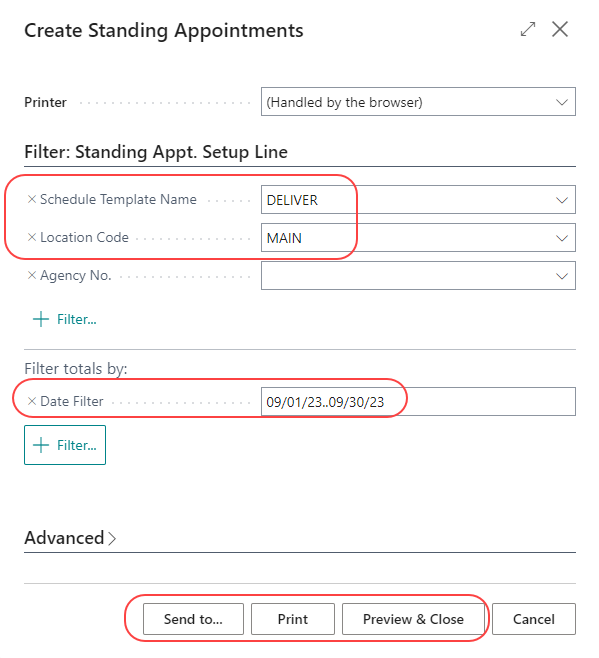
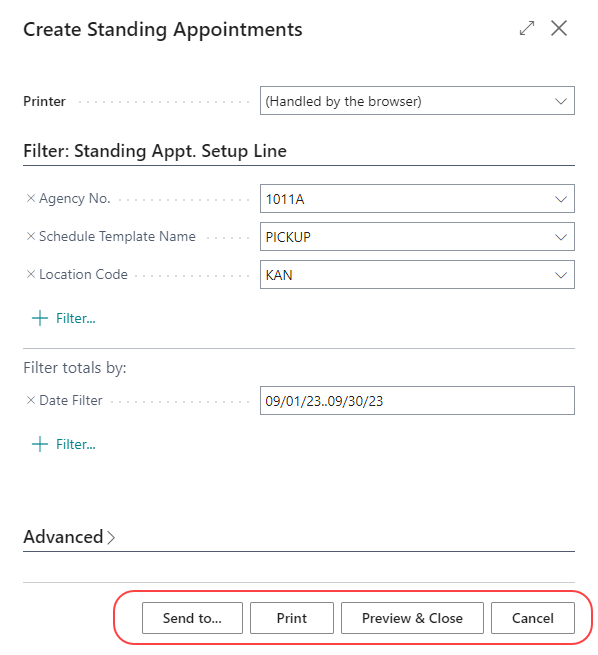
This will open the same request form as before. In this case, an Agency No. filter will not be displayed as you are creating standing appointments for all applicable agencies. Schedule Template Name and Location Code will default based upon the calendar opened before selecting Create Standing Appointments. You must input the Date Filter.
This process can only be run for an entire month (the dates created are based on the appointment lines you created earlier and may not be for an entire month if that’s how you schedule). The report cannot run without it. Confirm entries then hit preview (or Print if you want a .pdf or printout) to create standing appointments for all agencies based on settings.
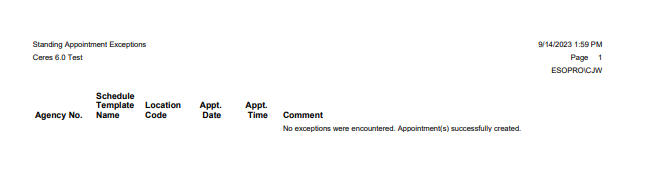
If any exceptions are encountered, you will receive a notification and an exception report will display:

Exceptions were reported because appointments already exist for B1029 (created on the Agency Card.)
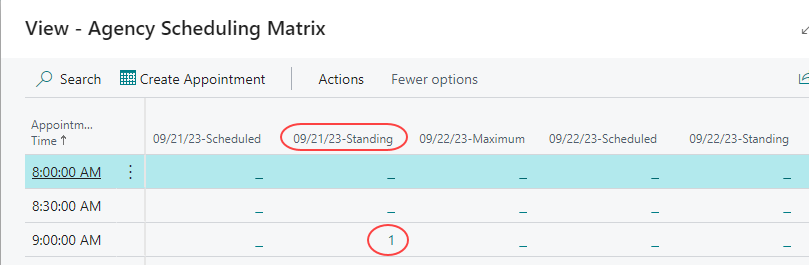
Standing appointments are now reflected on our calendar. In this example, we have a standing appointment on the 15th at 10:30 am. Once this standing appointment is used on an order, it will be deleted and replaced by a scheduled appointment (this process is explained in greater detail in the AE3 Managing Web Orders document) and will display under the Scheduled column instead.
Manually Creating (SINGLE) Standing Appointments
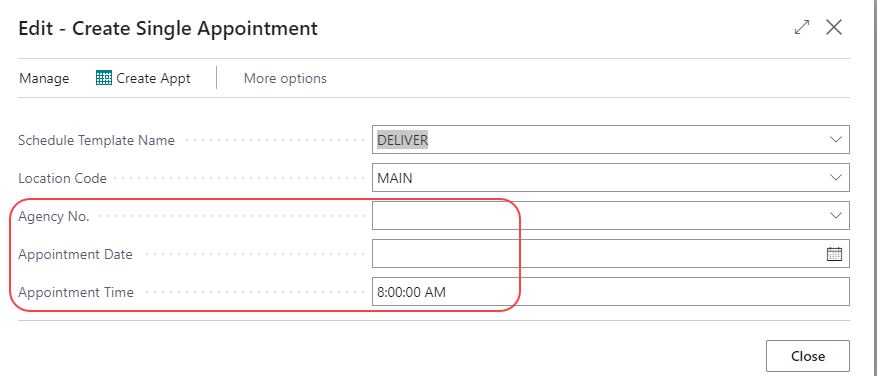
You can manually create a single standing appointment (an appointment without an Order yet) from the Agency Scheduling Matrix by selecting Create Appointment from the Actions menu.
There are two different buttons with very similar names. Create Appointment (singular) is used to manually create a single appointment as shown here.
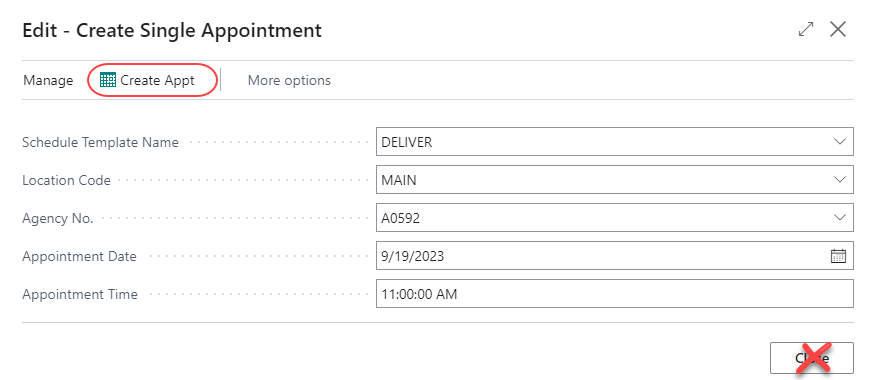
Most of the fields will default based upon the calendar. You will however need to specify an Agency and an Appointment Date. When satisfied with entries, hit Create Appt. to create the standing appointment.
You can also create a single appointment from the Agency Card (or by highlighting the Agency in the LIST view) by clicking Standing Appointments on the Navigate ribbon to open the Standing Appointments Lines window. In that window, click on Create Single Appointment on the Actions ribbon.
It is not necessary to Synchronize Appointments after generating Standing Appointments as they are immediately dropped in the Web Processing Queue for handling as soon as they are created.