Bank Reconciliations
The Bank Reconciliation process in Ceres is used to compare and clear bank ledger entries in Ceres with a statement provided by your bank.
Ceres Object release 5.00.00 is required for the functionality described in this document.
Bank Reconciliation Setup Options
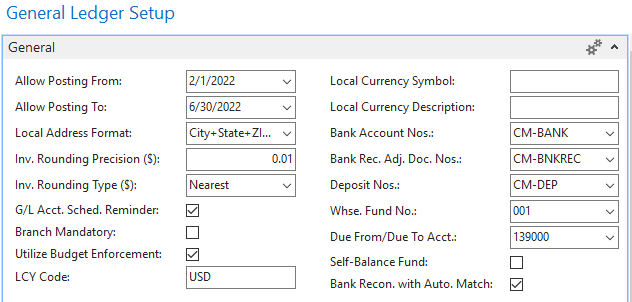
Ceres 5 contains two different bank reconciliation page formats, both of which can be used to compare bank ledger entries in Ceres to a bank statement and mark them as cleared. The Classic format has been in all prior versions of Ceres, and a newer Auto Match version has been recently added. To select between the two versions, navigate to General Ledger Setup.
-
For Classic format, Bank Recon. with Auto Match should be unchecked
-
For Auto Match format, Bank Recon. with Auto Match should be checked
When changing bank reconciliation formats, a warning dialog will appear confirming the change.
Creating and Posting a Bank Account Reconciliation
Classic Format
-
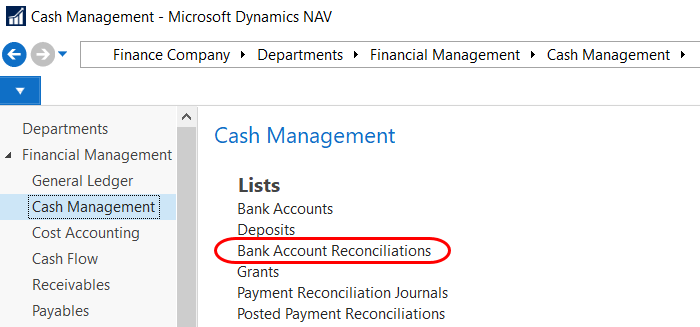
The Bank Account Reconciliation can be accessed from Departments ▸ Financial Management ▸ Cash Management ▸ Lists ▸ Bank Account Reconciliations.
-
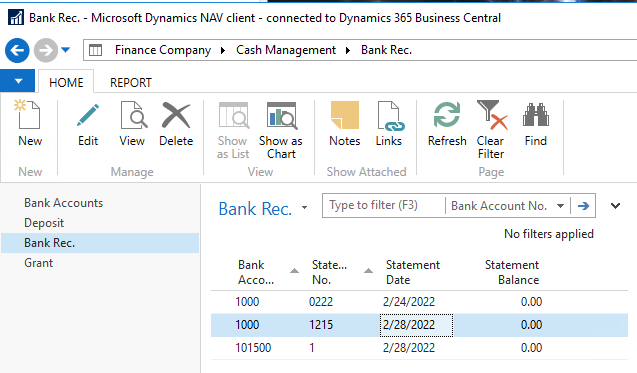
The Bank Rec. list view will show the most recent bank reconciliation (using Classic format) for each bank account in Ceres. To continue working on an unposted bank reconciliation, click the Edit button. To begin a new bank reconciliation, click the New button.
-
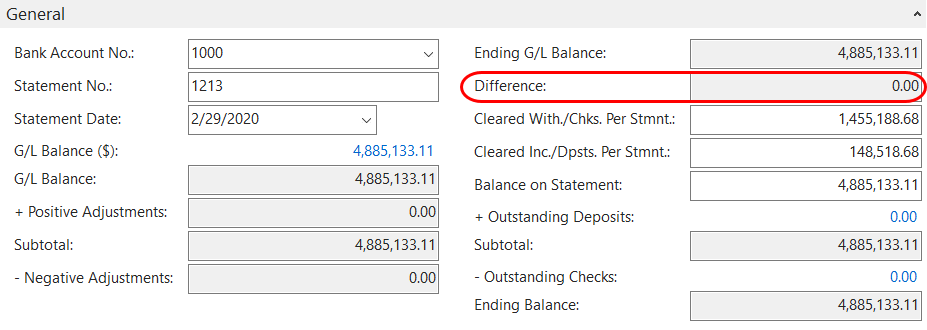
To create a new Bank Account Reconciliation, click on the Home Tab of the Ribbon and then New. The Bank Rec. Worksheet is divided into several FastTabs. The General FastTab contains details from the bank account subledger, the current bank statement, and summarizes check and deposit information from the other FastTabs.
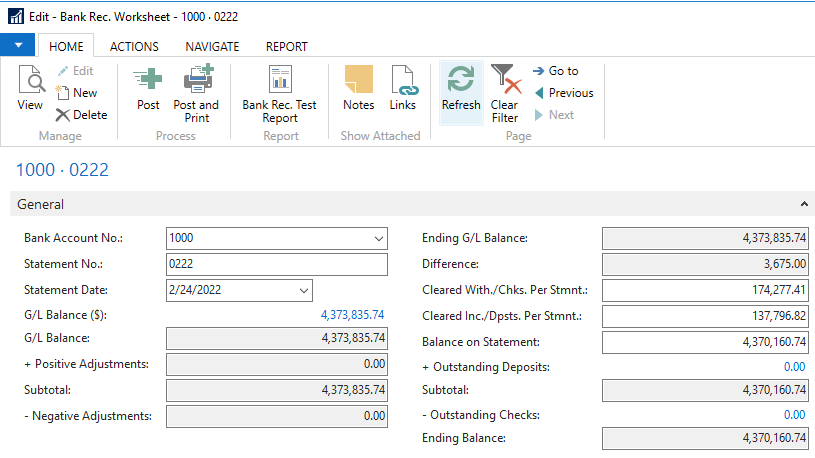
Bank Account No.: The account you are reconciling.
Statement No.: A sequential number for this bank reconciliation record. Ceres automatically fills in the Statement No. field by incrementing the Last Statement No. field on the bank account card.
Statement Date: Enter the date of the statement from the bank. This field is also used to filter the G/L Entries that display in the G/L Balance $ field.
noteYou can make entries into the G/L on the Bank Rec. Worksheet using the Bank Rec. Adj. Lines Subform, perhaps for bank interest or fees appearing on the bank statement. These entries change the Ending G/L Balance and are displayed in the + Positive Adjustments and - Negative Adjustments fields.
Difference: The difference between the cleared G/L Balance and the Bank Statement Balance, calculated as: Balance on Bank Statement + Outstanding Deposits - Outstanding Checks - Ending G/L Balance. The bank rec. can only be posted once this number is zero.
Cleared With./Chks. Per Stmt.: (Optional) Enter any checks and other withdrawals found on the bank statement. This populates the comparison field at the bottom of the Bank Rec. Check Lines Subform.
Cleared Inc./Dpsts. Per Stmt.: (Optional) Enter any deposits and other incoming transactions found on the bank statement. This populates the comparison field at the bottom of the Bank Rec. Dep. Lines Subform.
Balance on Statement: Enter the ending bank balance from the bank statement.
-
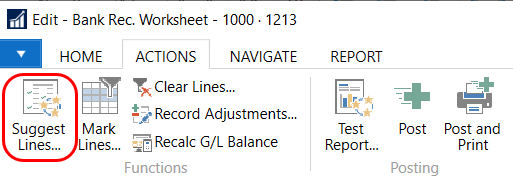
Populate the Bank Rec. Worksheet with uncleared transactions from the Bank Account subledger in Ceres by clicking the Suggest Lines… button found on the Actions tab.
-
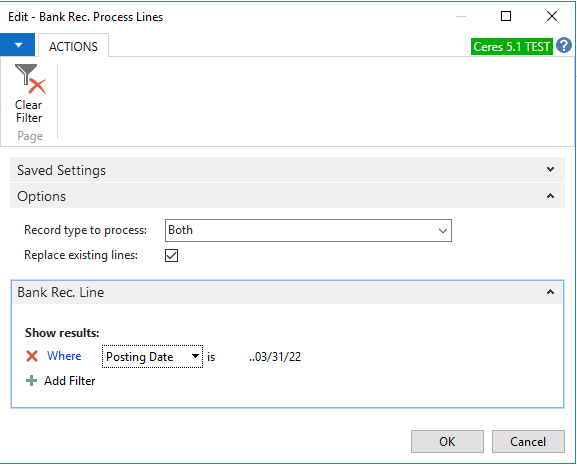
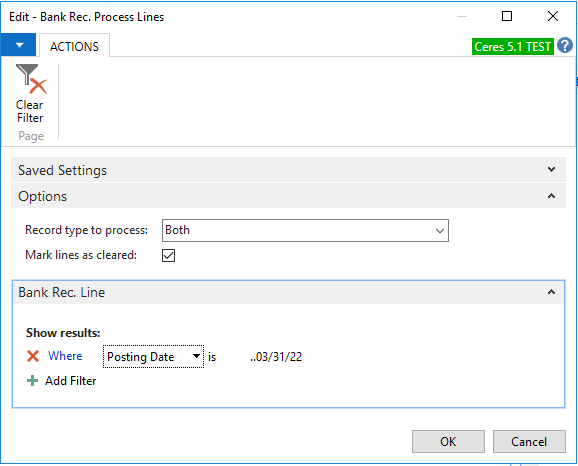
The Bank Rec. Process Lines Page will appear. The options are:
Record type to process: “Checks” will populate the Check Lines subform with open bank ledger entries with a corresponding Check Ledger Entry. “Deposits” will populate the Deposits/Transfers Lines subform with all other open bank ledger entries, including payments made by ACH. “Both” will populate both subforms.
Replace existing lines: When this box is checked, the subforms will be cleared and repopulated based on the filters on this page. When this box is not checked, lines will only be added to the subforms based on the filters on this page.
noteReplacing lines will also unclear any lines that you have marked as cleared.
Posting Date: Enter the date range for the Bank Ledger Entries that will populate the Check and Deposit subforms.
-
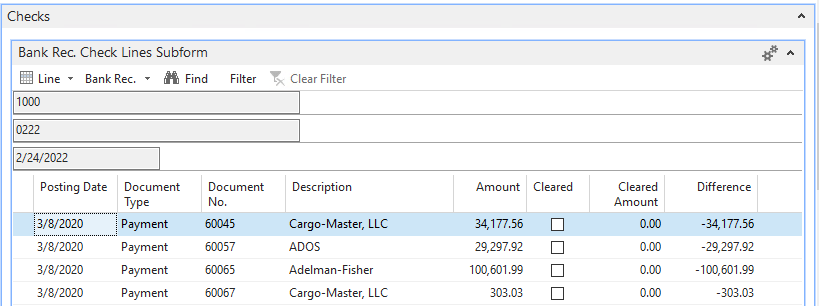
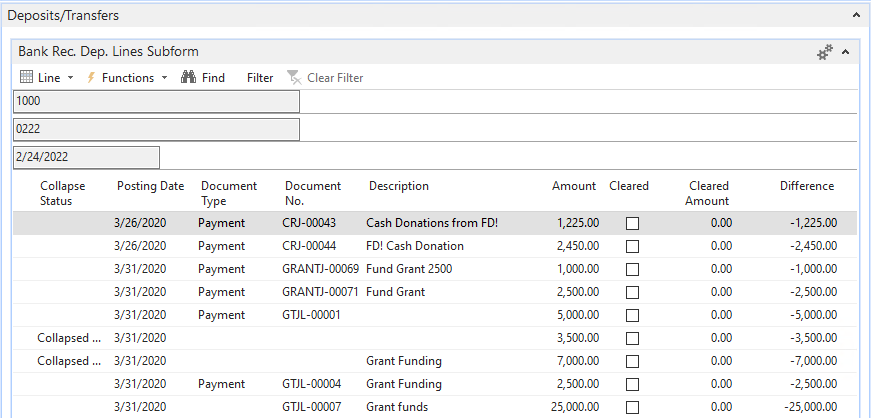
Click OK. Ceres fills in the lines on the Checks FastTab and the Deposits/Transfers FastTab. The Outstanding Checks and Deposits fields are also updated on the General FastTab.
-
In the Bank Rec. Check Lines Subform of the Checks FastTab, mark the Cleared checkbox for each check found on your bank statement.
-
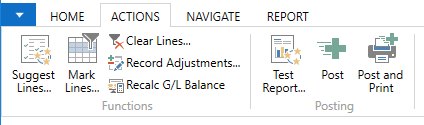
You may check or uncheck many boxes at once by clicking the Mark Lines button on the Home Tab of the Ribbon. The options are:
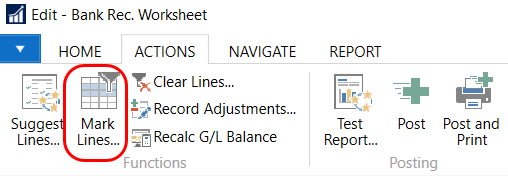
Record type to process: “Checks” will mark entries as cleared in the Check Lines subform. “Deposits” will mark entries as cleared in the Deposits/Transfers Lines subform. “Both” will mark entries as cleared in both subforms.
Mark lines as cleared: When this box is checked, the entries will be marked as cleared in the subforms. When this box is not checked, entries will be unmarked.
Posting Date: Enter the date range for the entries you wish to mark or unmark as cleared.
-
In the Bank Rec. Dep. Lines Subform of the Deposits/Transfers FastTab, mark the Cleared checkbox for each deposit, transfer and ACH found on your bank statement. The Mark Lines button is available here as well.
-
To remove some or all bank ledger entries from the Bank Rec. Worksheet, click on the Actions Tab of the Ribbon and select Clear Lines. This only clears the worksheet and does not affect bank ledger entries.
-
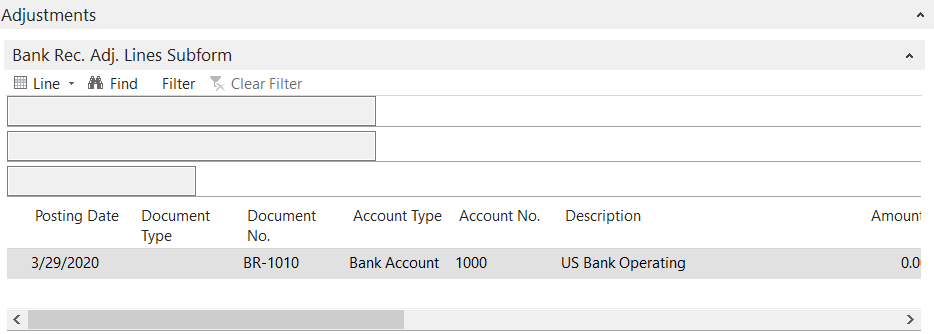
Use the Adjustments FastTab to enter any transactions from the bank statement that do not appear on the reconciliation lines, such as bank fees or interest. Any amounts entered on the Adjustment FastTab will post as a Journal Entry when the Bank Reconciliation is posted.
-
After you have marked checks and deposits as cleared to match your bank statement, check the General FastTab to confirm that the Difference is zero. The Bank Reconciliation cannot be posted until the Difference is zero. If you have entered any new transactions that you need to be reflected in the G/L Balance, click the Recalc G/L Balance button on the Actions ribbon. To recalculate other fields on the General FastTab, click the Refresh button on the Home ribbon.

-
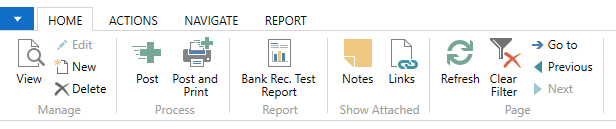
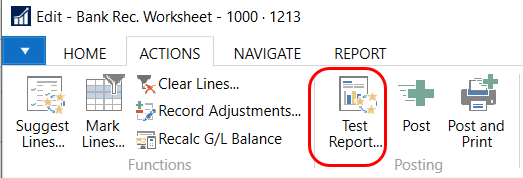
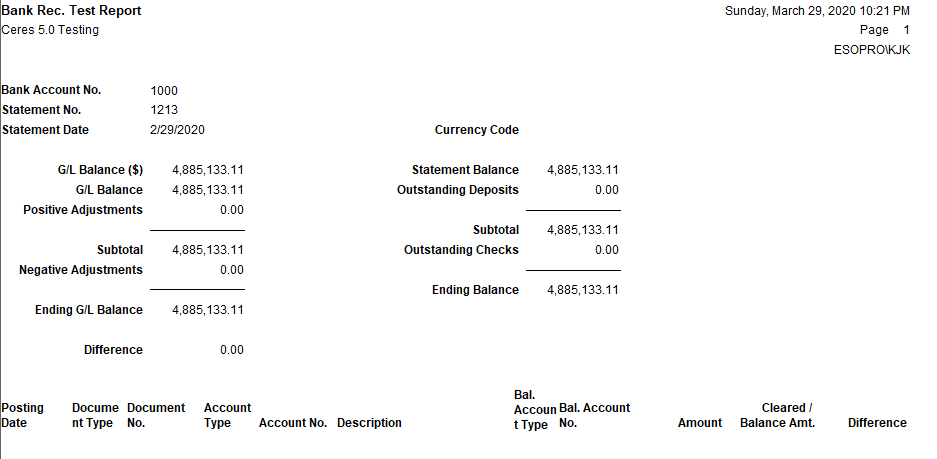
To print the Bank Reconciliation Test Report, click on the Actions FastTab of the Ribbon and select Test Report.
-
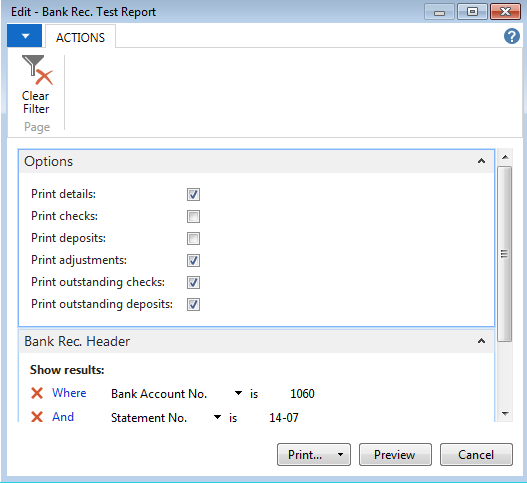
From the Bank Rec Test Report Page, select what you want to print on the Report. The easiest way to do this is to select Details (which checks all fields) and then un-check what you do not want to include.
-
In the below example, Adjustments, Outstanding Checks, and Outstanding Deposits were selected. Then select Print to print a hardcopy or Preview to preview the Report.
-
To post the Bank Reconciliation, click on the Actions Tab of the Ribbon and select Post or Post and Print.
Auto Match Format
-
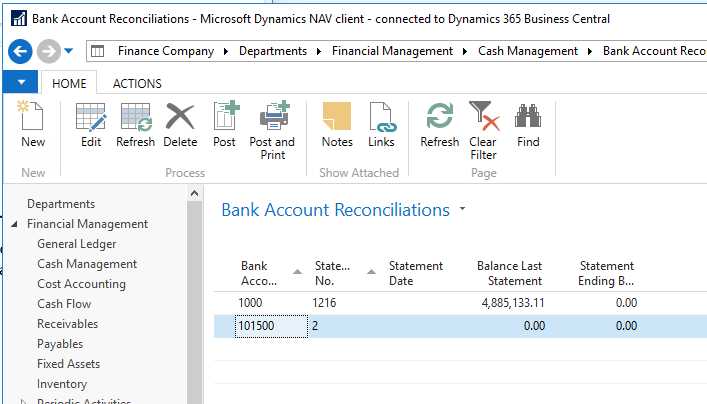
The Bank Account Reconciliation can be accessed from Departments ▸ Financial Management ▸ Cash Management ▸ Lists ▸ Bank Account Reconciliations.
-
The Bank Account Reconciliations list view will show the most recent bank reconciliation (using Auto Match format) for each bank account in Ceres. To continue working on an unposted bank reconciliation, click the Edit button. To begin a new bank reconciliation, click the New button.
-
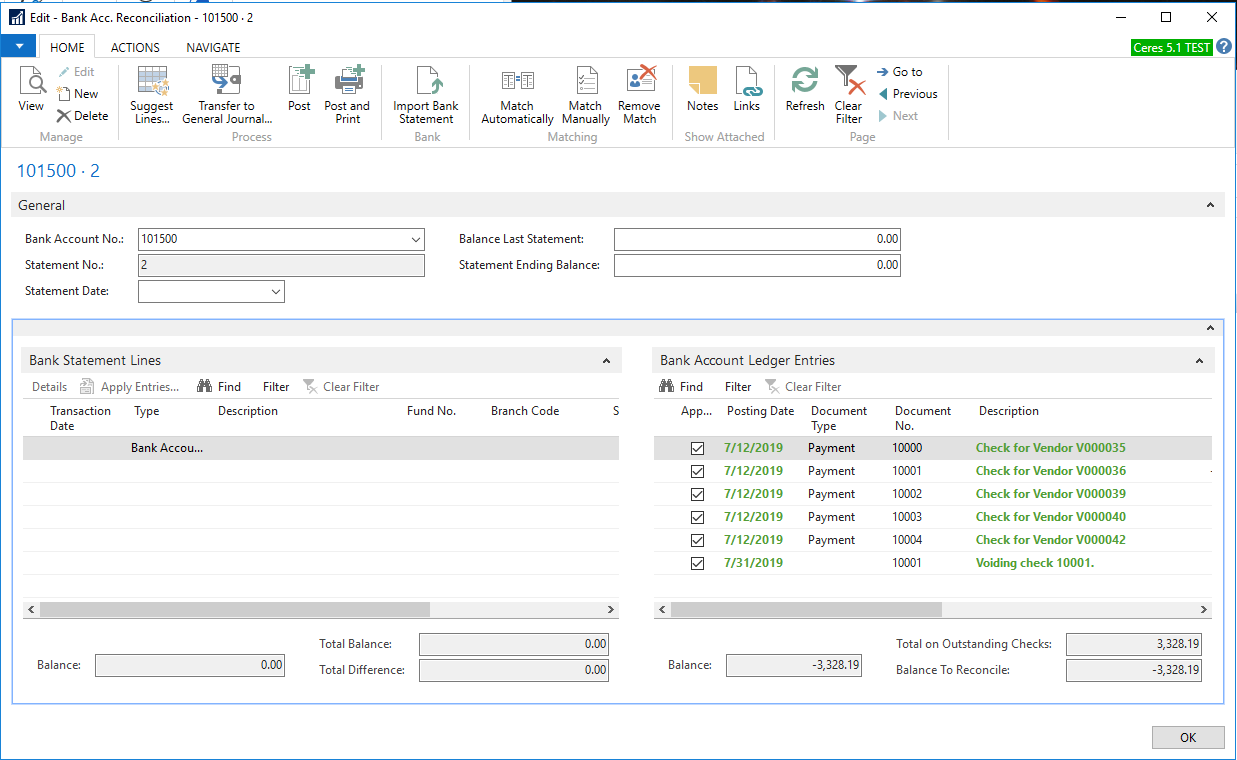
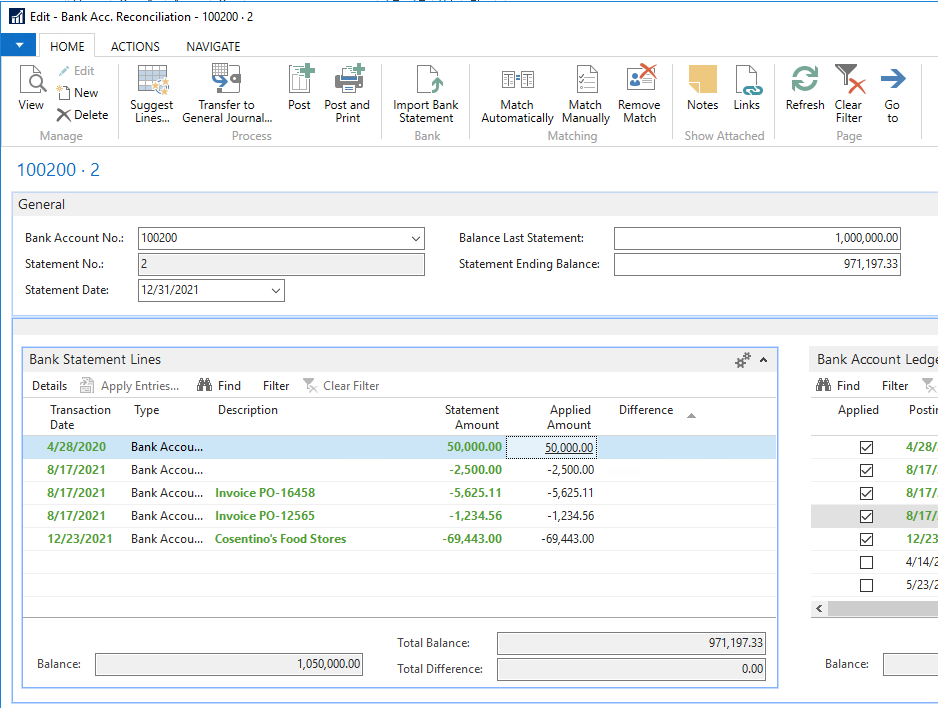
To create a new Bank Account Reconciliation, click on the Home Tab of the Ribbon and then New. The Bank Acc. Reconciliation page is divided into three sections. The top section contains information about the bank account, statement and balance. The bottom-left section contains the bank statement, and the bottom-right section contains bank ledger entries.
-
In the General FastTab, enter the following:
Bank Account No.: The account you are reconciling.
Statement No.: A sequential number for this bank reconciliation record. Ceres automatically fills in the Statement No. field by incrementing the Last Statement No. field on the bank account card.
Balance Last Statement: Ceres automatically fills this in from the same field on the bank account card.
Statement Date: Enter the date of the statement from the bank.
Statement Ending Balance: Enter the ending bank balance from the bank statement.
-
You can populate the Bank Statement form in Ceres using any of the following methods: pasting carefully formatted bank statement data into the lines, manually entering bank statement data, using the Suggest Lines function to bring in Bank Ledger History, or by using the Import Bank Statement function, which requires additional setup from your Ceres partner. The fields are:
Transaction Date: The date of the transaction on the bank statement.
Type: Bank Account Ledger Entry, for reconciling bank accounts.
Statement Amount: The amount of the transaction on the bank statement.
Applied Amount: The amount of the transaction applied to a bank ledger entry, populated using one of the Match functions in the ribbon.
Difference: A calculated field displaying any difference between the Statement Amount and any matched Bank Account Ledger Entries.
-
When pasting or manually entering bank statement data, Ceres requires that the Transaction Date, Type, and Statement Amount fields are entered.
-
The Suggest Lines function returns a filtered list of bank ledger entries into the Bank Statement Lines page. This can be used to quickly populate and automatically match the Bank Statement Lines.
-
To use Suggest Lines, click the Suggest Lines button on the Home ribbon. In the Suggest Bank Acc. Recon. Lines page that appears, choose the following:
Starting Date: The starting date for bank ledger entries that will be found on your bank statement.
Ending Date: The ending date for bank ledger entries that will be found on your bank statement.
Include Checks: Check this box to return checks as well as deposits and transfers.
Exclude Reversed Entries: Check this box to exclude any reverses or voids, as they typically do not appear on your bank statement.
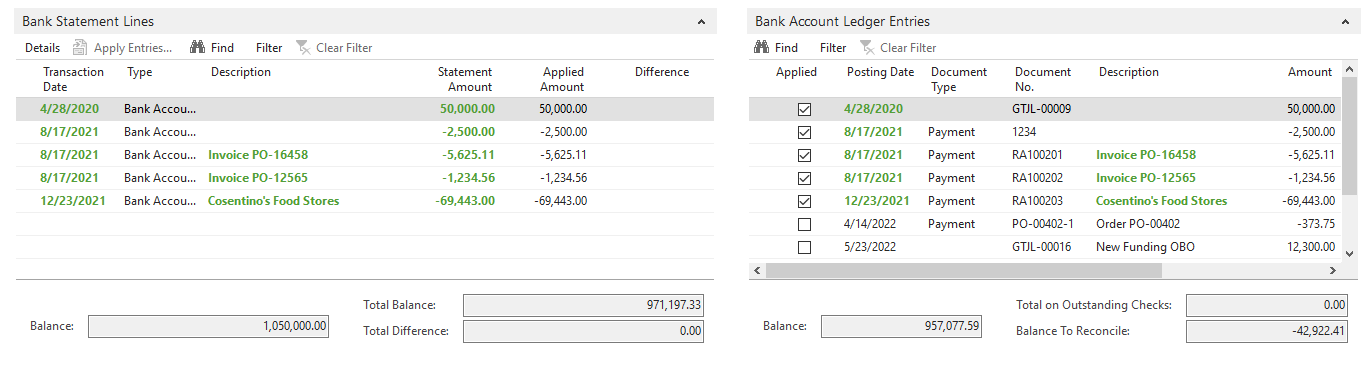
Click OK to populate the Bank Statement Lines with bank ledger entries. Ceres will automatically match these entries to any open bank ledger entries on the right. Matched entries display in green text, and the Applied box is checked in the Bank Account Ledger Entries pane.
 Warning
Because Suggest Lines is not using data directly from a bank statement, care should be taken to ensure that the items matched are accurate.
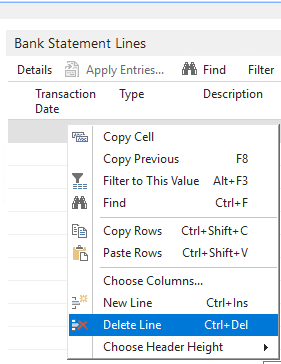
Any lines without a corresponding entry on the bank statement can be deleted by selecting the line, right-clicking and selecting Delete Line.
-
To import the bank statement into the Bank Statement Lines pane, click the Import Bank Statement button on the Home ribbon. In the file window that opens, locate and select the bank statement to import and click Open to import the bank transactions into the lines of the Bank Statement pane.
-
When importing, manually typing or pasting bank statement data into the Bank Statement pane, you will need to match the entries from your bank statement (on the left) to the bank ledger entries (on the right.) The three buttons in the Matching section of the Home ribbon are used for this task.

-
Match Automatically runs a function that will attempt to match entries based on the amount, transaction date and description. Clicking the button opens an option page to select a Transaction Date Tolerance (Days) that tells Ceres how many days off the two transactions can be and still match.

Click OK to run the automatic match function. Ceres will respond with how many matches it found. Matched entries display in green text, and the Applied box is checked in the Bank Account Ledger Entries pane.

-
If Match Automatically does not pick up a matched transaction or set of transactions, you can match them manually. Select the transaction(s) in the right pane and the matching transaction(s) in the left pane, and click the Match Manually button.
-
To remove a match, select the transaction(s) you want to unmatch and click the Remove Match button.

-
To print the Bank Reconciliation Test Report, click on the Actions FastTab of the Ribbon and select Test Report.

-
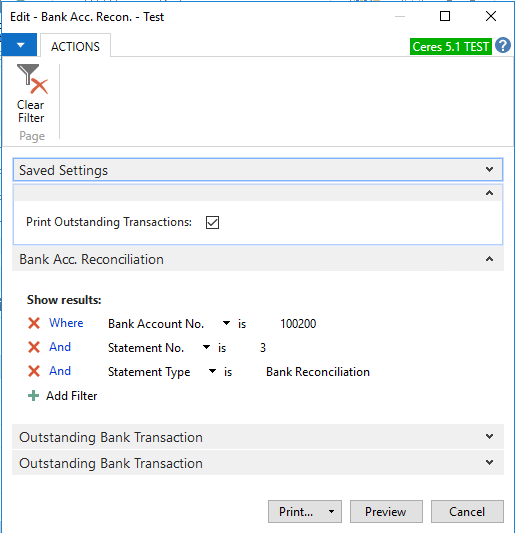
From the Bank Acc. Recon. - Test page, check the Print Outstanding Transactions box if you want the report to include any unmatched transactions, and preview or print the report.
-
In the below example, Print Outstanding Transactions was selected.

-
When the Total Difference field at the bottom of the Bank Statement lines is zero, and the Statement Ending Balance matches the Total Balance, you can post the Bank Reconciliation by clicking Post or Post and Print.
Viewing a Posted Bank Reconciliations - Classic
-
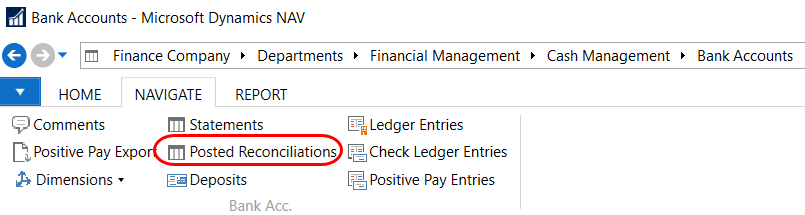
Posted bank reconciliations (Classic) can be viewed from the Bank Account Card by clicking the Navigate Tab in the Ribbon and selecting Posted Reconciliations.
-
Highlight the posted bank reconciliation you want to view and the click on the Home Tab of the Ribbon and select View.
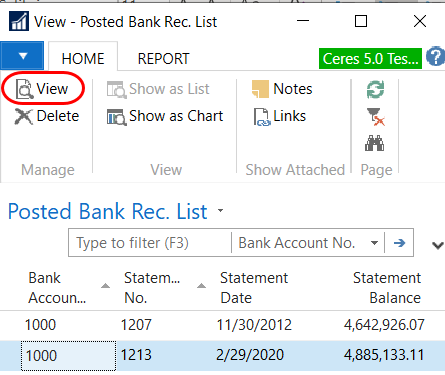
Viewing a Posted Bank Reconciliations - Auto-Match
-
Posted bank reconciliations (Classic) can be viewed from the Bank Account Card by clicking the Navigate Tab in the Ribbon and selecting Statements.
-
Highlight the posted bank reconciliation you want to view and the click on the Home Tab of the Ribbon and select View.