Analysis Views
This document illustrates the step-by-step process of using Dimensions in order to create complex analyses. In Ceres 5, Dimensions are available to tag data to an entry as data categorization markers. Data with like characteristics can then be grouped together for analysis & reporting. Dimensions can be used on any transaction including in journals, documents, and budgets.
Dimension is the term for the data category tag and describes how the analysis can be designed. A two-dimensional analysis, for example, would be of grouped transactions of Expenses per Department. However, by using more than two Dimensions when creating an entry, you can carry out a more complex analysis, such as Expense per Department per Project.
Ceres Object release 5.00.00 is required for the functionality described in this document.
Setting up an Analysis View
An analysis by dimensions displays a selected combination of dimensions. You can store and retrieve each analysis you have set up. The information for setting up an analysis is stored on an Analysis View card to simplify future analysis.
-
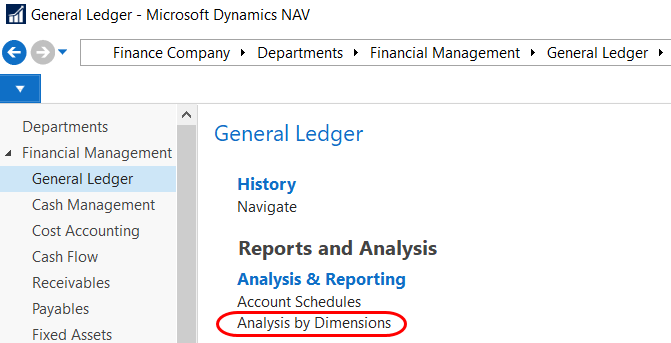
Analysis Views can be accessed from Departments ▸ Financial Management ▸ General Ledger ▸ Reports and Analysis ▸ Analysis & Reporting ▸ Analysis by Dimension, or by typing “Analysis by Dimension” in the search box.
-
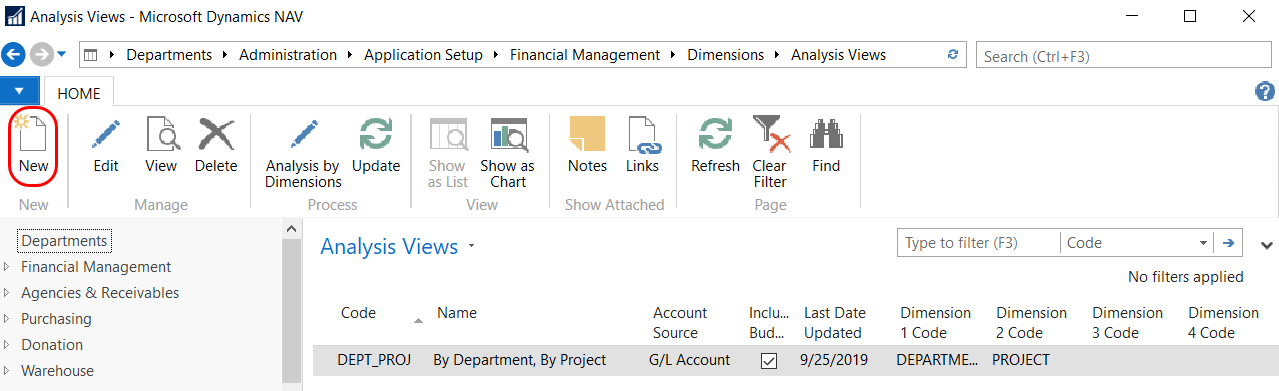
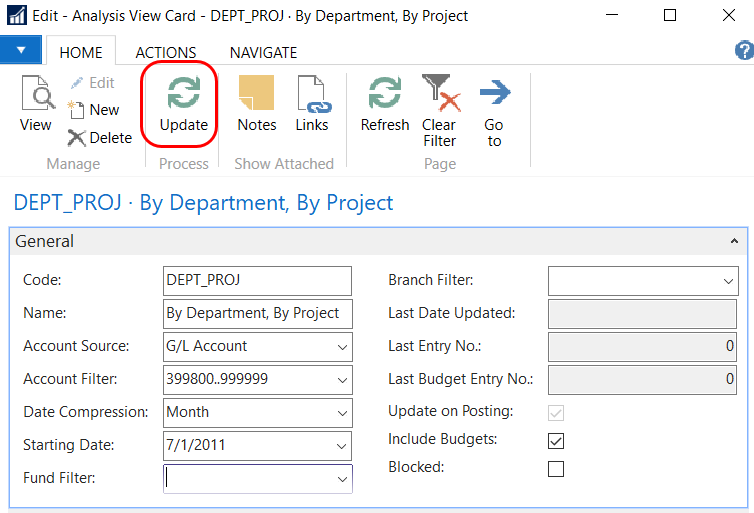
Select New from the Home ribbon to create a new Analysis View.
-
Update the fields on each of the FastTabs as necessary.
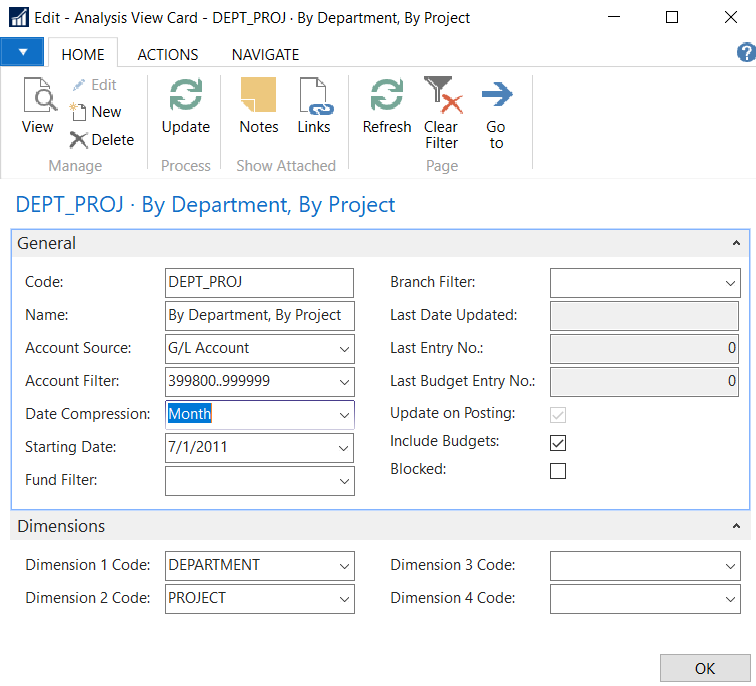
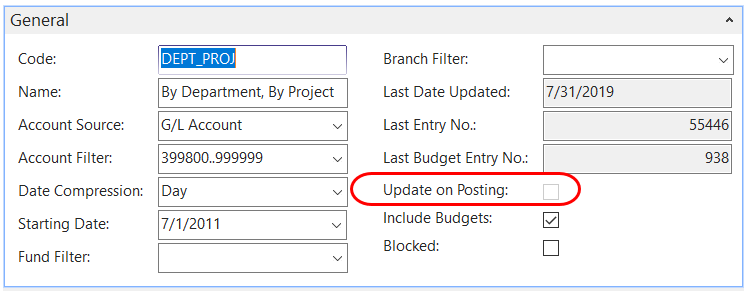
Code – Define a unique code for the Analysis View.
Name – Enter a name for the Analysis View.
Account Source – Select either G/L Account or Cash Flow Account.
Account Filter – Set a filter to specify the G/L Accounts or Cash Flow Accounts that will be included in an Analysis View. By setting filters, you also specify that only entries posted to the filter accounts will be included when an Analysis View is updated.
Date Compression – Select the length of the period whose entries will be combined.
Starting Date – By entering a starting date here, you specify from which date G/L Entries will be included in an Analysis View. All entries posted on or after the date you enter will be compressed to the level selected by you in the Date Compression field and included in the Analysis View. All G/L entries posted prior to the date you enter here will be compressed into one entry and given the date immediately before the starting date.
Fund Filter – Select a Fund from the list.
Branch Filter – Select a Branch from the list.
Last Date Updated – Displays the date the Analysis View was last updated.
Last Entry No. – Displays the last G/L entry posted prior to updating the Analysis View.
Last Budget Entry No. – Displays the last Budget entry posted prior to updating the Analysis View.
Update on Posting – A checkmark in this field indicates that Ceres will automatically update the Analysis View every time you post an entry. To enable or disable this field, click the Enable Update on Posting or Disable Update on Posting buttons on the Actions ribbon. You can manually update the Analysis View by clicking the Update button found on the Home ribbon.

Include Budgets – Place a checkmark in the field if you want to include budget entries when updating an Analysis View.
Blocked – Place a checkmark in the box to block the Analysis View so that it cannot be updated.
Dimension 1 Code – Dimension 4 Code – In each of the Dimension Code fields select the Dimensions you can include in an Analysis View.
-
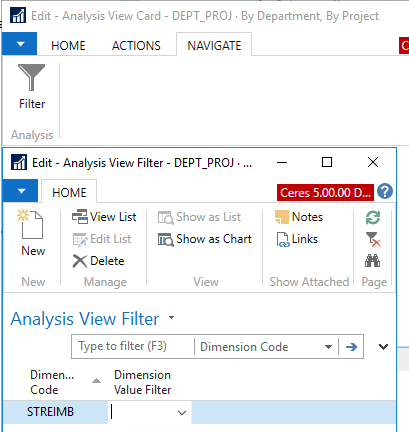
To add other Dimension Codes in addition to the four on the Dimensions FastTab, click the Filter button on the Navigate ribbon. Fill in the fields in the Analysis View Filter page and then click OK.
-
Click OK once you are finished creating the Analysis View.
-
To edit an Analysis View, select the Analysis View you want to change from the list and then select Edit from the Home ribbon.

-
Make the necessary changes and then click OK. A message will display indicating the Analysis View Entries will be changed. Select Yes to update the entries or click the Update button.
Updating an Analysis View
After the Analysis View has been created, you need to update the View to include the entries it is based on. You also need to run the update when update on posting is enabled, and before you run the Analysis View Report if update on posting is disabled. See below on how to enable and disable updates on posting.
-
To update an Analysis View, select the Analysis View you want to update from the list and then select Update from the Home ribbon.This will automatically update the Last Date Updated, Last Entry No., and Last Budget Entry No. fields.
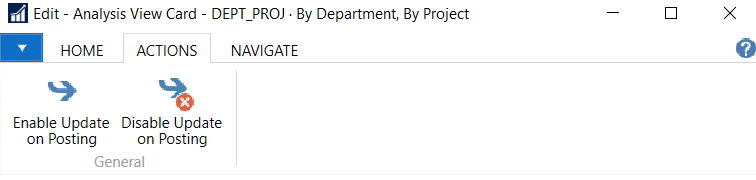
Enabling and Disabling Update on Posting for an Analysis View
-
To enable or disable update on posting for an Analysis View select Enable Update on Posting or Disable Update on Posting from the Actions ribbon.
-
When you Enable Update on Posting, a message will pop up reminding you to Update the Analysis View. Select Yes to update the Analysis View. When the update is completed, a checkmark will display in the Update on Posting field.

-
When you Disable Update on Posting, the checkmark in the Update on Posting field will be cleared.
Viewing Analysis Views
You are now ready to analyze your data. Select the Analysis View you want to use from the list and then select Analysis by Dimensions from the Home ribbon. Update the fields on each of the FastTabs as necessary:
General FastTab

Analysis View Code – Select an Analysis View Code.
Show as Lines – Select the Dimensions and Dimension Values you want to show as lines in the Analysis.
Show as Columns – Select the Dimensions and Dimension Values you want to show as columns in the Analysis.
Filters FastTab
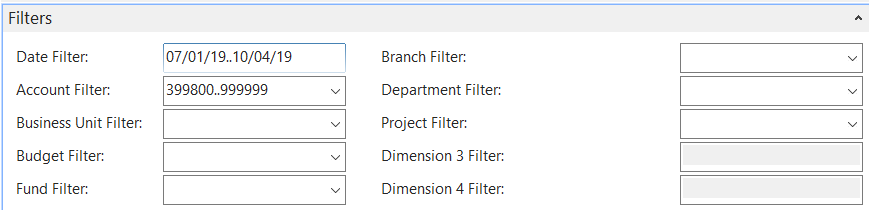
Date Filter – Set a date filter so that the matrix view will only display values for that period.
Account Filter – Set a filter to specify the G/L accounts that will be included in the matrix view.
Business Unit Filter – Set a filter to specify the Business Units that will be included in the matrix view. (Business Units are not typically used in Ceres.)
Budget Filter – Set a filter to specify the Budget that will be included in the matrix view.
Fund Filter – Set a filter to specify the Funds that will be included in the matrix view.
Branch Filter – Set a filter to specify the Branches that will be included in the matrix view.
Dimension Filters – Set a filter to specify which Dimension Values will be included in the Analysis. The Dimension Codes that display are based on the Dimension Codes defined in the Analysis View. These Dimension Codes are customized by each food bank, so they may have different names than shown here. In the demonstration database, the Global Dimensions are called Department and Project.
Options FastTab
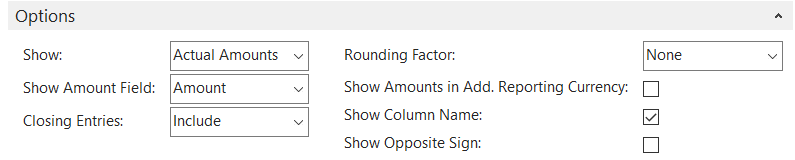
Show – Select one of the options below based on how you want to view your data in the matrix view. The options are:
Actual Amounts – The matrix window will display actual amounts based on Analysis View Entry.
Budgeted Amounts – The matrix window will display budgeted amounts based on Analysis View Budget Entry.
Variance – The matrix window will display the variance between actual amounts and budgeted amounts. A negative figure means that actual amounts are less than the budgeted amounts.
Variance % – The matrix window will display the variance between actual amounts and budgeted amounts as a percentage. A negative percentage means that actual amounts are less than the budgeted amounts.
Index % – The matrix window will display the variance between actual amounts and budgeted amounts as an index. An index percentage of 100 means that actual amounts are equal to budgeted amounts. An index percentage of over 100 means that actual amounts are greater than budgeted amounts. An index percentage under 100 means that actual amounts are less than budgeted amounts.
Show Amount Field – Select one of the options based on how you want to view the amounts in the matrix view.
Amount – Displays the net amount.
Credit Amount – Displays only credit amounts.
Debit Amount – Displays only debit amounts.
Closing Entries – Select whether or not the amounts shown in the matrix will include closing entries.
Rounding Factor – Select a rounding factor for the values in the matrix view.
Show Column Name – Place a checkmark in this field to display the column names rather than the codes in the matrix view.
Show Opposite Sign – Place a checkmark in this field if you want debits to be shown as negative amounts (that is, with minus signs) and credits to be shown as positive amounts in the matrix view.
Matrix Options FastTab

View By – Select a time interval for the amounts in the matrix view. The options are Day, Week, Month, Quarter, Year, or Accounting Period.
Column Set – Shows the range of values that are displayed in the matrix view. To change the contents of the field, click Next Set or Previous Set.
View As – Select Net Change to display the net change in the balances for relevant time interval, or Balance at Date to display the balance as of the last day in the relevant time interval.
-
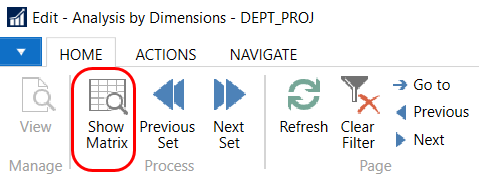
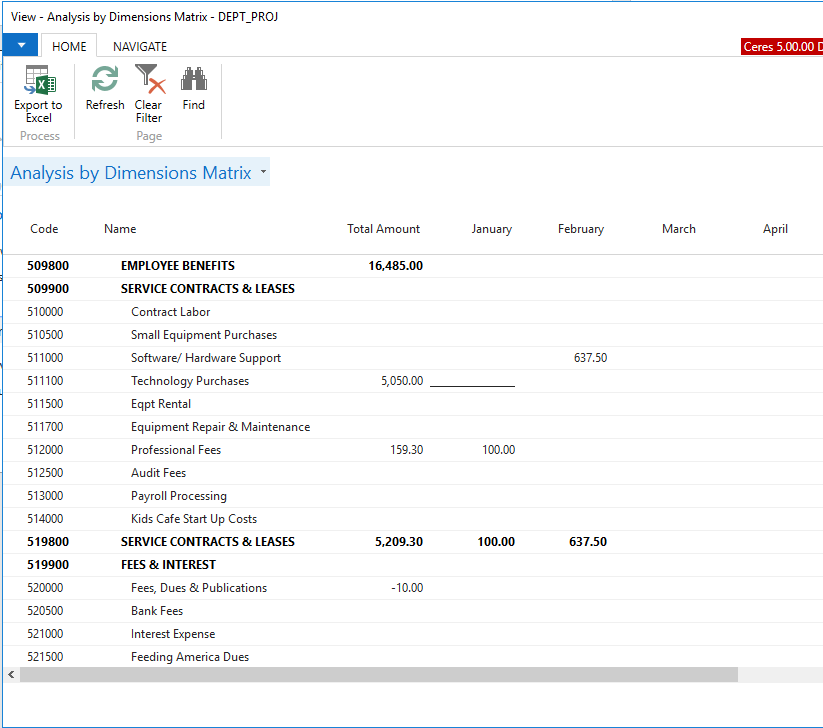
Select Show Matrix to display the amounts based on the filters you set on each of the FastTabs.
-
You can export the Analysis View to Excel by clicking Export to Excel from the Home ribbon. A Pivot Table is created when the entries are exported. Click on the Data Tab to view the entries that were exported.