Processing AP Checks
The Payment Journal in Ceres is the starting point for:
-
Creating and printing computer-generated checks
-
Generating single checks
-
Recording manual payments
You may generate many checks using the Suggest Vendor Payment Batch Job or record a manual entry.
This document describes how to use the Payment Journal function to create and post checks in Ceres 5.
Ceres Object release 5.00.00 is required for the functionality described in this document.
Creating and Posting Computer Checks
-
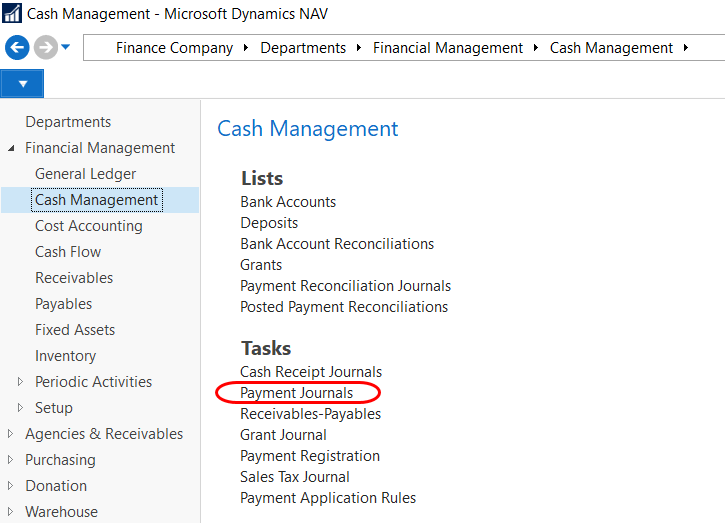
The Payment Journal can be accessed from Departments ⯈ Financial Management ⯈ Cash Management ⯈ Tasks ⯈ Payment Journals.
-
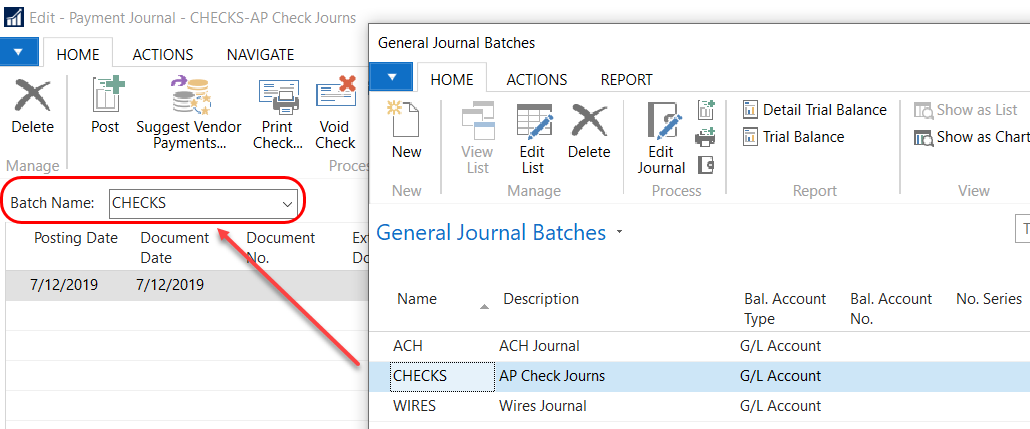
If using Payment Journal Batches, select your Batch from the Batch Name field.
-
To suggest invoices for payment, select Home ⯈ Suggest Vendor Payments.

-
Update the fields as necessary on the Options FastTab.
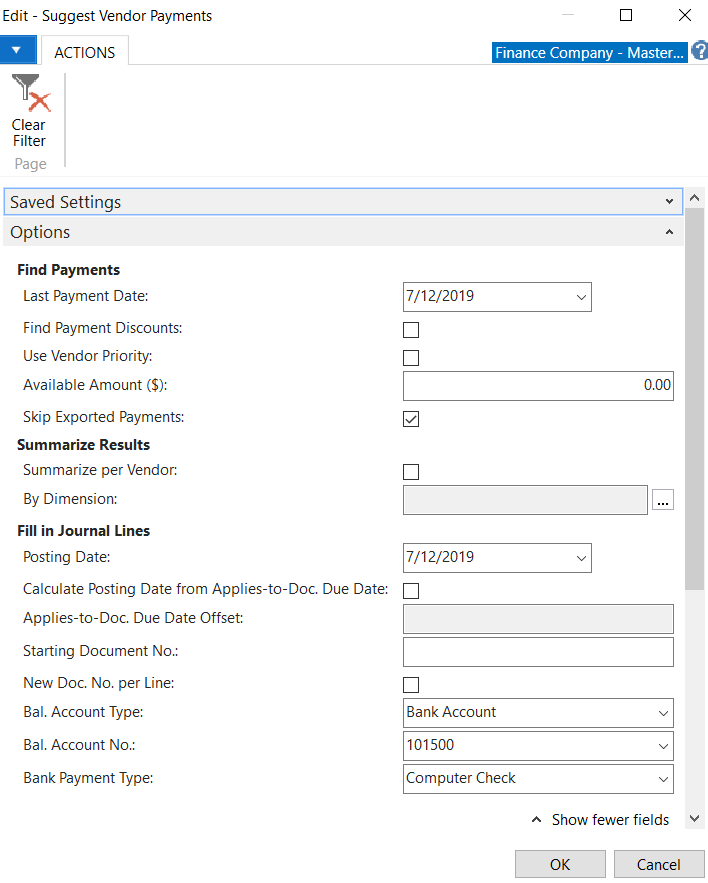
Last Payment Date: Enter the latest payment date that can appear on the Vendor Ledger Entries to be included in the Batch Job. Only entries that have a due date or a payment discount date either before or on this date will be included. If the payment date is earlier than the system date, a warning will be displayed.
Find Payment Discounts: Place a checkmark in this field if you want the batch job to include Vendor Ledger Entries for which you can receive a payment discount.
Use Vendor Priority: If there is a checkmark in this field, the contents of the Priority field on the Vendor Card will determine in which order vendor entries will be suggested for payment. Ceres always prioritizes Vendors for payment suggestions if you specify an available amount in the field below.
Available Amount ($): If there is a maximum amount available for payments enter it here. The Batch Job will then create a payment suggestion on the basis of this amount and the prioritization of Vendors (see field above). It will include only vendor entries that can be paid fully (can be fully applied to).
Skip Exported Payments: Place a checkmark in this field if you do want the batch job to insert Payment Journal Lines for documents for payments that have already been exported to a bank file.
Summarize per Vendor: Place a checkmark in this field if you want the batch job to make one line per Vendor. Ceres will then use the Applies-to ID field when the Journal Lines are posted to apply the lines to Vendor Ledger Entries. If you do not place a checkmark in this field, the Batch Job will make one line per invoice.
By Dimension: Select the Dimensions by which you want to group the suggested payments. You get one suggested payment per combination of Dimension Values for each currency in which the Vendor has ledger entries.
Posting Date: Enter the check date in this field that will appear as the Posting Date on the lines that the batch job inserts in the Payment Journal.
Calculate Posting Date from Applies-To Doc. Due Date: Place a checkmark in this field if you want the due date of the purchase invoice to be used to calculate payment posting date.
Applies-To Doc. Due Date Offset: Specify a period of time that will separate the payment posting date from the due date on the purchase invoice. For example:
-
Enter CW-2D (end of current week minus 2 days) to pay the purchase invoice on the Friday in the week of the due date.
-
Enter -2D (minus 2 days) to pay the purchase invoice two days before the due date.
Starting Document No.: Enter a 1 here. The document number will be incremented by one on each of the following Journal Lines. This will be populated with the check number once you print the checks.
New Doc. No. per Line: Place a checkmark in this field if you want Ceres to fill in the Payment Journal Lines with consecutive document numbers, starting with the document number specified in the field above. If the Bank Payment Type field contains the Manual Check and the Summarize per Vendor field does not contain a checkmark, this field must contain a checkmark. Ceres will then use the document number as the unique ID for the check.
Bal. Account Type: Select Bank Account.
Bal. Account No.: Select the Bank Account the checks will be paid from.
Bank Payment Type: Choose Computer Check.
-
-
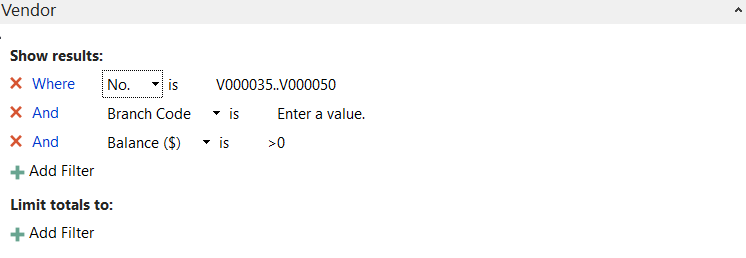
On the Vendor FastTab you can narrow the list of Vendors to be included in the batch. Leave the No. field blank to include all Vendors. You can also filter by Payment Method Code, by Fund No., etc.
Note: To filter out vendors with credit balances you may enter the filter criteria of Balance >0 as shown here
-
Select OK to run the Batch Job.
-
Upon completion of the Batch Job, the Payment Journal will be populated with the Vendor Invoices to be paid based on the selected criteria.
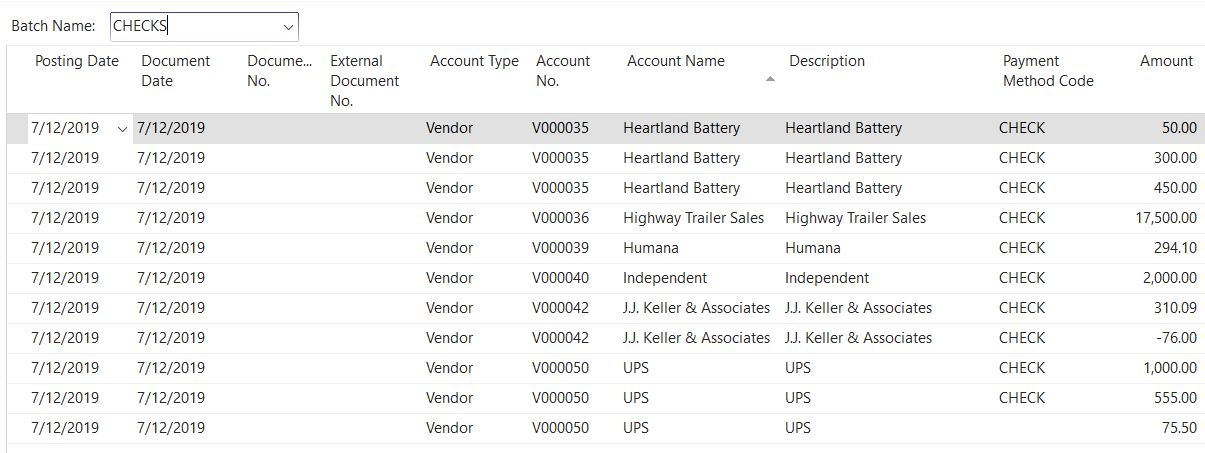
-
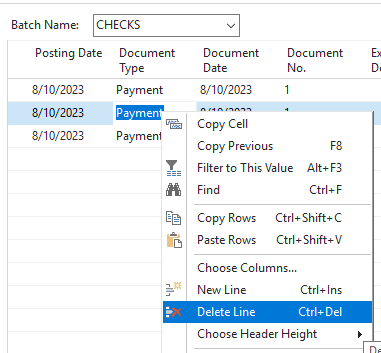
Review the Journal Lines for accuracy and make any required adjustments. If there are any checks in this batch that you do not want to pay, you can delete them from this list by right-clicking the row, and selecting delete line from the menu. If the payment journal contains multiple lines per vendor (one for each invoice) and you would prefer one check per vendor, delete the entire journal and re-run Suggest Payments, ensuring that the Summarize per Vendor option is checked.
-
Description of the Payment Journal columns are provided in the Creating and Posting Manual Checks section below.
-
Select the Print Checks from Home ⯈ Print Checks.
-
Update the fields as necessary.
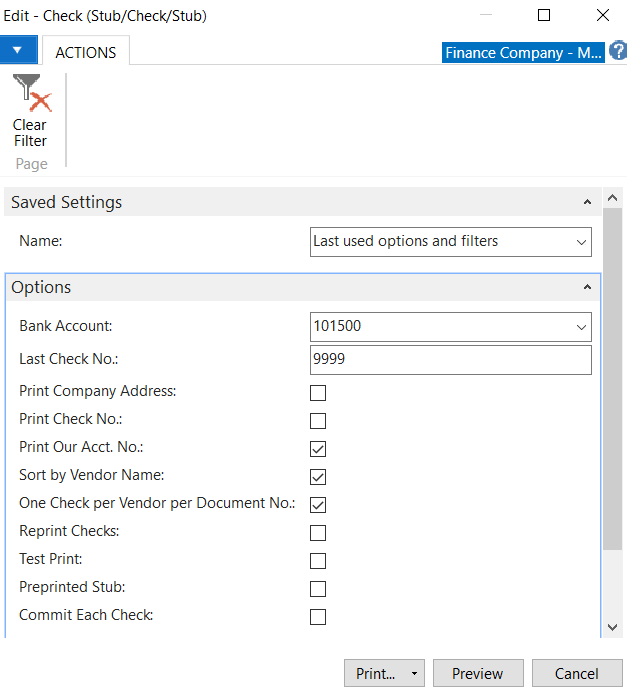
Bank Account: Select the Bank Account No. the checks will be issued from. This needs to be the same Bank Account you selected when you ran the Suggest Vendor Payments Batch Job.
Last Check No.: Verify the last check number that was used. This will automatically flow from the Bank Account Card.
Print Company Address: If selected, the address from the Company Setup will print on the check.
Print Check No.: If selected, the Check No. assigned by Ceres will print on each check and stub.
Print Our Acct. No.: If selected, the Account No. identified on the Vendor Card will print on the check.
Sort by Vendor Name: If selected, the checks will print alphabetically by Vendor Name as defined on the Vendor Card. This is regardless of the order the lines were created in the Payment Journal.
noteThis feature is currently only available for the Stub/Check/Stub (report 10411) and Check (report 1401).
One Check per Vendor per Document No.: Choose this option to combine multiple invoices for one Vendor onto one check. If you leave this field blank, a separate check will be printed from each Vendor invoice.
Reprint Checks: Choose this option if you tried to print checks, encountered a problem, and now need to reprint them.
Test Print: Place a checkmark in this field if you want to print the checks on blank paper before you print them on check stock.
Preprinted Stub: Place a checkmark in this field if you are using check stock with a preprinted stub so column information will not print.
Commit Each Check: Place a checkmark in this field if you want Ceres to do a commit to the database for each check rather than at the completion of the print job. This can avoid discrepancies between the data and check stock in case of printer error on networks where the print job is cached.
Use Invoice Line Dimensions: Place a checkmark in this field if you want Ceres to populate the lines in the Payment Journal from the Dimensions on the invoice.
-
Select Print and then choose the printer that you wish to print to. Once the checks are printed the Document No. will be replaced with the Check number.
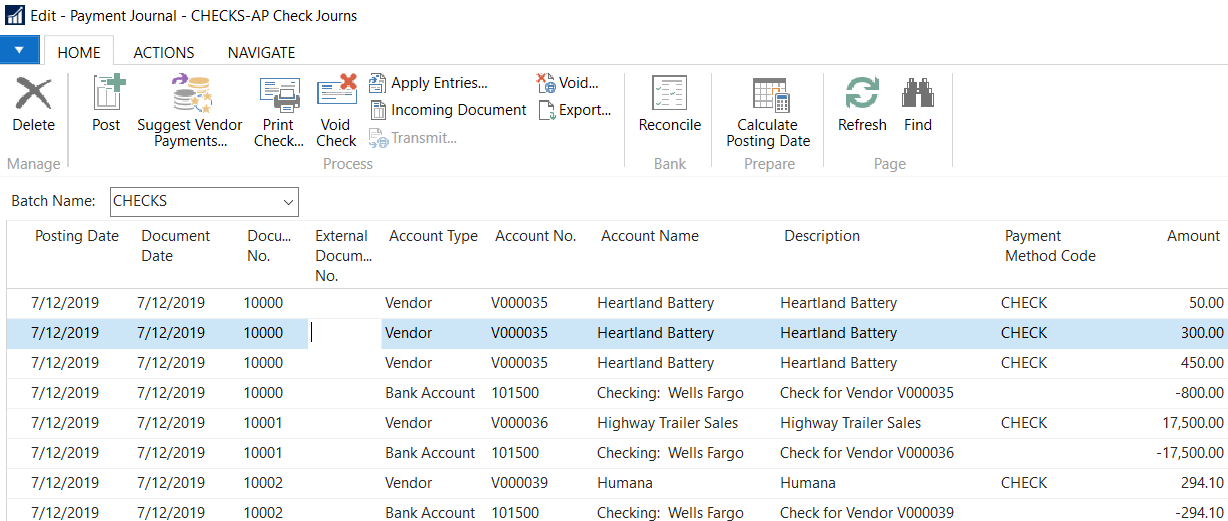
-
Review the printed checks for accuracy. Remember to verify that the printed check numbers match the Document No. in the Payment Journal. When you have printed a check, Ceres places a checkmark in the Check Printed field on the Payment Journal Lines.
-
To post the Payment Journal, select Actions ⯈ Posting ⯈ Print or Post and Print. Select Yes to confirm that you want to post the Journal Lines.
Creating and Posting Manual Checks
A "manual check" in this instace is one that is handwritten. For a one-off check that you still want Ceres to print, follow the steps below but change Bank Payment Type to Computer Check.
-
Generally, a manual check is for payment of a single invoice or may be generated prior to receiving the invoice because the Vendor needs to be paid immediately.
-
Just like computer checks, the Payment Journal is used to process manual checks. See step 1 above on how to access the Payment Journal.
-
If using Payment Journal Batches, select your Batch from the Batch Name field.
-
Update the fields in the Payment Journal as necessary.
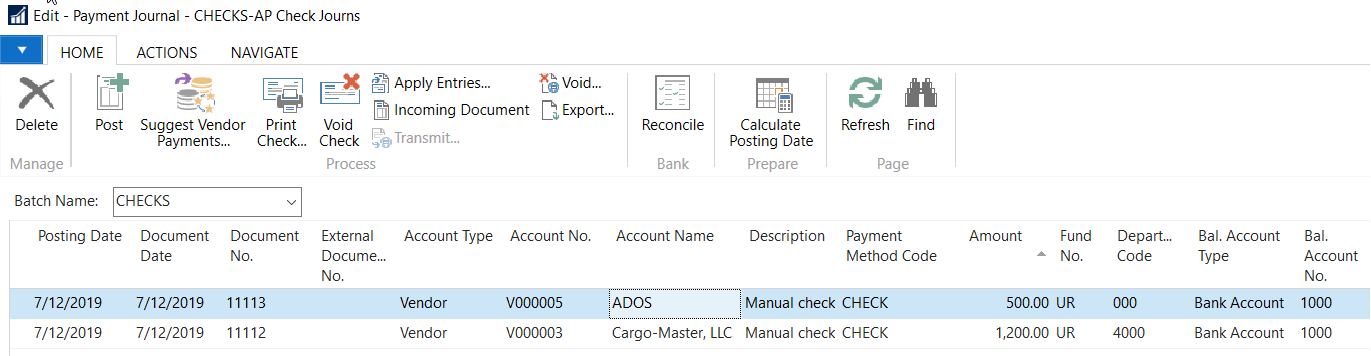
Posting Date: Enter the check date that will appear as the Posting Date on the lines that the Batch Job inserts in the Payment Journal.
Document Type: Select Payment from the List.
Document No.: Enter the manual check number.
Account Type: Select Vendor from the List.
Account No.: Select the Vendor that you wish to pay from the Vendor List.
Amount: Enter the amount of the check.
Bal. Account Type: Select Bank Account.
Bal. Account No.: Select the Bank Account the checks will be paid from.
Bank Payment Type: Select Manual Check for a handwritten check, or Computer Check for one you want Ceres to print for you.
Applies-to Doc. Type: Select Invoice to apply the manual check to an invoice.
Applies-to Doc. No.: Select the Invoice Number you are applying the manual check to. You can apply a payment to an Invoice after the fact if this field is left blank.
-
If this is a computer check, select Print Checks from Home ⯈ Print Checks.
-
To post the Payment Journal, select Home ⯈ Post. Select Yes to confirm that you want to post the Journal Lines.
Recording Payments Made Directly or Through a Third-Party Service
If you are using a service like Bill.com or Concur Pay to generate payments to vendors, you may use the Payment Journal to record the transaction to the Bank Account and Vendor Ledger in Ceres without issuing a check. Alternatively, you can set a Payment Method Code that debits directly from your Bank Account without using the Payment Journal.
Direct Payments Using the Payment Journal
-
The Payment Journal can be accessed from Departments ⯈ Financial Management ⯈ Cash Management ⯈ Tasks ⯈ Payment Journals.
-
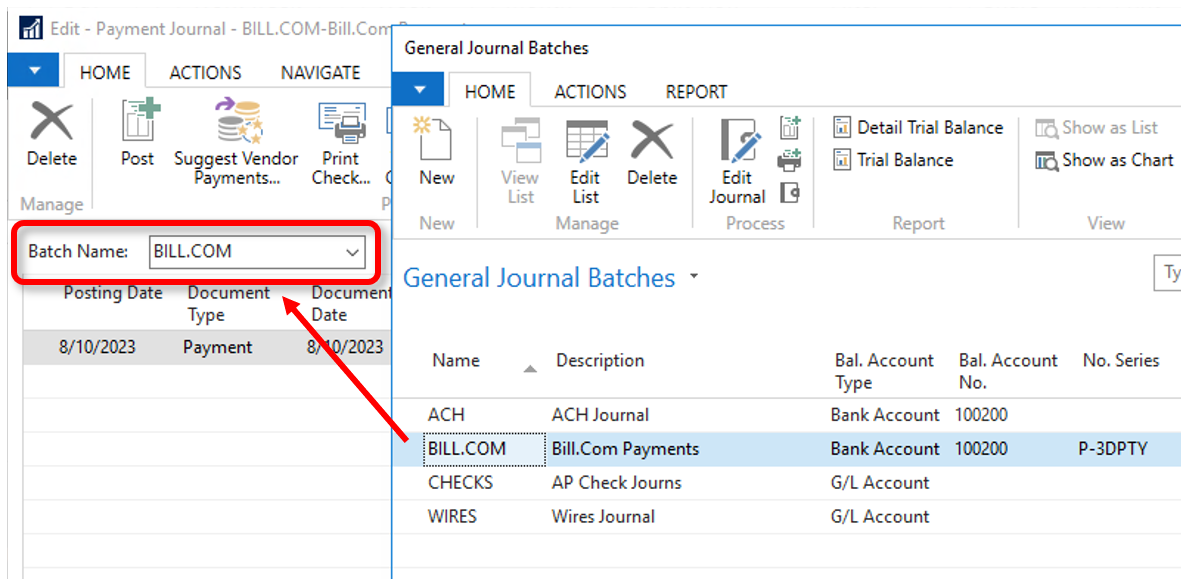
It is recommended that you set up a separate General Journal Batch for these payments so that the Balancing Account and Document No. is set appropriately for each check run. Because payments will not be made with physical checks, no entries are made into the Check Ledger and payments will not have corresponding check numbers. With no check number to use, Ceres uses a Document No. that can either be set from the Suggest Payments window or in the Payment Journal. Creating a No. Series specific to third party payments and setting it to this batch defaults the Document No. into the journal.
-
Follow the steps in Creating and Posting Computer Checks above to generate suggested payments into the Payment Journal window. Ensure that the following options are set:
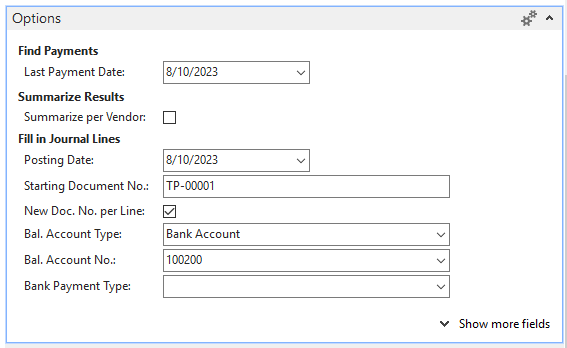
Starting Document No.: This should be a unique number for this payment, ideally set by the General Journal Batch.
New Doc. No. per Line: This must be checked to provide a unique ID for each payment.
Bal. Account Type: Set this to "Bank Account".
Bal. Account No.: This is the Bank Account that the third-party payment will be sent from.
Bank Payment Type: This should be left blank.
-
Update any fields in the Payment Journal as necessary. Detailed descriptions of the columns are provided in the Creating and Posting Manual Checks section above.
noteThe Vendor Pre-Payment Journal report, found on the Actions tab, is a good way to review that the payments are posting the way you expect.
-
To post the Payment Journal, select Home ⯈ Post (or Navigate ⯈ Post & Print). Select Yes to confirm that you want to post the Journal Lines.
Direct Payments Using a Payment Method Code
The Payment Method Code field lets you determine how you want to pay each individual invoice from a range of options including by credit card, directly from a bank debit, through a third-party service or by check. You can use a Payment Method Code to record payments of vendor invoices directly from your bank account, bypassing the Payment Journal process.
With this method, Ceres doesn't communicate with your actual bank account or third-party service. For that functionality, please see the Acccounts Payable ACH Processing documentation.
The Payment Method Code field found on a Purchase Invoice or Purchase Order defaults in from the Payment Method Code set on the associated Vendor Card. Ceres assumes that the payment method for a vendor remains consistent, however you can change the Payment Method Code on any invoice. Payment Method Code options should be set before using the code.