Standard Text Codes
Standard Text Codes and Extended Text allow commonly used lines of text to be added to the body of many documents in Ceres, including Agency Orders, Agency Invoices, Purchase Orders, Purchase Invoices and others.
Creating Standard Text Codes and Extended Text
To define extended text for standard text codes:
-
In the Search box, enter "Standard Text Codes" and then choose the related link. The Standard Text Code List will display. Select New.

-
In the Code field, enter the code, and in the Description field, enter the desired text for the first line. This text line is limited to 50 characters.

-
On the Home menu, choose Extended Text. This opens the Extended Text List. Choose New to open the Extended Text page.

-
Fill in the lines in the Extended Text page with the additional text. Each line is limited to 50 characters.

-
On the General FastTab, fill in the Starting Date and Ending Date fields if you want to limit the dates on which the extended text is used.
-
On the Distribution and Purchases FastTabs, select relevant check boxes for the document types where you want the extended text to be available to be printed.
Inserting Extended Text
Create the document in which you want to insert extended text.
-
In the Type field in the lines section of document, select the blank code.
-
In the No. field, enter the Standard Text code.
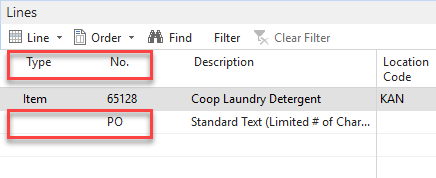
The extended text lines for the selected Standard Text code will appear on the printed document.

If you set up the extended text to be inserted only on specific documents, for example by selecting the Agency Order field on the Distribution FastTab, you can still enter the extended text code on other types of documents, but then only the first line of text (the line on the Standard Text Codes page) will be inserted.
Some reports that have been customized do not support extended text. In these cases, you can stack multiple standard text codes to get more than 50 characters printed.