Agency Return Orders
Sometimes it is necessary to return Agency Orders that were not picked up, were rejected by the Agency or were otherwise not delivered. In these cases the food bank should use Return Agency Order functionality in Ceres 5 to track the Items and Quantity being returned. Return Reason codes can be used to track why inventory is being returned. Setup options determine whether product must be returned to its previous Item, Lot, Pallet and Bin, or whether the Pallet and Bin can be changed.
If applicable, a financial credit is automatically created and posted as part of the Return Order process. If no product is being returned, or you wish to simply create a financial credit to the account to reverse Agency Fees on an Order, Credit Memos should be used instead. (See Agency Credit Memo document.)
Ceres Object release 5.00.00 is required for the functionality described in this document.
Setup Options
Ceres has some configurable options available that will affect both Agency Credit Memos and Agency Return Orders. The two options available allow the ability to configure Ceres to disallow the entry of items on Agency Credit Memos, forcing product returns to be handled through the Agency Return Order process. In addition, Ceres can be configured to allow new pallets to be created on product returns instead of returning product to the pallet it was shipped from. Both of these options can be found on the General Tab of the Agency & Receivables Setup page.
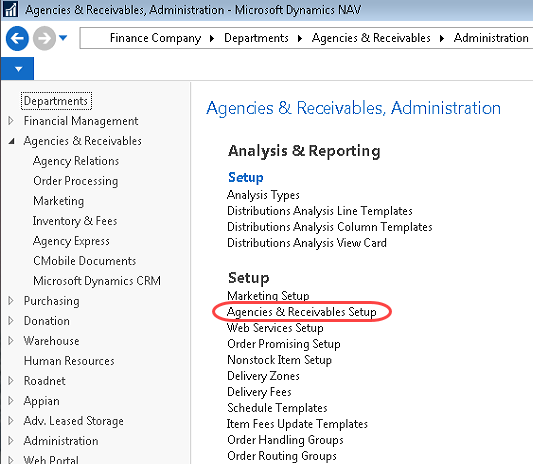
The Agencies & Receivables Setup page is accessed from Departments ▸ Agencies & Receivables ▸ Administration ▸ Setup ▸ Agencies & Receivables Setup.
The two fields important to both Agency Return Orders and Agency Credit Memos are Exclude Item from CM and Allow Pallet No. change CM/RTO.
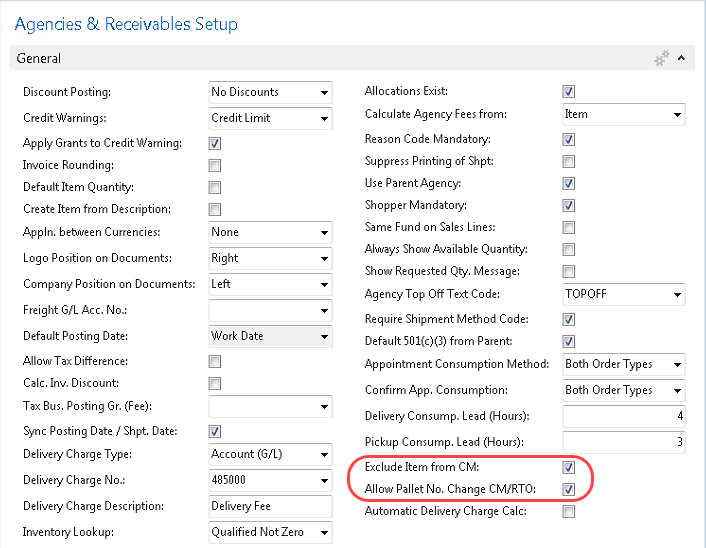
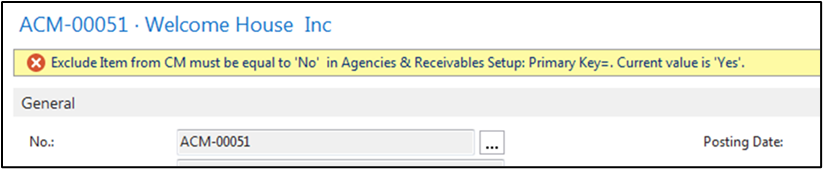
Exclude Item from CM: Check this box to configure Ceres to prevent the entry of items on Agency Credit Memos. To return items to inventory from Agency Orders, the user must use Agency Return Orders. An attempt to place items on an Agency Credit memo with this field checked will result in the following error.
Allow Pallet No. Change CM/RTO: check this field to configure Ceres to allow creation of a new pallet when returning product or to allow the user to return the product to another pallet of the same item. If a new pallet is created, the pallet will inherit all of the properties of the original pallet, including lot number and FBC & UNC codes. If the user attempts to return the item to a different existing pallet, it will only be allowed if the FBC & UNC codes exactly match the original pallet. If no existing pallets have the same coding as the original pallet, the user will be forced to create a new pallet. With this option checked, the user still has the ability to return the product to the original pallet it was shipped from.
Basic Process for Agency Return Orders
The following are the standard steps in processing a basic Agency Return Order. A basic return order is created when you simply want to credit your Agency for a returned item. Additional return options are described below along with further instructions for creating the document.
-
Create an Agency Return Order - On the Invoicing FastTab, you can apply the return order to the associated Agency invoice by filling in the Applies-to Doc. Type and Applies-to Doc. No. fields.
-
Post the Agency Return Order - By receiving and invoicing the return order, a posted Agency credit memo is created. The associated invoice was not applied earlier in the process; this application can take place after posting.
Additional Return Options
-
The following options can be used in conjunction with basic processing steps outlined above.
-
If you want to revalue the returned item using the unit cost that is connected to the original Agency entry, assign Exact Cost Reversing.
-
You may agree to compensate your Agency for an item that you sold them by giving them a deduction against the original Agency order price by creating an Agency allowance (credit).
-
You may agree to replace an item that you have sold your Agency by creating a replacement Agency order. The replacement item can be the same or it can be different.
-
You can create all return-related documents at the same time from the Agency Return Order window. Alternatively, you can create all the documents (replacement Agency orders, purchase return orders, and purchase orders) individually.
-
-
For Items that have been received but not yet invoiced:
-
There may be times when your Agency returns several items that are covered by different Agency Return Orders. Once the items have been received and before you invoice, you can use the Get Return Receipt Lines function to create one Agency Credit Memo for all of the received items.
-
If a return order has been received but the Item is subsequently rejected, you must create a corrective Agency Invoice to complete the return order transaction.
-
Creating Agency Return Orders
You may agree to compensate an Agency for an Item that you sold them by allowing them to return the Item. At this point, you have already shipped the Item to the Agency.
-
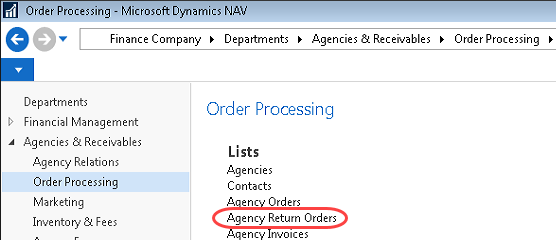
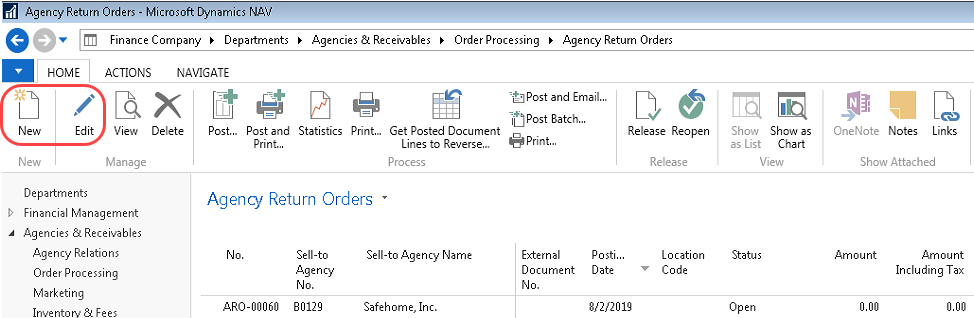
Agency Return Orders can be accessed from Departments ▸ Agencies & Receivables ▸ Order Processing ▸ Agency Return Orders.
-
If you are using Batches, select your batch from the Batch List; otherwise click Cancel.
-
You will see the listing of open Agency Return Orders that exist within the system. Select one from the List to edit it, or click New to create a new Return Order.
Agency Return Order Header
-
Click Home ▸ New to create a new Agency Return Order. The Document will be blank.
-
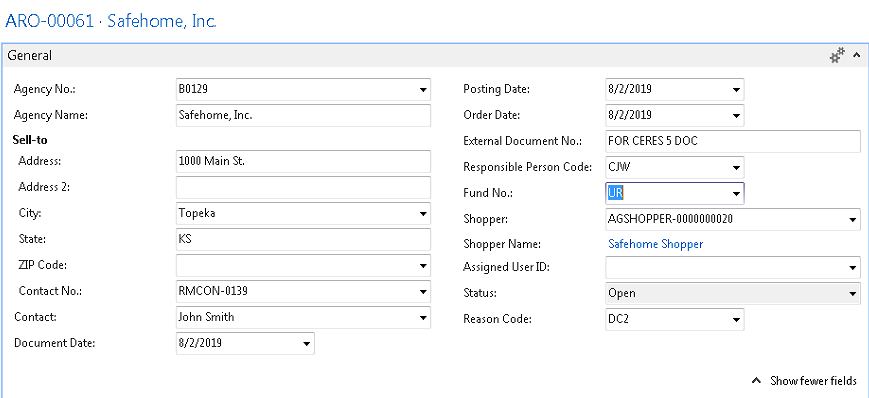
In the Sell-to Agency No. field, enter the Agency number or use the lookup to find the Agency No. The Document No. will be assigned at this time per your numbering series. The only time you would have to enter a Document Number is if you are not using Default Numbering.
-
In the External Document No. field, enter the Agency's reference number. This is for informational purposes only and is not required.
-
Fill in the Responsible Person field. This is the person who is creating the credit memo.
-
Select the Shopper who placed the original order that you are correcting or crediting.
-
Select a valid Reason Code for the return from the Dropdown.
-
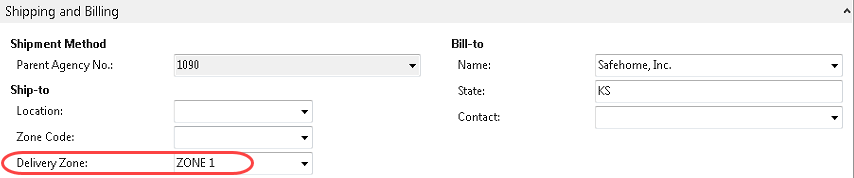
If this is for a delivery order and a delivery charge is to be included for the return order, specify the Delivery Zone on the Shipping FastTab.
noteReturn orders that include a delivery charge must be posted with the Receive & Invoice option.
Agency Return Order Lines (Manual Entry)
-
Move to the lines of the Agency Return Order

-
In the Type field select Item if product is being returned. Otherwise select G/L Account to record a credit on their account.
noteTypically if you are just adding a credit to a G/L Account, this would be done via the Agency Credit Memo document rather than an Agency Return Order.
-
In the No. field, type in the item number or the G/L Account number. You can use the lookup and select from the list. The Item Description, Unit of Measure, and Gross Weight will flow forward to the line. If a G/L Account was selected, the name of the G/L Account will flow.
-
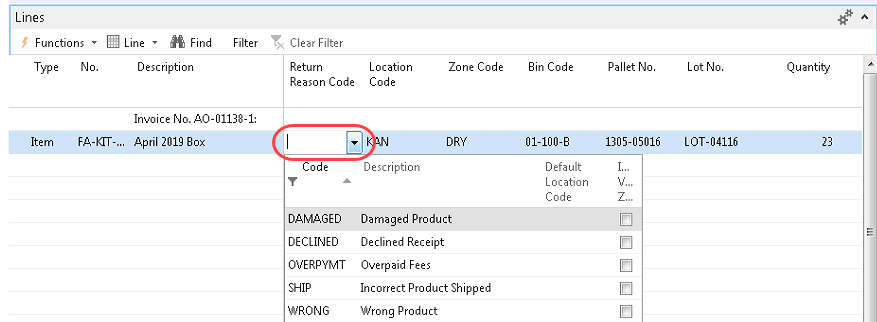
In the Return Reason Code field, select the Code or reason why the product is being returned.
-
In the Location Code field, select the Location where product is being returned to.
-
If the Location you specified is set up to require Bins, select a Bin Code. The Bin selected should be the bin where the product is being returned to.
-
In the quantity field enter the quantity, cases, pounds, etc, that is being returned. If the Account Type is G/L Account then enter 1.
-
The Unit Fees should populate from the Item Card. Confirm that the correct amount is listed In the Unit Fees Excl. Tax field, or enter the unit fee or the amount that you are crediting.
noteIf you are not crediting the entire quantity, in order for the Amount Including Tax field to update, the Credit Memo must be released. If the Quantity has to be changed again, you must Reopen the Credit Memo, adjust the Quantity and then Release it again to update the Amount Including Tax field. (When the Credit Memo is reopened, the Amount Including Tax is set to $0.00 on the lines). If you do not Release the CM after changing quantity and before posting, the Amount on each line will not be calculated correctly.
-
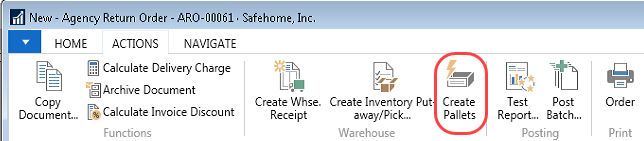
If Ceres is configured to allow new or changing of pallets, you may enter the pallet number you wish to return the product to. If you are creating a new pallet for the returned item, ensure that a proper tier and height is entered on the line and that the pallet number field is blank. At that point you can create pallets by selecting Create Pallets from the Actions ribbon.
-
In the “Appl.-from Item Entry” column specify the distribution (outbound) layer the return order line should apply-to. This can be determined by drilling down in the “Appl.-from Item Entry” column and locating the Item Ledger Entry pertaining to the inventory (Item, Pallet, lot, etc.) related to the outbound document line being returned.
noteWhen using the Copy Document or Get Posted Document Lines to Reverse, Ceres will automatically populate the “Appl.-from Item Entry” so as to apply-to the distribution layer being reversed.
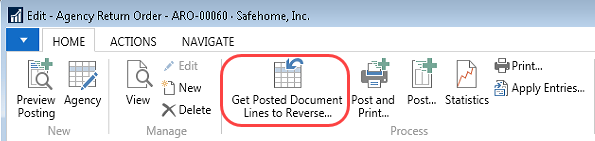
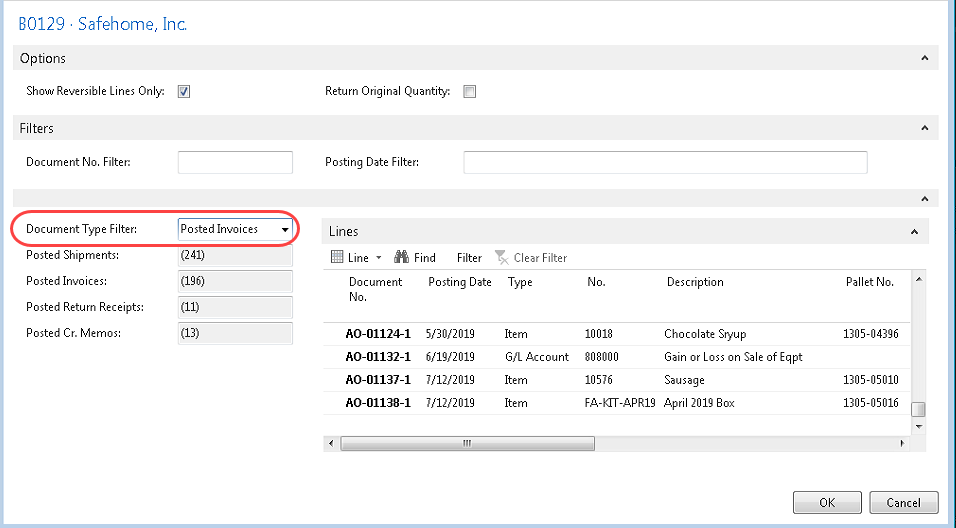
Using Get Post Document Lines to Reverse
You can also use the Get Posted Document Lines to Reverse Function to copy one or more document lines from one document to another. The purpose of this function is to allow you to create a Return Order from one or multiple documents and to reverse the costs from the posted document line. When using this option, you will get a Posted Agency Document Line Page where you can select if you wish to Show Reversible Lines Only and/or Return Original Quantity.

-
From the Get Posted Document Lines to Reverse Page, enter a Document No. filter, a Posting Date Filter or select a Document Type filter and then select the lines you would like to copy to your current document to ensure that the cost of the original document is exactly reversed in the new document.
-
If you want to see only lines from posted shipments or invoices with quantities that have not yet been reversed or returned, place a check mark in the Show Reversible Lines Only field. Select the line or lines you wish to reverse and then click OK.
-
When you use either of these functions, if you have also set up exact cost reversing as mandatory in the Agency & Receivables Setup, Ceres creates a link to the original Item Ledger Entries in the Appl.-from Item Entry field to ensure that the costs are copied from the original posted document.
-
In the Return Reason Code field, you can enter the reason for the return. Click the dropdown to the right of the field and select the relevant Code.
-
If the Location on the Agency Return Order Line is set up to require bins but not to require put-away processing, you can assign a Bin Code on the line to Indicate where the Item should be placed when it arrives at the Location.
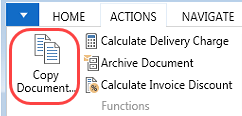
Using Copy Document
You can use the Copy Document batch job to copy an existing document to the Return Order. This function can be used to copy an un-posted or posted document
-
On the Agency Return Order, select Copy Document from the Actions ribbon.
-
The Edit - Copy Agency Document window will open. Select the Document Type to copy from, then select the Document No. Verify that the correct Agency No. and name populate in the window. Place a check mark in the Include Header field if you want Ceres to copy the information, including dimensions, from the document header you are copying from to the document you are creating. The document lines will be copied regardless of the entry in this field.
-
Place a checkmark in the Recalculate Lines field if you want to recalculate the lines in the document you are creating. The process retains the item numbers and item quantities but recalculates the amounts on the lines based on the Vendor information on the new Document Header. In this way, the process accounts for item prices and discounts that are specifically linked to the Vendor on the new Document Header. Normally if you are crediting an Agency for a return you will not Recalculate Lines to credit the same fees originally charged to the agency.
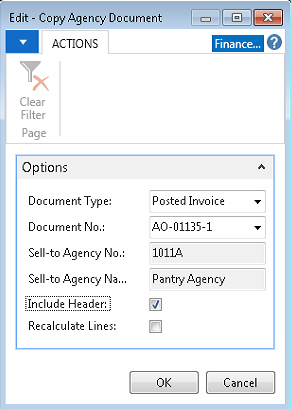
-
Click OK to copy the document to your Return Order.
-
Review the information that has been copied and add a Return Reason Code if required. Edit other information as needed prior to posting.
-
On the Invoice Details FastTab, you can view additional information that was copied, if applicable.
Posting the Agency Return Order
If you are using Inventory Put-aways or Warehouse Put-aways additional steps are required prior to Posting (see Using Warehouse Documents to Return Inventory).
-
When the Agency Return Order is complete and has been reviewed, you can post the Return Order by selecting Post. A hard copy of the Return Order can be printed by selecting Post and Print.
-
If you wish to just receive the product back into inventory but do not wish to create a Credit Memo at this time, choose Receive. This would be if you are not yet sure what fees you are crediting back to the agency if any, but need to get the product back into inventory. If creating a Credit Memo from the Return Order, click Receive and Invoice.
noteThe Credit Memo will not only be created but will also be posted so it is imperative that you confirm data entry before selecting this option.
-
If you do not decide to create a Credit Memo at this time and you wish to credit the Agency for the items received back into inventory at a later time, go to Departments ▸ Agencies & Receivables ▸ Order Processing ▸ Agency Credit Memos to create and post the credit adjustment.
-
Select the Create Return-Related Documents feature if you would like to create:
-
Purchase Return Orders for items that need to be returned to a vendor
-
Purchase Orders if a replacement item needs to be purchased
-
Agency Orders if a replacement Agency Order needs to be created
-
-
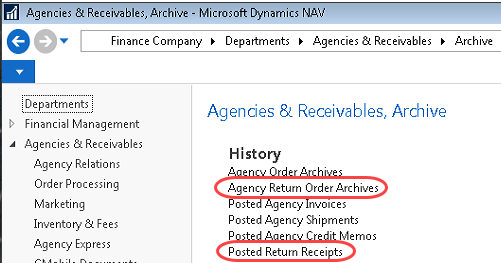
The posted Return Order documents can be viewed from Departments ▸ Agencies & Receivables ▸ Archive and selecting the appropriate option:
Using Warehouse Documents to Return Inventory
If you are using warehouse processes such as Inventory Put-aways or Warehouse Receipts & Warehouse Put-aways, then additional steps are required to bring the inventory back into the warehouse.
Inventory Put-Away
Once your Return Order has been created and details are verified, you will create an Inventory Put-Away to perform the physical movement of inventory into the warehouse.
-
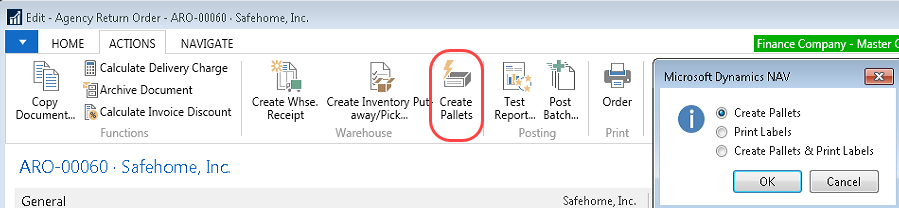
You may be required to recreate Pallets because Ceres only allows a Pallet to exist in a single bin. Therefore if the Pallet you are returning is currently still in the warehouse, you will need to create pallets by selecting Create Pallets from the Actions ribbon.
-
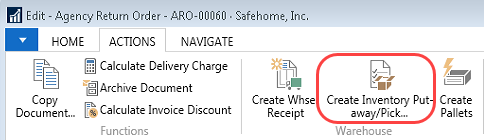
Release your Return Order and create the Inventory Put-Away by selecting Create Inventory Put-away/Pick from the Actions ribbon.
-
Once the Put-away is created, standard Inventory Put-away instructions apply.
-
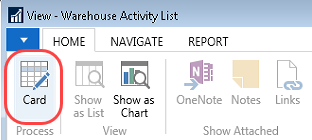
To browse to the Put-Away from the Return Order, go to Navigate ▸ Warehouse ▸ Inventory Put-away/Pick Lines. This shows you the List of associated Put-Away documents. Select/highlight the document, then click on Home ▸ Process ▸ Card.
-
Now you are ready to process the Put-Away. Make sure the Bin is filled in with the proper warehouse location you will be using to put away the inventory.
-
Post the Inventory Put-Away by clicking Post or Post & Print. Choose Receive Only to increase the quantity on hand only, or Receive & Invoice which will also credit the Agency account if there are costs associated with the Items.
Warehouse Put-Away
Once your return order has been created and details are verified you will create a Warehouse Put-Away to perform the physical movement of inventory into the warehouse.
-
You may need to recreate Pallets because the system requires that a Pallet only exist in a single bin. If the Pallet you are returning is currently still in the warehouse you will need to create pallets by selecting Create Pallets from the Actions ribbon.
-
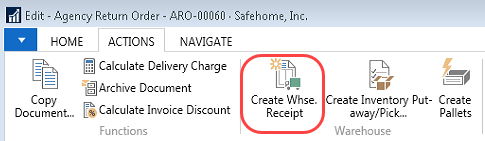
Release your Return Order and create the Whse Put-Away. by selecting Create Whse. Receipt from the Actions ribbon.
-
Post the Whse Receipt. This process will increase the quantity on hand & place the inventory into the Receiving Bin and initiate the creation of the Warehouse Put-away.
-
Now you are ready to Register your Put-away. Go to Warehouse ▸ Goods Handling Multiple Orders ▸ Lists ▸ Put-Aways. Browse to your Put-away. Update the Bin you are placing the inventory into in the warehouse. Register your Put-away.