Donor Change on Posted Donation Order
After posting a donation order it may be necessary to update the donor to whom the donation order is related. This need arises from the wrong donor being specified on the donation order. This document explains how to change or update the donor number on posted donation order.
Ceres Object release 5.00.00 is required for the functionality described in this document.
Overview
The Update Donor Number functionality can be used to correct the donor associated with posted donation order. The Update Donor Number functionality does not update items, item quantities, or any details of the transaction other than changing the donor information on the record. The parent donor must be the same for the original and the new Donor. Security is in place to prevent unauthorized users from running this process.
Setup
-
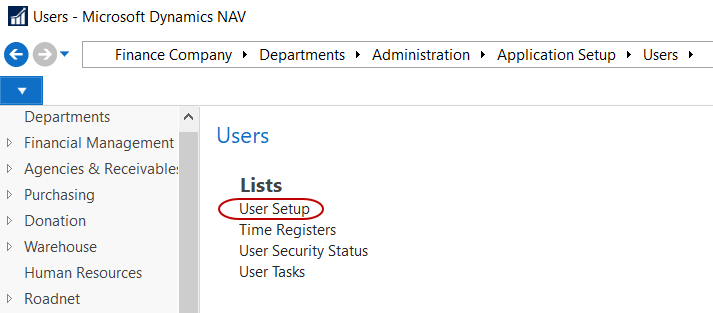
The Change Donor on Posted Documents field in the User Setup controls which users can or cannot run the Update Donor Number function. To access the User Setup, go to Departments ▸ Administration▸ Application Setup ▸ Users ▸ User Setup.
-
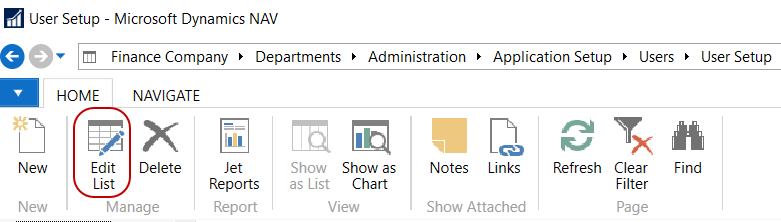
From User Setup List Page, select Home ▸ Manage ▸ Edit. You are now in edit mode and will be able to make changes to the setup.
-
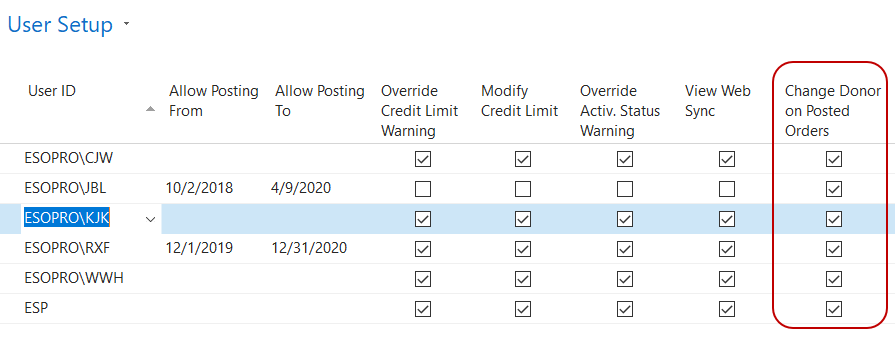
Locate the desired user’s record you want to update and place a check mark in the Chane Donor on Post Orders field. This user has now been granted permission to run the Update Donor Number function.
Updating Donor Number on Posted Donation Orders
-
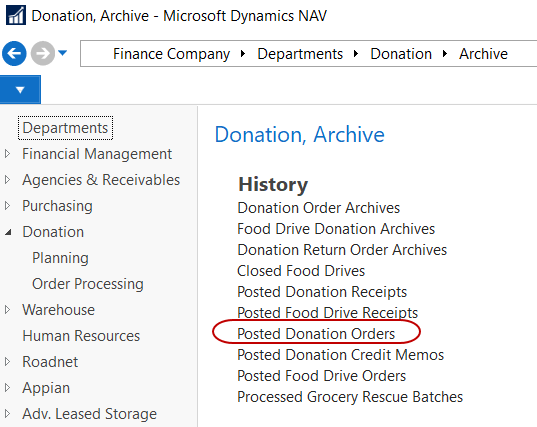
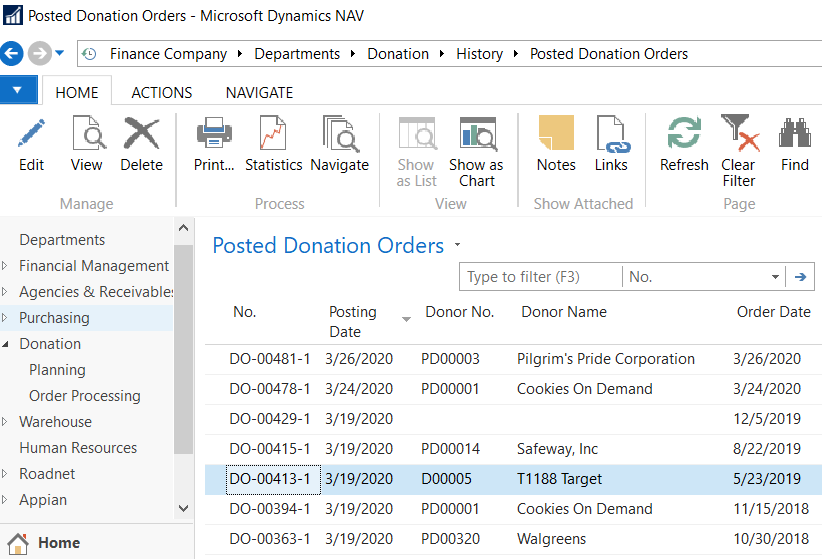
The process of changing the Donor is initiated from the posted donation order. Posted donation orders can be accessed from Departments ▸ Donation ▸ Archive ▸ History.
-
The Posted Donation Order List Page will be displayed.
-
Locate the posted donation order you want to change, and then select Home ▸ Manage ▸ Edit.
-
From the Posted Donation Order, select Home ▸ Process ▸ Update Donor Number.

-
If Ceres has not been configured for a specific user to complete this function, the following message will display. Click OK to clear the message.

-
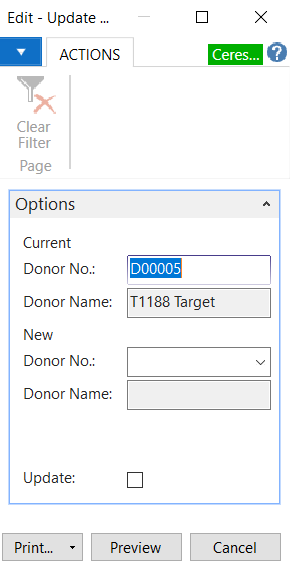
Whereas if the user is configured to complete this function, the Update Donor Number Request Page will be displayed. The current Donor number and Donor name will populate by based on the related posted donation order’s donor information.
-
Enter the new Donor in the New Donor No. field.
-
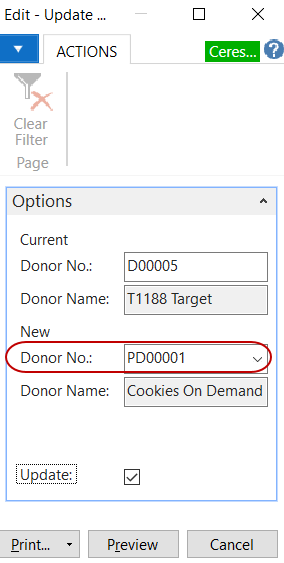
Place a checkmark in the Update box if you wish to have Ceres effect the changes. Left unselected, the report will simply provide a preview of the information what will be changed by this process. Normally you would check this box and press Print to complete the process. If you have the Update box checked, you will not be allowed to preview as a hard copy is required when performing this update. If you attempt to Update without printing you will receive the following error message.

-
When you select print with the Update box checked, a confirmation message will display. Click Yes to replace the Donor No. and No to cancel the process.

-
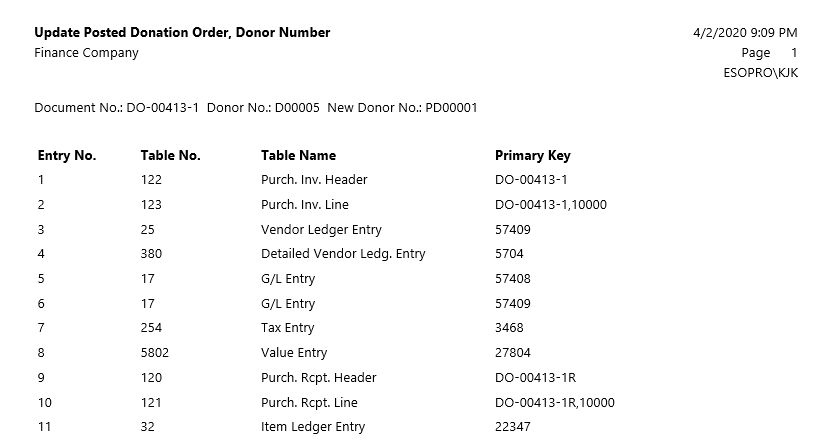
The process will run, and all related records are updated. At the completion of the process you will receive the following message and the donation order will show the new donor information.

-
The printed report will capture the information changed in the database by the process. Below is an example of the reports output.
Related Topics
- Donation Order Overview
- Donation Credit Memos
- Donation Return Orders
- Blue Receipt Activity Report